Heraldic Plaque Belt 14th-15th Century
Belts and girdles of the medieval period are widely variable in style and design. From small and simple designs to belts with hugely ornate and richly furnished buckles and fittings. This diverse miscellany reflects the opportunity for fashionable self expression at various levels of society.
These styles of medieval belts are evident in a number of different sources. We see them documented in extant belt fragments, brass monuments, stone tomb effigies, paintings and in sculpture. They appear with regularity across these art forms of the 14th and 15th centuries, though some examples are as early as the 12thcentury. The heavily decorated plaque belts appear to have been a predominantly masculine dress accessory, and whilst not unknown, it seems relatively fewer appear worn by women.
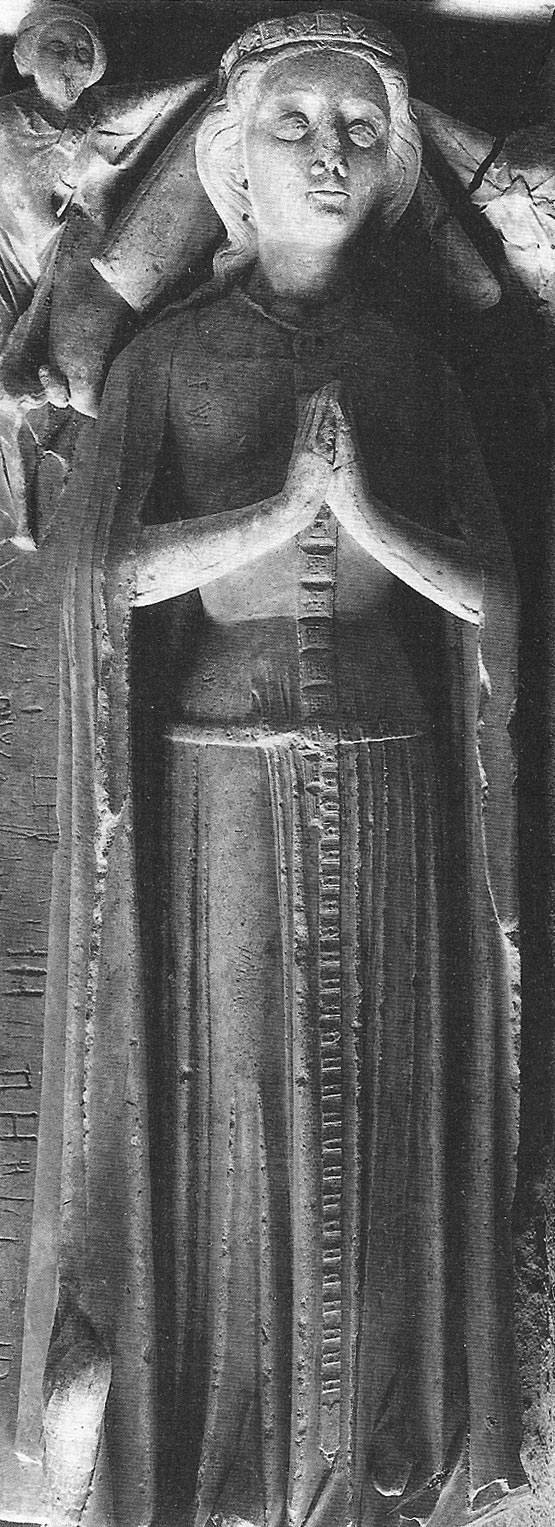
Stone tomb effigy
Mid14thC. All Saints Church Clehonger, Hereford. (Egan & Pritchard pg37)
The belts have some uniformity of construction, buckle, buckle plate, strap or girdle and often strap ends, but are exceedingly diverse in materials and designs. The metal fittings were made from ’latten’ metals, such as copper, iron and steel. Copper alloys, pewter or lead tin alloy were considered inferior or false metals until well into the 15th century before a wider acceptance of alloys was sanction by trade guilds (Egan & Pritchard, pg 119). Buckles and strap ends can be seen to not necessarily always be made of the same metals as mount plaques on the same item.
Some examples were made with precious metal such as gold and silver, and, as with most items from the medieval period, demonstrate a varying degree of workmanship.
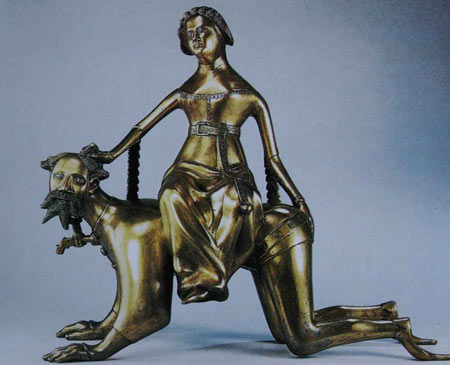
Aristotle being subjugated by his shewish wife.

Netherlandish Sculpture, Artist Unknown c,1400
Heraldic designs appear frequently on the belt mounts and occasionally on the belt end and buckle end of these period plaque belts. They are usually of identifiable period arms which indicates highly individual workmanship. This has placed the practice of armorial plaque belts firmly in an upper-class context. Armorial mounts were functional to denote ownership of the item and would have been an indicator of status and wealth.
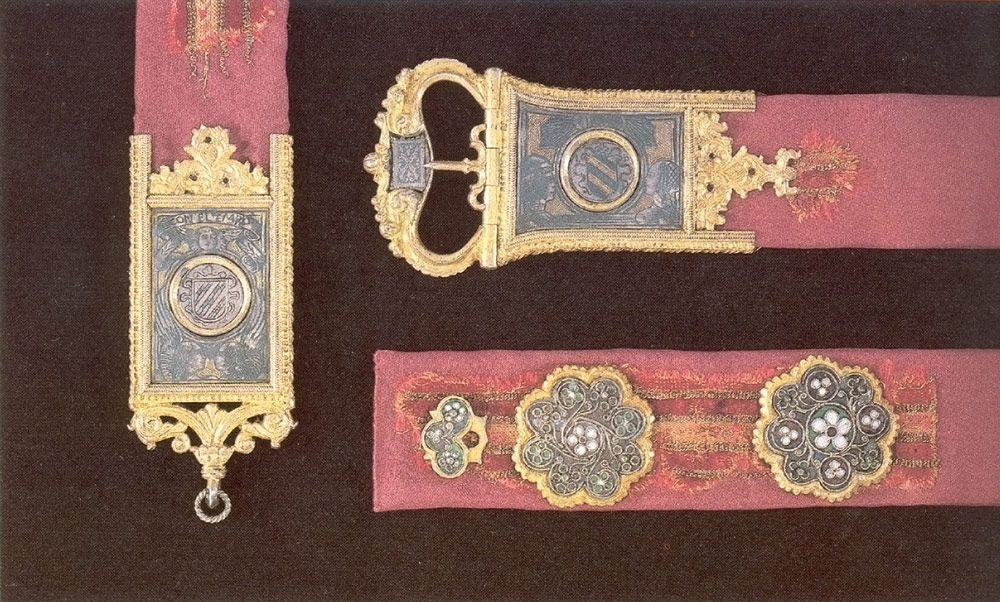
Venetian velvet plaque belt - with heraldic belt ends, Late 15th Century. British Museum of London. MLA AF2851 (Cherry pg21)
Heraldic Devices As Badges
A badge is a distinctive device or emblem assumed as a mark of recognition by an individual or family and often worn as a symbol of loyalty and allegiance. Badges used in this way are a particularly British heraldic tradition that became fashionable in the late 14th century, at the court of Edward III (1327-1377). In the later Middle Ages it became customary for the devices or badges of kings and the nobility to be worn by their retainers and household servants as visible affirmations of allegiance. (Spencer, pg 278) Edward III was particularly dedicated to chivalric tradition and with this renewed devotion to chivalric ideals, came a resurgence in the interest of heraldic display within the nobility.
Heraldry at this time had become increasingly complex - largely due to excessive quarterings and the use of crests and supporting animals becoming popular. Badges became a simpler and more direct means of identification. They never replaced an individual’s heraldry, but were used in addition to it. Badges were usually used alone, separate and distinct from the shield design of the achievement of arms. The emblems used could be a single charge taken from the arms of the owner, or an entirely different object chosen at the will of the bearer. As such, it was rather personal item and within a single household, many different badges would be present for the various family members. Being far less formal than a coat of arms, it should be mentioned that badges did not have the same official registration system that existed to record and protect coats of arms.
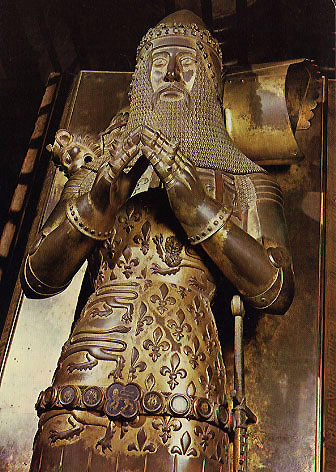
Tomb Effigy to Edward the Black Prince |Canterbury Cathedral c1380.| Depicting heraldic plaque belt (Bartlett)
By the 14th century, the habit of identifying ownership on possessions with heraldry and badges was well established. Badges can be found represented as identifiers throughout the medieval period. Buildings and churches were also often decorated with heraldic badges in a very obvious display of charity, patronage and largesse. Equestrian trappings, iconistic paintings, domestic household items, jewellery and dress accessories can be found bearing the symbols of heraldic badges indicating ownership and status.
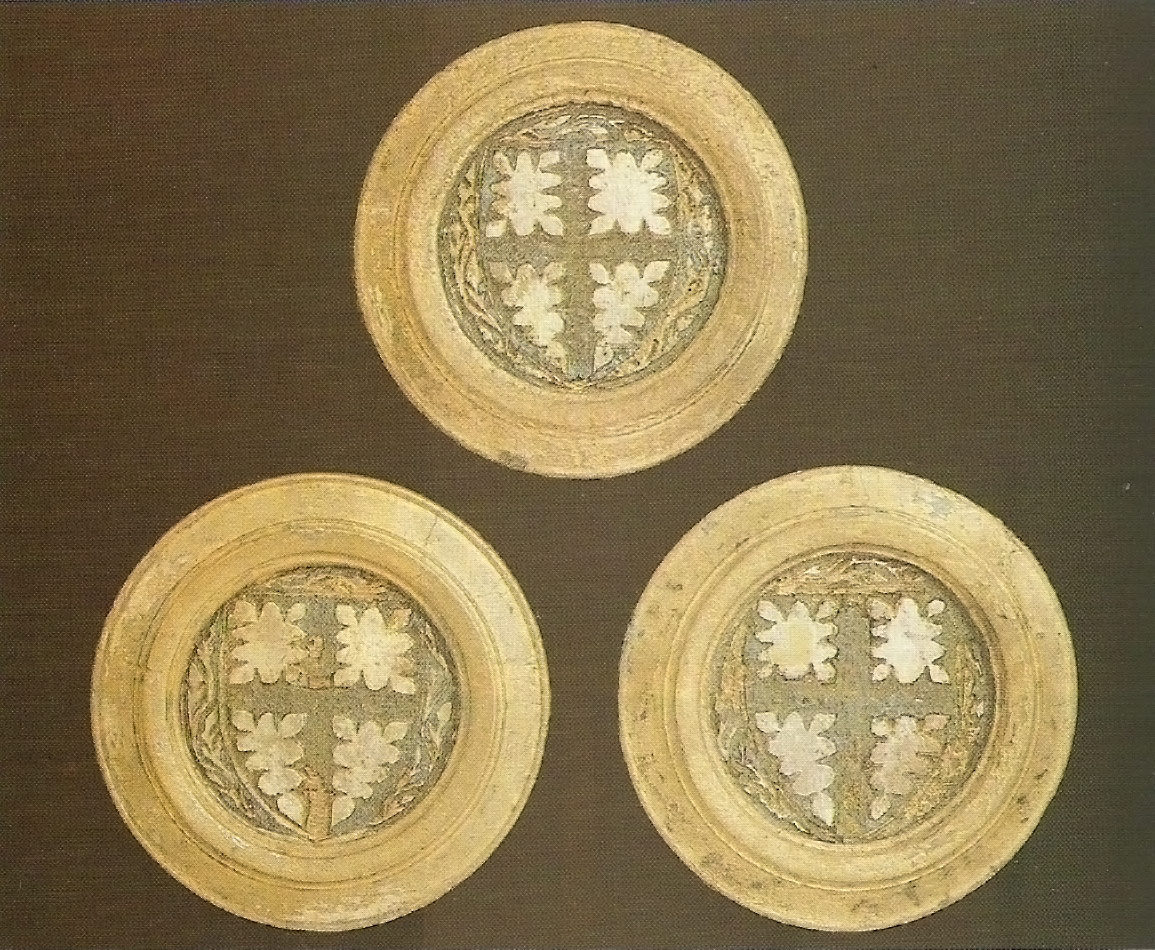 | 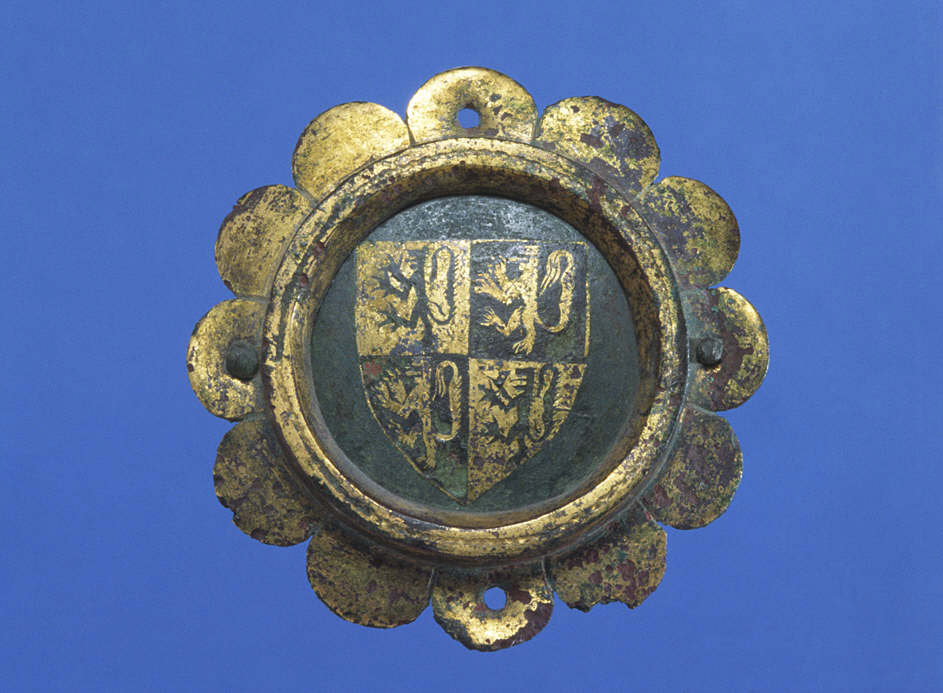 |
|---|---|
| Circular heraldic mounts Copper alloy with silver plating and enamel or diello c.1300s (Egan & Pritchard Plate 2) | Armorial mount Harlech Castle National Museum of Wales c1400 |
Manufacturing Techniques
There are a number of different ways in which belt fittings were manufactured in the medieval period. Some designs appear to have been stamped into or cut out of sheets of flat metal. Many of the circular and trefoil to multifoil mounts seem to have been manufactured using these techniques - the shapes are stamped into flatten metal and the excess cut away to leave the multifoil shape. Another technique is that using stone moulds. Extant moulds from the late 14th century utilise limestone for casting, though it is not currently known if this typifies manufacturing practices at that time.
 The mounts in this casting are only one fifth the weight of the entire casting - the sprue consists of the other four fifths, which would necessitate the recycling of the metal from the sprue.
Many belt fittings, buckles and mounts were likely to have been made individually, but by as early as the 14th century, buckles were being mass produced in copper-alloy, and by the 15th century, in pewter also.
Medieval ceramic mould tray for single looped buckles with decorative outer edge c 1250-1400
(Whitehead, pg 9)
The bulk production of buckles and fittings was achieved through the use of ceramic moulds in the form of trays,. These trays had many buckles carved into the one mould, allowing many items can be cast simultaneously. Most buckles throughout the medieval period were single piece in construction. Once the buckles are cast and removed from the mould, they are finished by hand. - the sprues removed and mould marks filed off. Most buckles have some features that are purely decorative. The decorative design for buckles is extremely varied and is an expression of contemporary tastes which rose and fell accordingly with fashion.
Heraldic Plaque Belt Construction
Making The Buckle
Soapstone is a soft stone with a slippery and soapy feel that is composed essentially of talc, chlorite, and often some magnetite talc. It is usually whitish, gray or greenish in colour and is soft and easily carved whilst being fairly durable when handled well. It has a smooth, dense, non-absorbent surface and it stores massive amounts of heat, which it then radiates it slowly and steadily.
[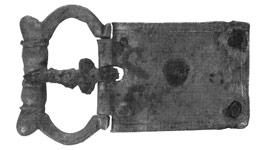 (/projects/heraldic-plaque-belt/WhiteheadBuckle1.jpg) (/projects/heraldic-plaque-belt/WhiteheadBuckle1.jpg) |  | |
|---|---|---|
| Soapstone slabs cut and flattened for carving. Holes drilled for alignment pegs. | Cast copper-alloy single loop oval buckle, lobed outer edges, circa 1250 - 1400 (Whitehead). | Buckle design based on extant example. |
The soapstone may be cut using a bandsaw if available or by hand using a hacksaw. Cut the soapstone into slabs to the size required for the item, making sure the stone face is large enough for the item and the cone or sprue through which the metal is poured. Using a piece of glass (which is definitely flat) and some sandpaper, sand the working sides of the slabs to be as absolutely flat as possible.
 |  | |
|---|---|---|
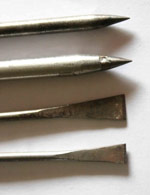
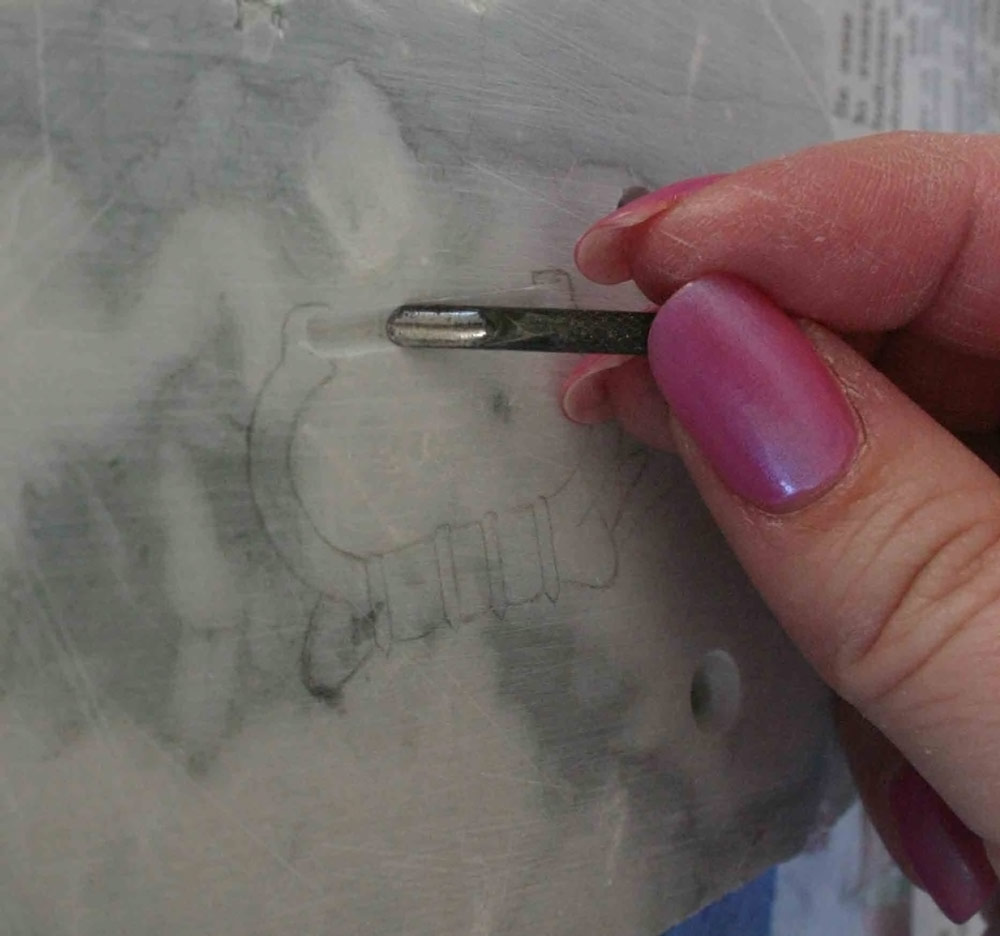
| Cartoon transferred to stone | Some examples of carving tools | Starting the carving process |
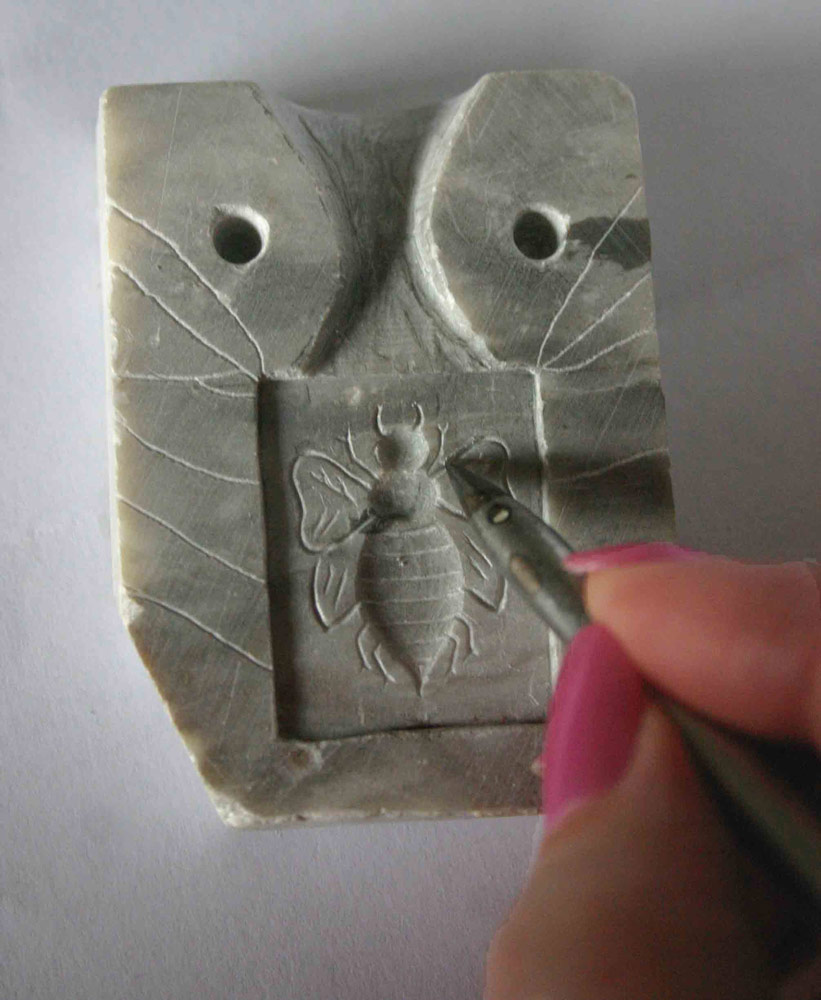
Transfer the design onto your soapstone slab by tracing or copying it, and start carving. The sandstone is relatively soft and can be marked quite easily. Go slow and don’t apply too much pressure to your tools until you get the feel for it. Having a few trials on a scrap piece can be helpful too. Different tools will enable different shapes to be carved into your soapstone, small chisel shaped tools to get larger flat sections, burrs to get nice rounded sections. Detail can be picked out using a scribe to make sharp lines.
When carving the soapstone, care needs to be taken not to undercut any the edges of your object. If an item is undercut, it will not allow the cast metal item to be removed from the mould and may result in damage to the mould when the object is removed after casting. This means that the bar of the buckle needs to be carved as a U shape rather than a round bar and will need to be filed to shape after casting.

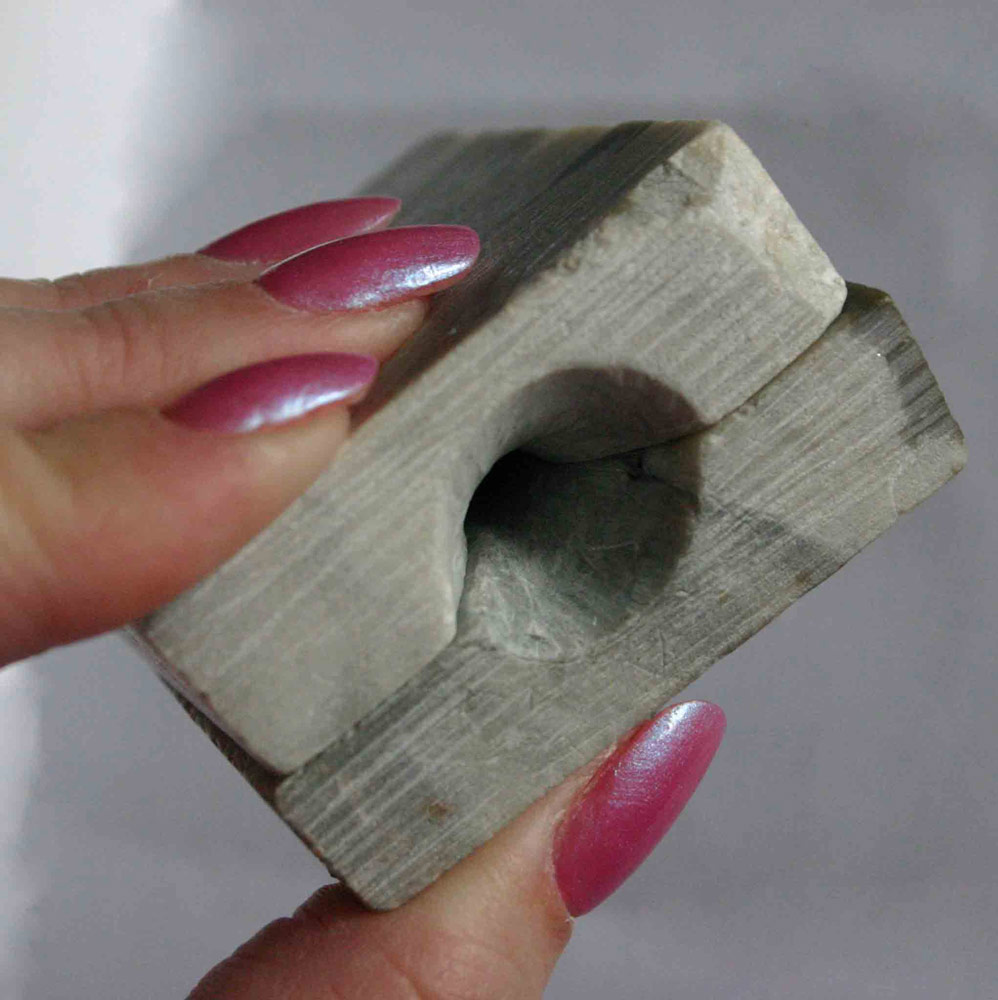
Once the design has been carved, a sprue (a conical shape that attaches to the object) has to be carved into your soapstone to allow a channel through which the molten metal is poured. The sprue should be nice and smooth, and designed to encourage the metal to flow in a uniform direction, allowing the metal to be quickly and efficiently disseminated to all parts of the mould. The sprue can be as thick and solid as your soapstone allows.
Making The Belt Mounts
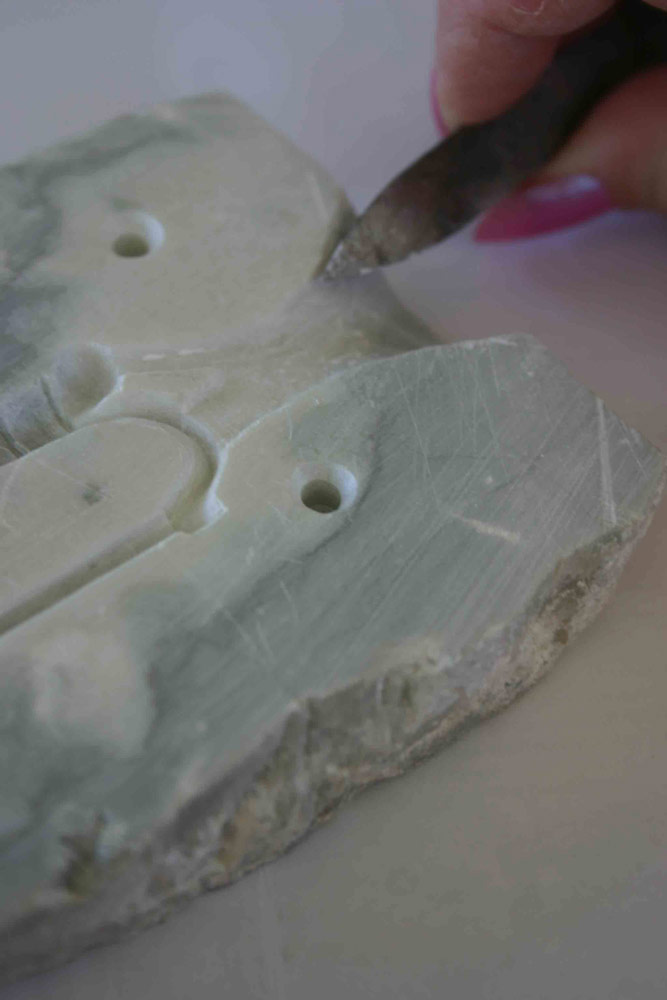
Most mounts were purely decorative, though some functional variants can be found which have eyelets, purse hangers and strap loops attached. Mounts were made in an extensive variety of shapes, particularly throughout the 14th and 15th centuries, including round, square, rectangular, trefoil to multifoil, lozenge and figurative styles. To make the mounts, the same carving process is completed. For each required cast item, a separate mould needs to be created - for the buckle, the pins and decorative mount plates etc.

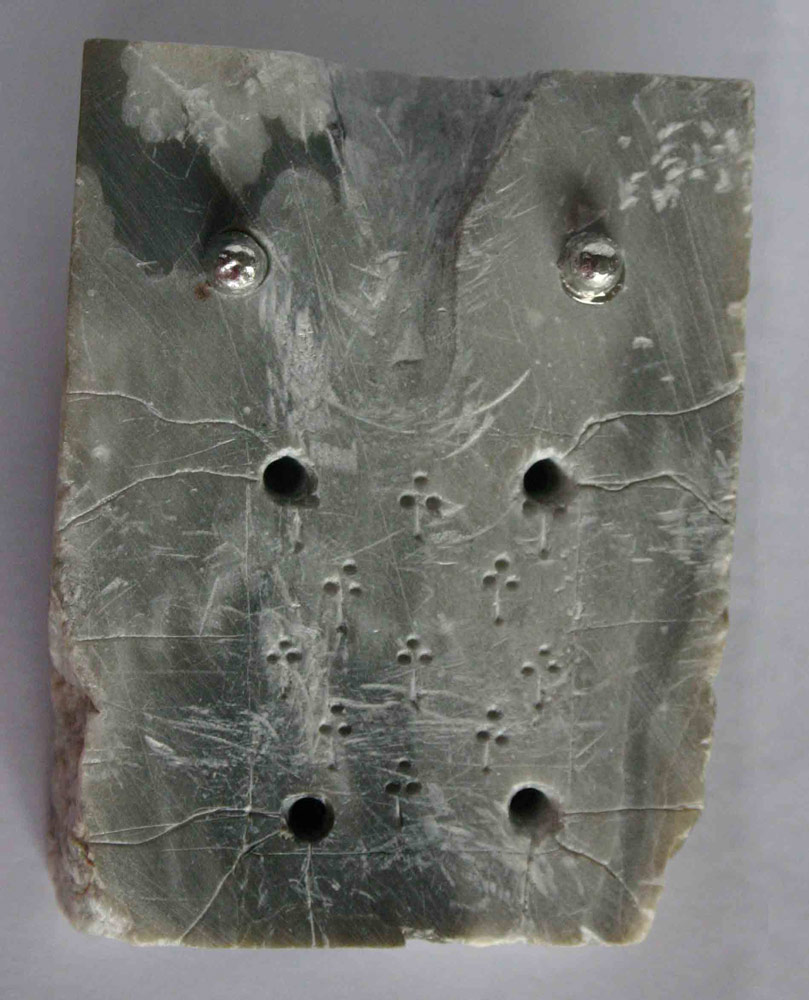
After carving the mount with any decorative elements, pour a casting. Lay it on the backing slab with the sprue lined up precisely and then draw a line around it. This will accurately mark out the position and shape of your mount on the backing slab which will allow you to establish the correct placement of the integral rivets which need to be carved into the backing slab. As these are for a heraldic plaque belt, the design utilizes my personal badge.
Pouring The Moulds

After the designs have been satisfactorily carved, the sprue needs to be carved to allow the molten pewter to be poured into your mould. Pewter is a tin-based metal alloyed with varying amounts of other metals such as lead, antimony, bismuth, copper or zinc to make it stronger and harder. The metal generally has a dull grey finish. The tin content of most pewter exceeds 90%, although there are exceptions. The metal possesses a low enough melting point to make it easy for casting After each pour, you have an opportunity to analyse the item and make alterations to the mould to refine your design or enable better pouring, Eg, Smooth lines that may not have been apparent to the naked eye or add small score lines from the carved item to the edge of the mould allows air to escape as the molten metal is poured into the mould allowing the smoother pouring of the pewter. When casting, the mould rapidly heats up and starts to retain that heat, this means the first castings will set rapidly, but as you continue, the later castings may take longer to solidify.
SAFETY NOTE: Any water that comes into contact with the molten metal will result in a steam explosion. This can be quite dangerous, especially to eyes and any exposed skin. Ensure all your moulds are totally dry before molten pewter is poured.
Cleaning The Castings

Once the item is poured, it takes only a matter of moments before the metal solidifies again. Pull the mould sections apart and with a bit of luck the item can be tipped out. If it doesn’t come out easily, you may have an undercut in your carving that is holding the casting in. Your item is then ready to be cleaned up - the sprue can be easily removed with a pair of cutting pliers or tin snips. The metal of the removed sprue can be recycled back into the molten pot for further casting. Using a pair of snips or a sharp knife edged tool, remove any ‘flashing’. The flashing is any very thin bit of pewter protruding from the edge of your object. After that, it is time to finish off each object using files to smooth any undesirable rough edges.
Making The Tongue
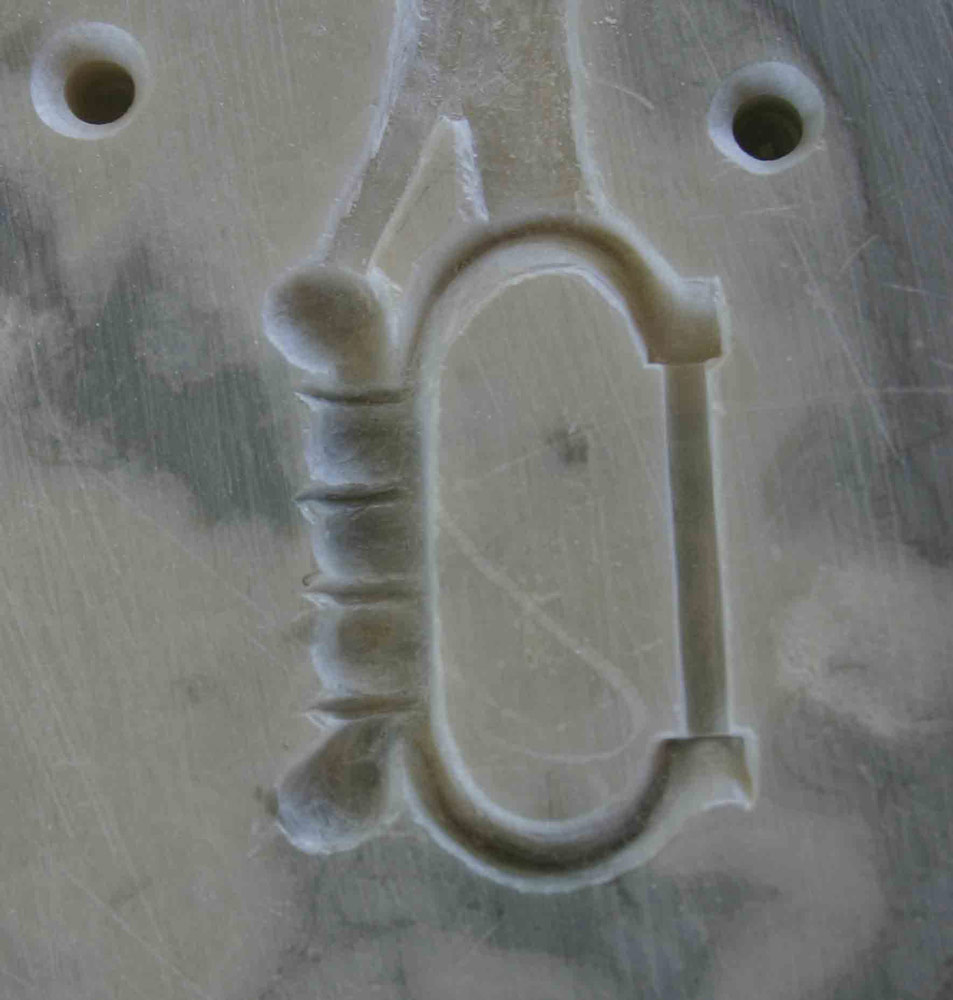
The tongue, being a small tapered and rounded bar of pewter can made by carving it as a second item into the existing soapstone mould, alongside the buckle. The sprue for this item has been carved to allow pouring from a different edge of the mould. This was done so as not to interfere with the flow of the metal when carving the buckle item, which was working extremely well. It could have been joined onto the main sprue, which would allow pouring both buckle and tongue at the same time, but may have affected the ease with which the buckle was pouring.
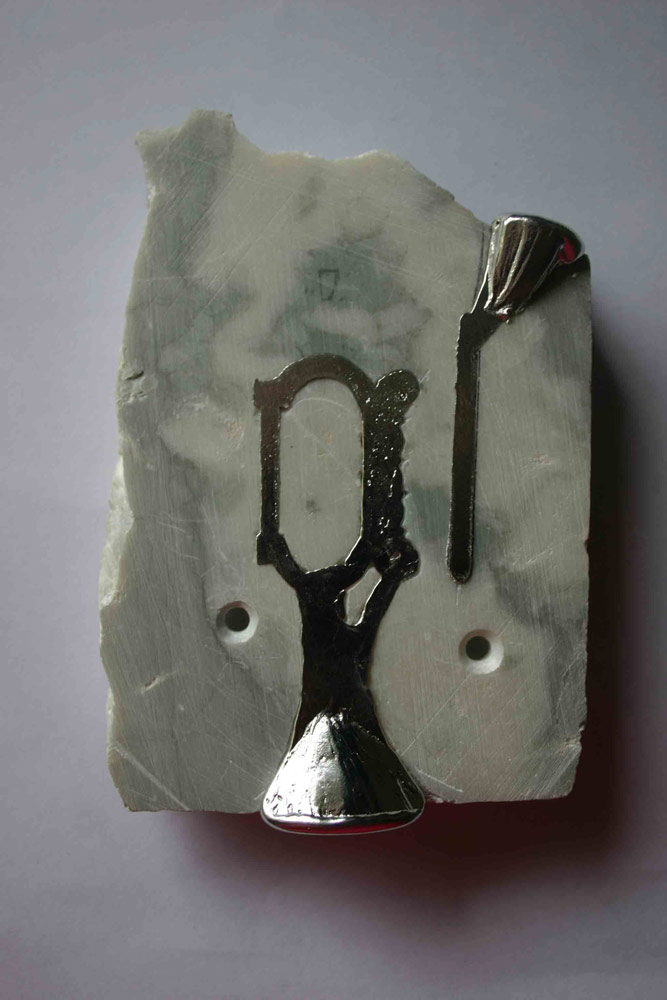 |  | |
|---|---|---|
| Carving the tongue in beside the buckle on the soapstone mould | Castings placed in mould to show the two separate pour entrances | Casting of the tongue and with the sprue removed |
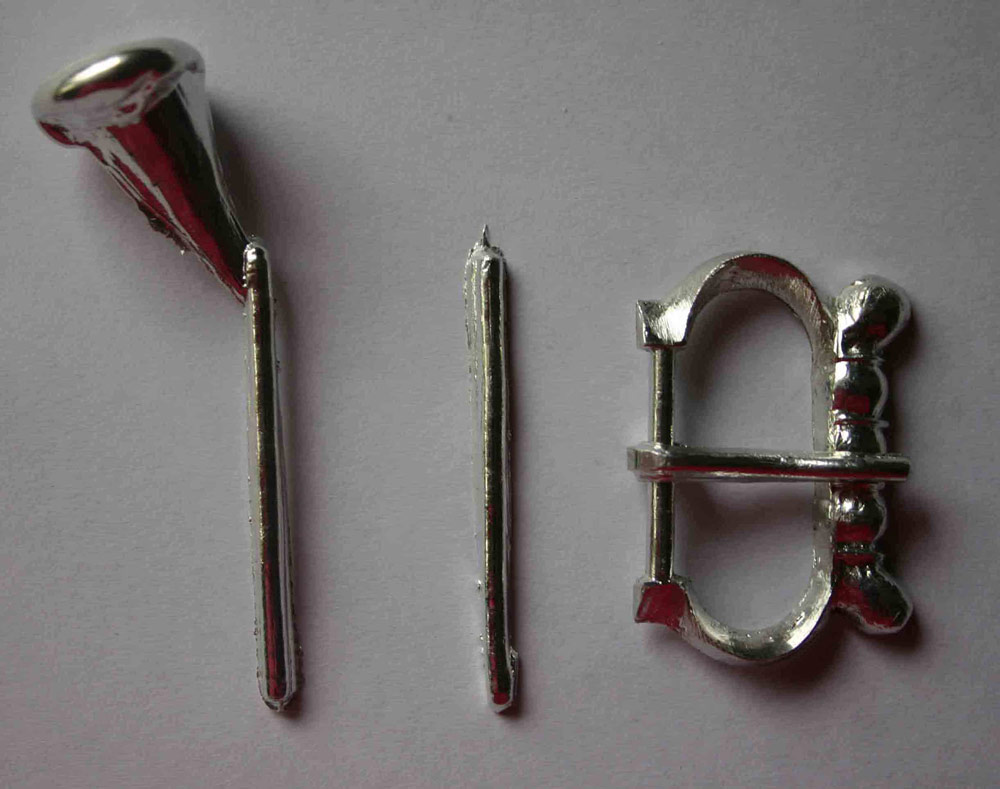
The tongue item was poured and the casting cleaned up by removing the sprue, cutting away any flashing and giving it a light file. After this the tongue needs to be bent into a rounded shape at one end to enable it to be attached to the metal bar section of the buckle. This was done using a pair of rosary pliers (rosary pliers have one conical shaped arm to enable metal to be curved around it easily. They are also tapered in shape to enable curves of different sizes.
When working the metal around the cone of the rosary shape, the tongue needs to be turned upside down a number of times so you make a circle and not a spiral shape. Once the tongue is the desired diameter and nicely curved, open the curve using and wrap it around the buckle bar. Use a pair of flat pliers to close the tongue again.
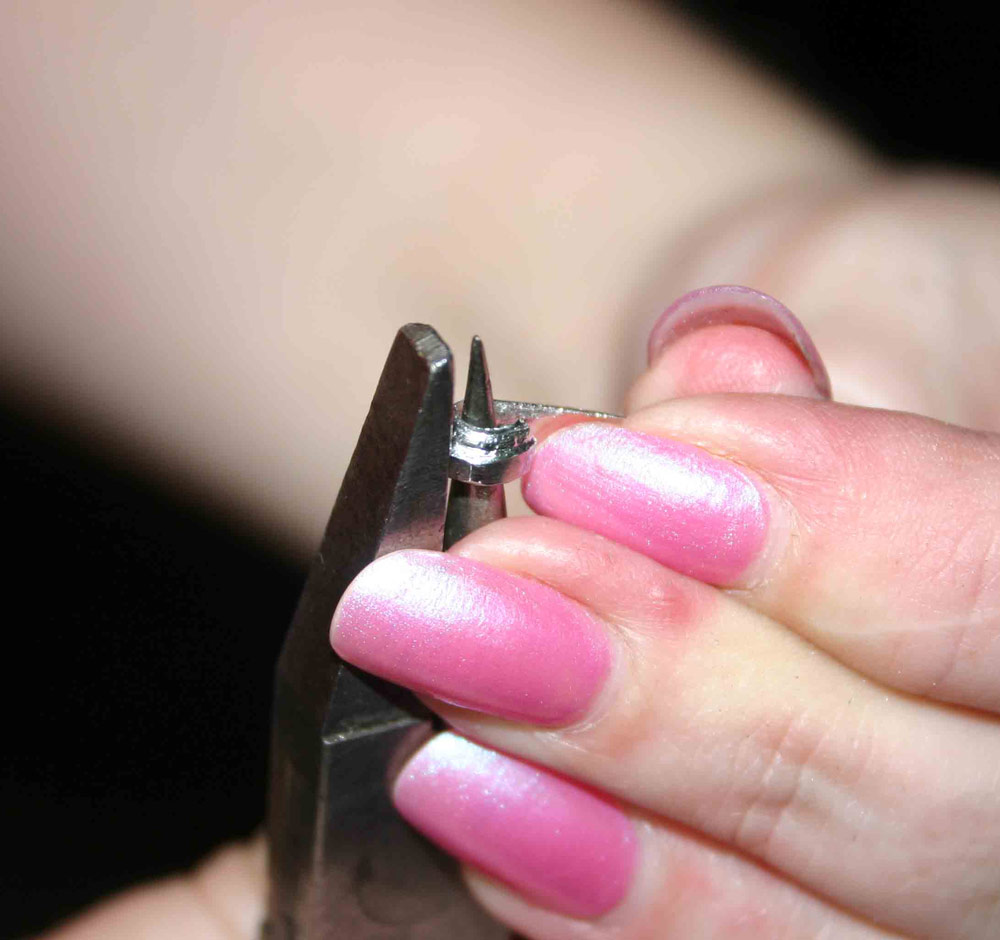 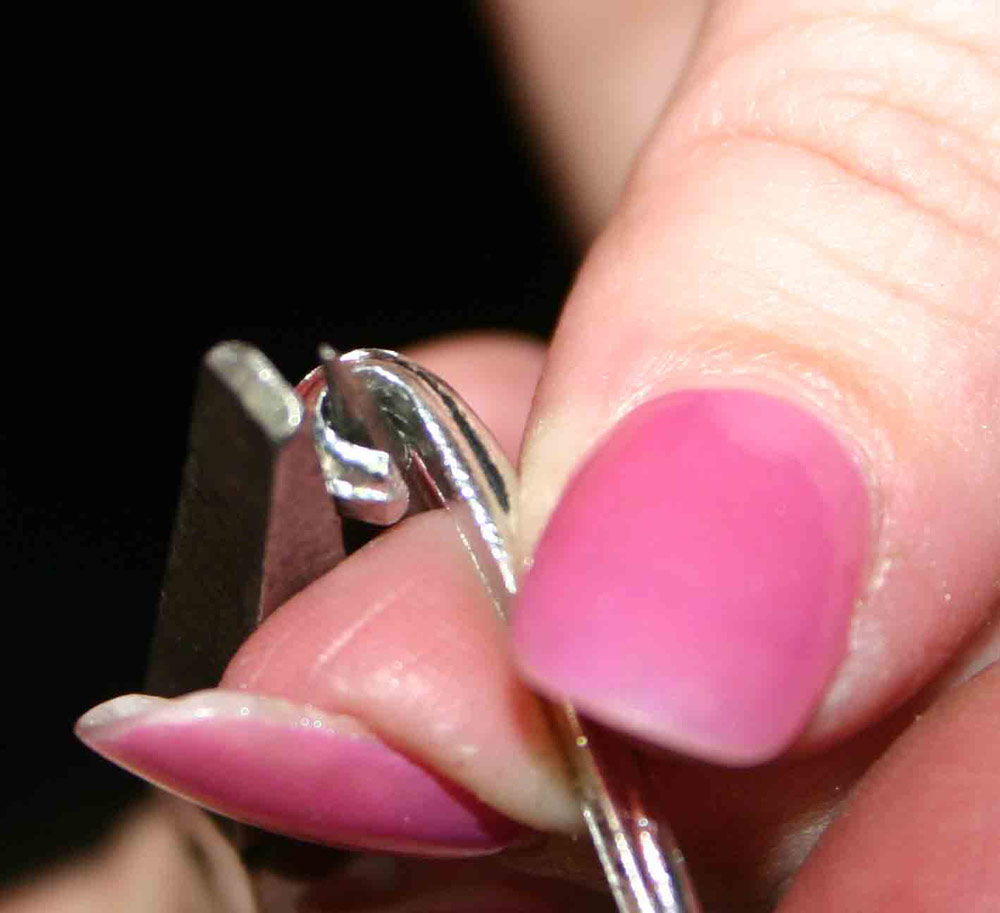 |  |
|---|---|
| Using the rosary pliers to turn the belt tongue round | Tongue with sprue, removed cleaned up and fitted. |
Making The Buckle Plate
 |  |
|---|---|
| Cutting the pewter can be done with a pair of ordinary paper scissors. | Polishing the pewter with steel wool. |
The buckle plate and strap end can be made from pewter also. These are can be made from flattened piece of pewter plate. You can either purchase it as such, or have someone with some jewellers’ rollers thin a piece out for you.
Next step is to cut the pewter into the required width, being that of the belt width - in this case 31.5mm wide - use a pair of dividers to score a mark along the pewter to ensure a nice even width along the length. Pewter this thin (approximately .08mm) is very soft and plaint and may even be cut with paper scissors, The metal strap is then polished using some 000 grade steel wool.
 |  |
|---|---|
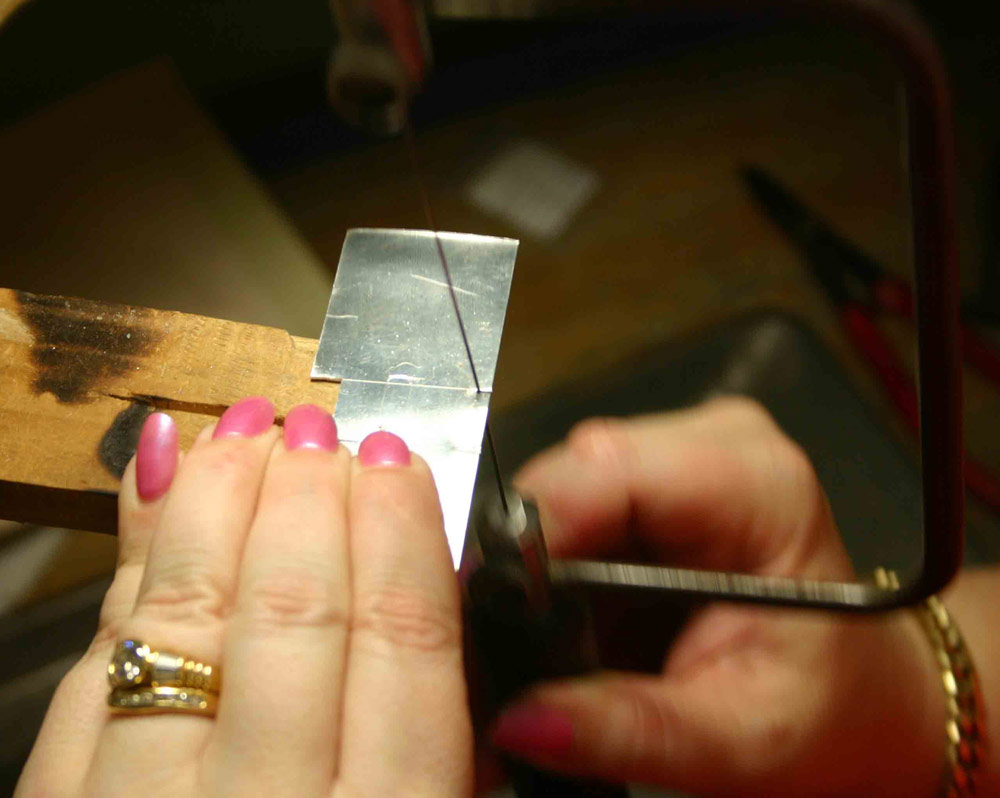
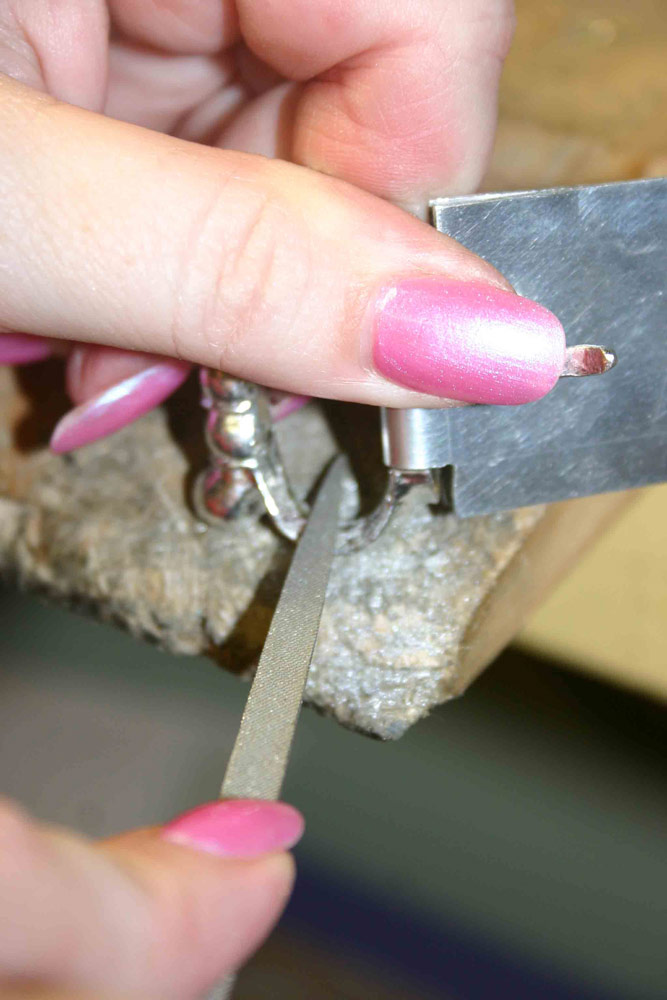
| Sawing the buckle plate to accommodate the buckle | Final cleaning up the buckle |
After cleaning up the edges and giving it a bit of a polish, measure the desired length for the buckle plate, and using a saw, cut in the edges to allow for the buckle ends, and the hole for the buckle tongue to protrude through. When sawing ensure your blade is as vertical and perpendicular to your item as possible to give a sharp right angle rather than a bevelled edge. Finish the saw cuts using a file if necessary.
The buckle plate is then folded back on itself in half, being very careful to ensure the ends line up perfectly. The completed buckle is now able to be threaded into the plate, by wedging open the plate, and putting the tongue out the hole, and swinging the buckle into place.. Give your buckle and the plate a bit of a final clean up and it is then ready to be fitted onto the belt.
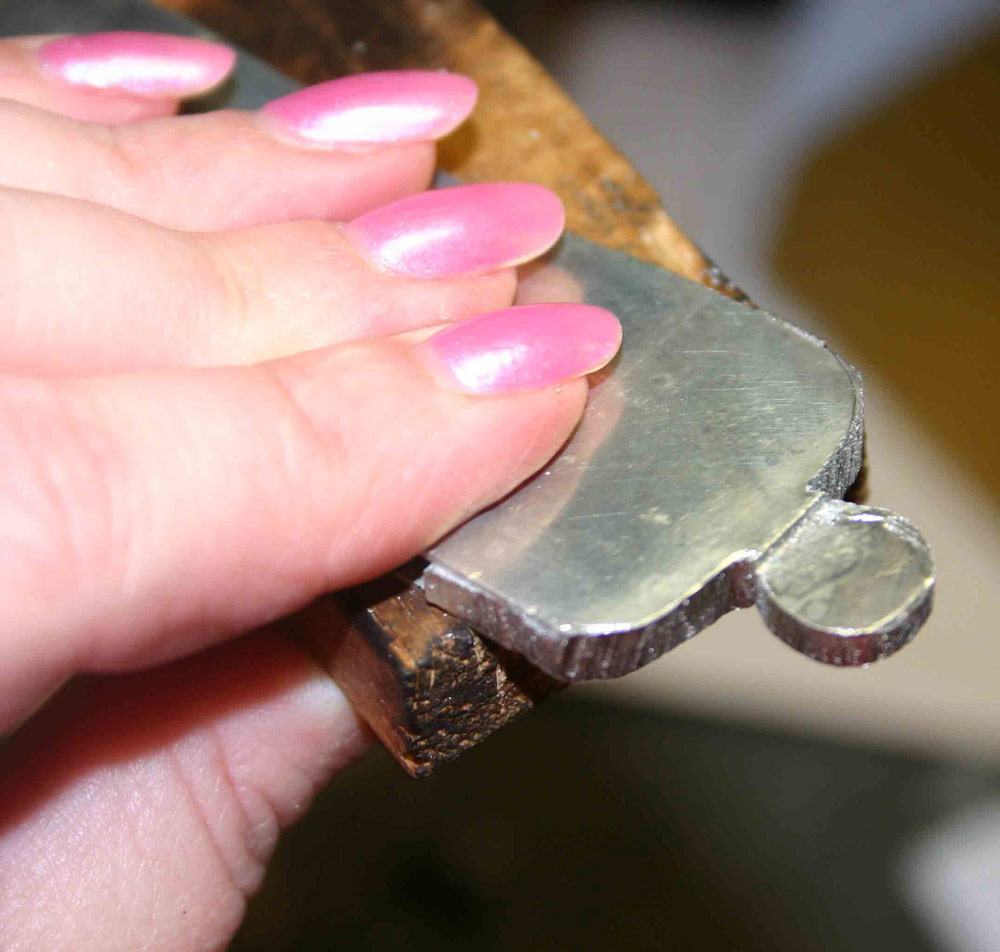
Making The Strap End
 |  |
|---|---|
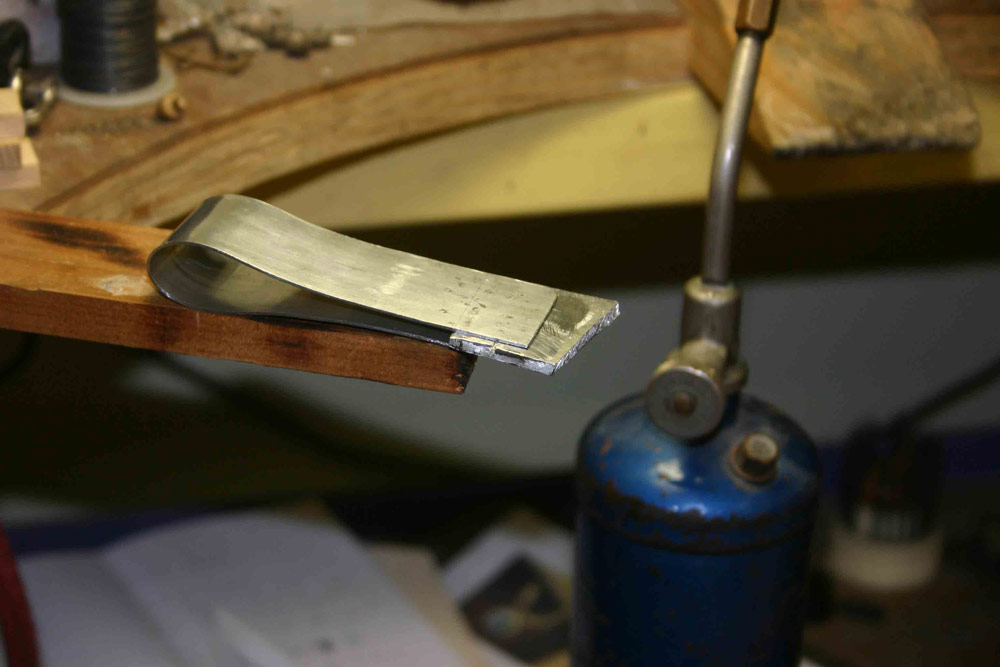
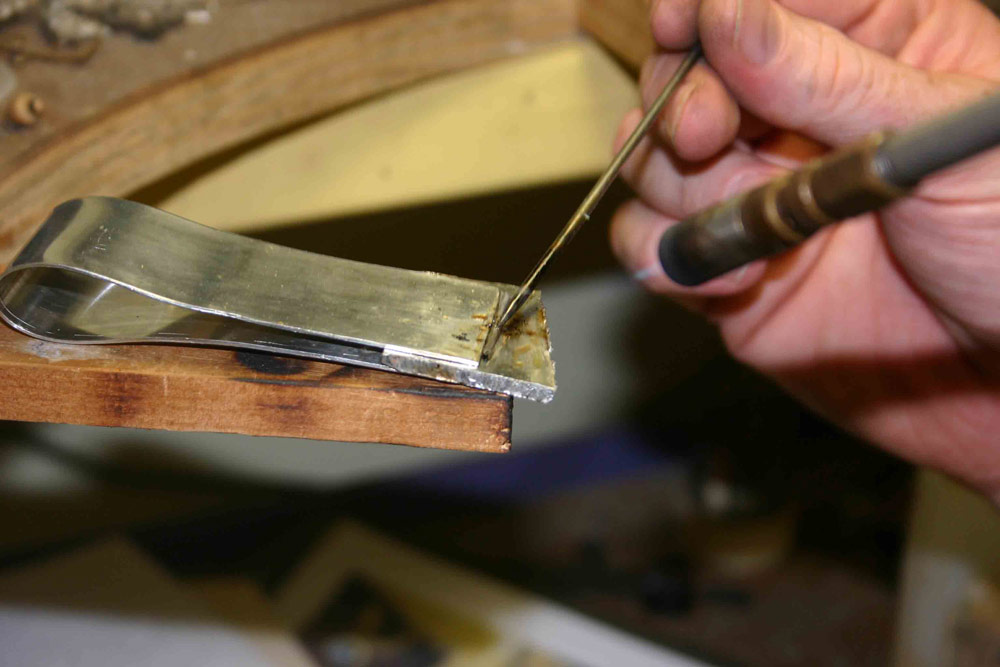
| Pewter sections painted with flux and sitting in place | Applying pewter solder and heat |
The strap end can be made in a number of different ways (see attachments at back from Dress Accessories). Many are simple pieces of flat metal folded over the end of the belt, or with side sections soldered in, or in two pieces with thicker pieces of metal soldered into the end, or even three piece ones with frames. This belt is having a two piece strap end. This requires a thick piece of pewter to be soldered into the end which can be shaped later. Soldering pewter can be tricky, due to its relatively low melting point. (NB: Sir Master Leofric Willoughby de Broke kindly soldered the strap end for this project).
 |  |  |
|---|---|---|
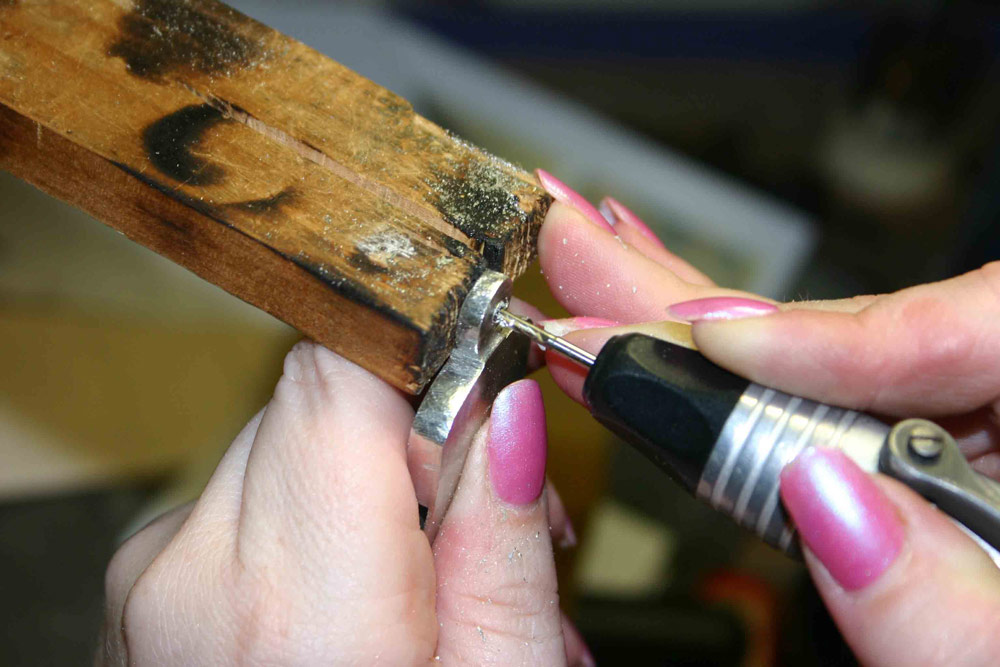
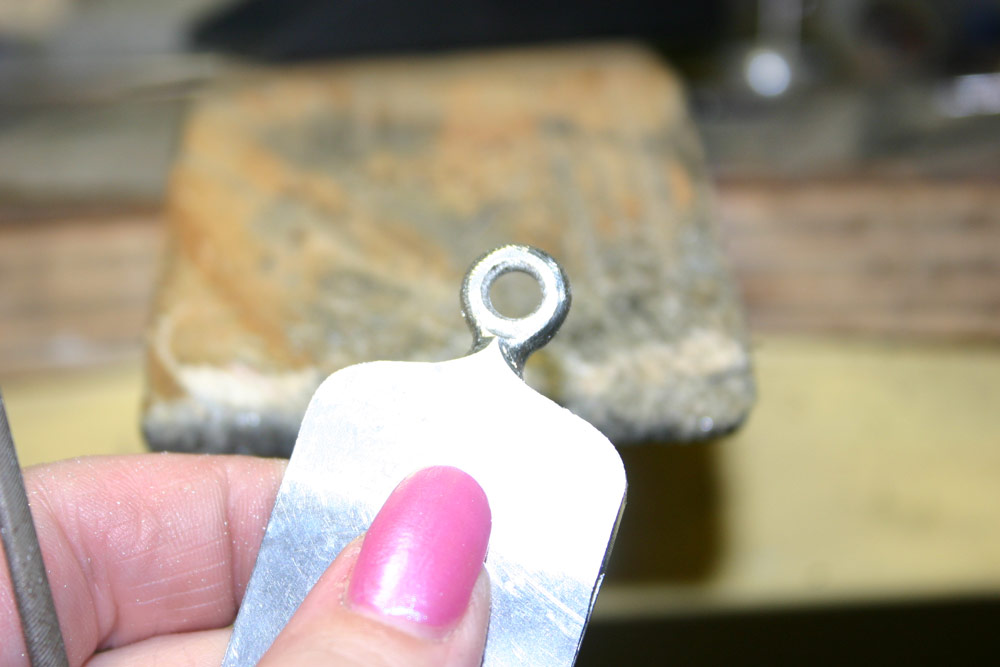
| Rough cut strap end shape | Drilling decorative hole | Shaped and cleaned strap end |
After the pewter is soldered into the strap end giving a nice thick piece of metal to work with, a decorative shape can be created out this solid section. There are many different period design precepts which can be replicated on the strap end. To do this, the design was etched into the metal, and then cut out using a saw. To make the ring shape, a hole was drilled through the shaped end, and then burred out using some burs and a flexidrive drill. The design was then cleaned up and the edges smoothed using files. The shape of the strap end was then replicated in a cut out on the top side of the strap end and on the buckle plate. This was done by tracing the design, cutting out a template and applying it to each piece, and then cutting it out using the saw.
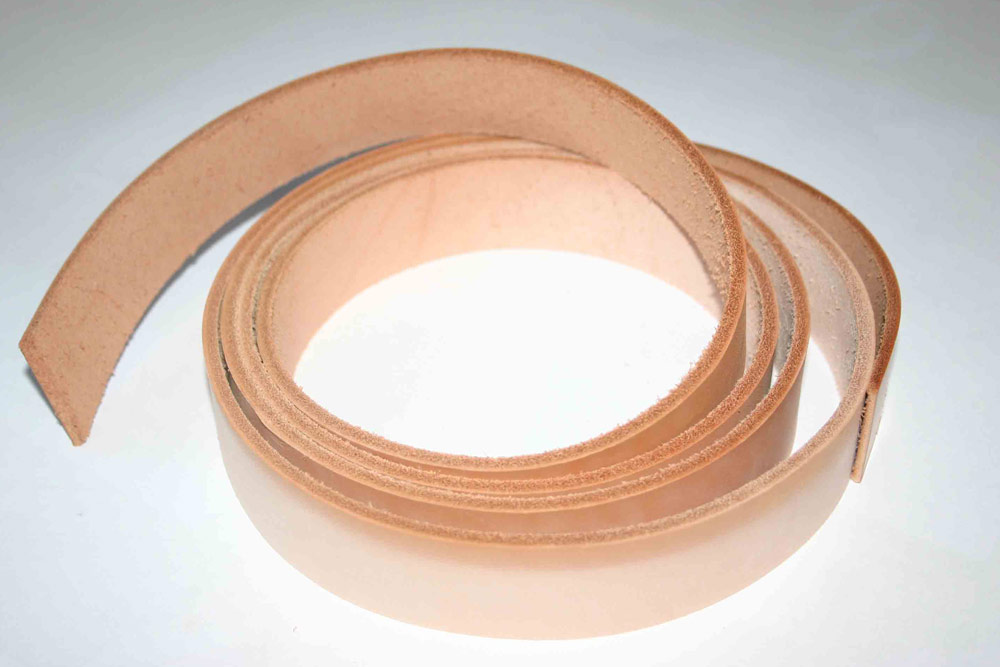
Preparing The Leather
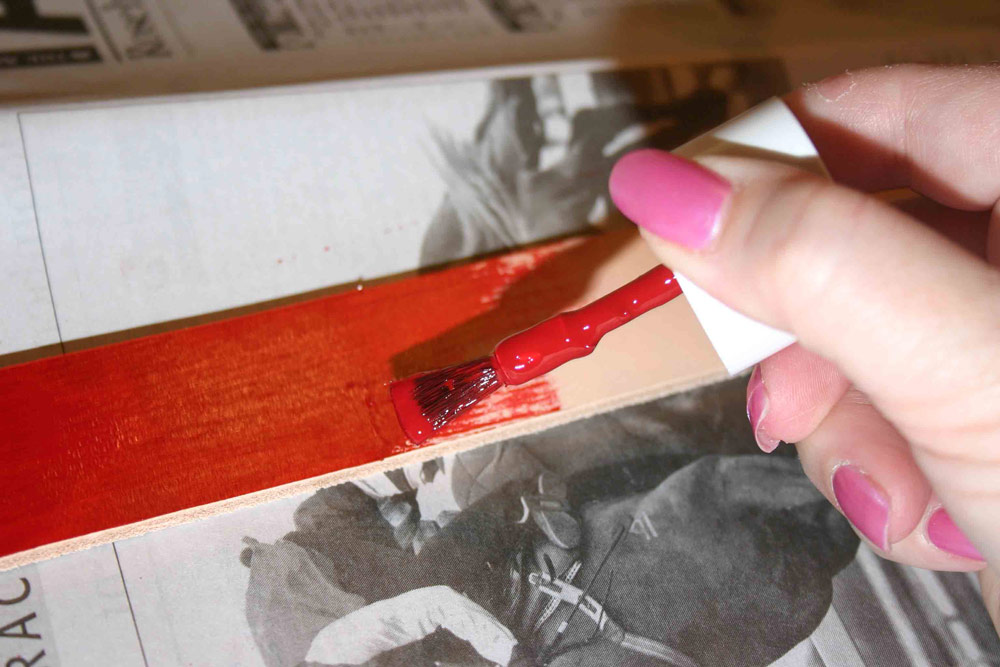
First cut the leather into a belt strap using a strap cutter. I chose a fairly thick piece of leather, as a belt is a utilitarian item and sections of it will cop quite a bit of abuse. Colour the leather if desired using either specific leather dyes or leather paint. Dyes are usually oil based and will soak into the leather, while leather paints are usually acrylic based and will sit on top of the leather rather than soaking in. The edges require colouring also, as does the back, particularly if the belt hangs long. This belt has been painted with Waproo leather paint, in a vibrant red. Two coats have been applied to give a solid coverage.
Attaching The Buckle Plate
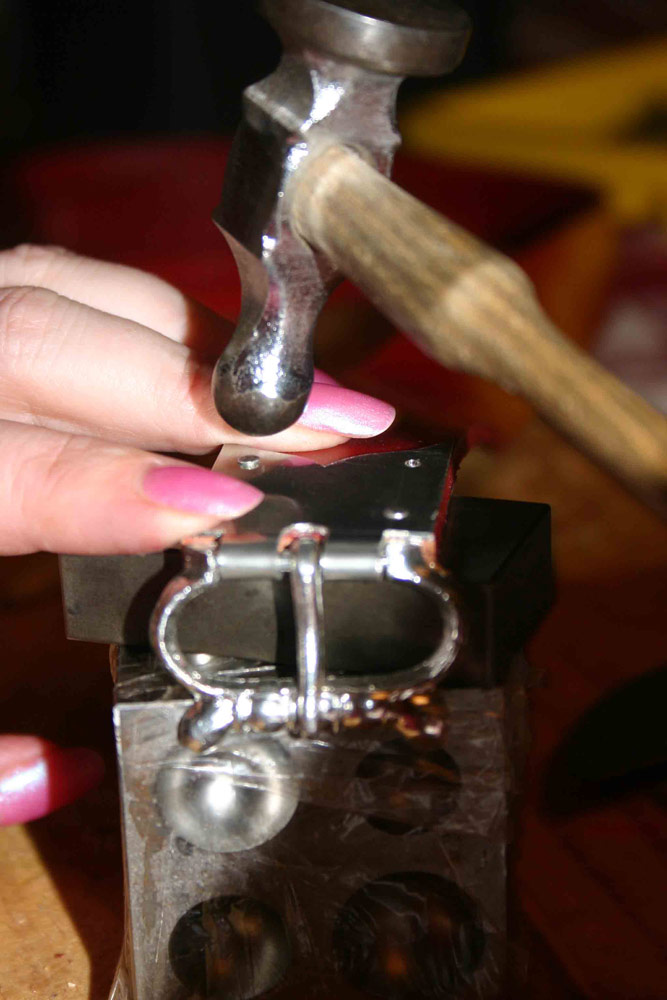

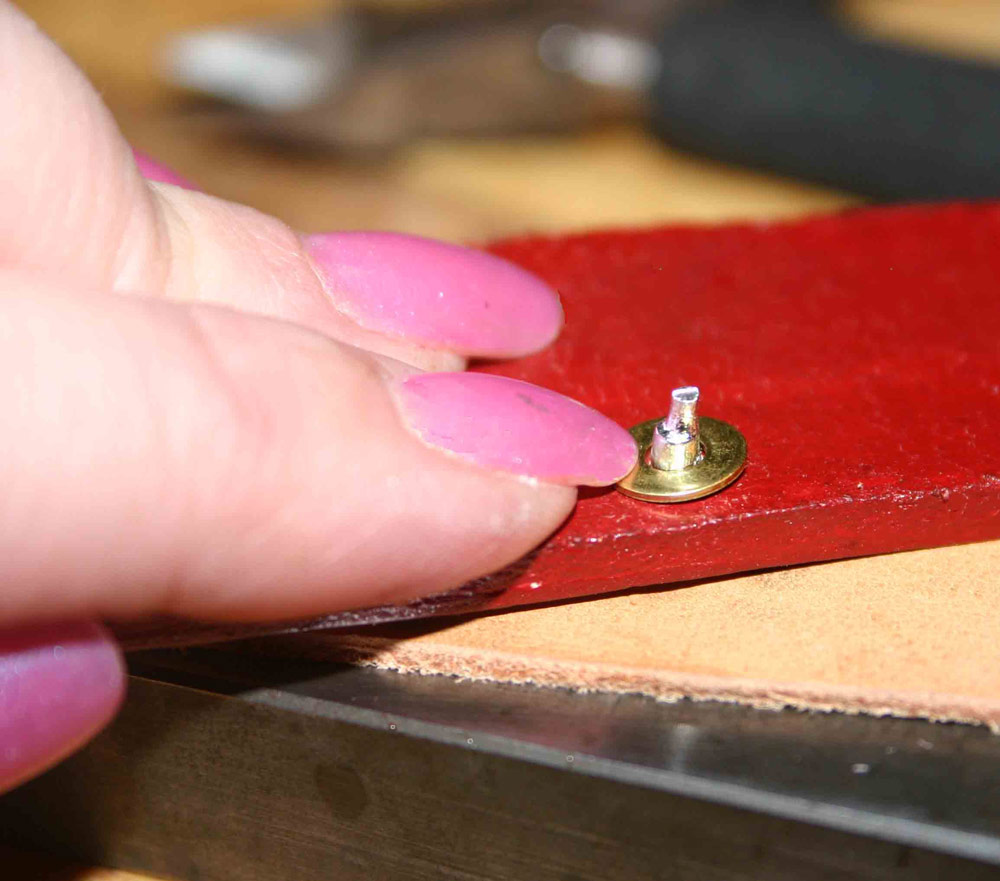
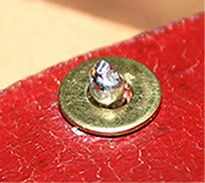
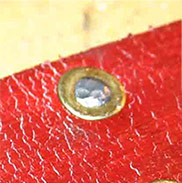
First, the end of the leather belt needs to be squared neatly. This is easily achieved using a square and a half moon leather cutting knife. Once the end is square, pry the buckle plate gently open to accommodate the leather belt end. Decide where the rivets are going to be place, and drill the holes accordingly through both the pewter plates and the leather. The rivets are made using a small section of rolled pewter which is approximately the depth of the hole plus 1mm or so on either so. Working on the front first, and using a small ball pean hammer, gently hammer the pewter plug to ‘mushroom’ the top so it becomes larger than the hole. Then turn the item over and repeat the process on the back on the leather.
Cross section of rivet through the leather
Attaching The Mount Plates
Mount plates are found in many different shapes and sizes. Orientation and number of mounts can also be used to produce different pattern effects (Egan & Pritchard, pg 162). The mount plates cast for this belt were carved with bees and made with an integral rivet at time of casting. To attach the mounts to the belt, firstly the spacing of the mounts needs to be decided upon. To maintain proportions on this belt, I used a width of the rectangular mount as the spacer between each mount which was being mounted lengthways.
 |  |  |
|---|---|---|
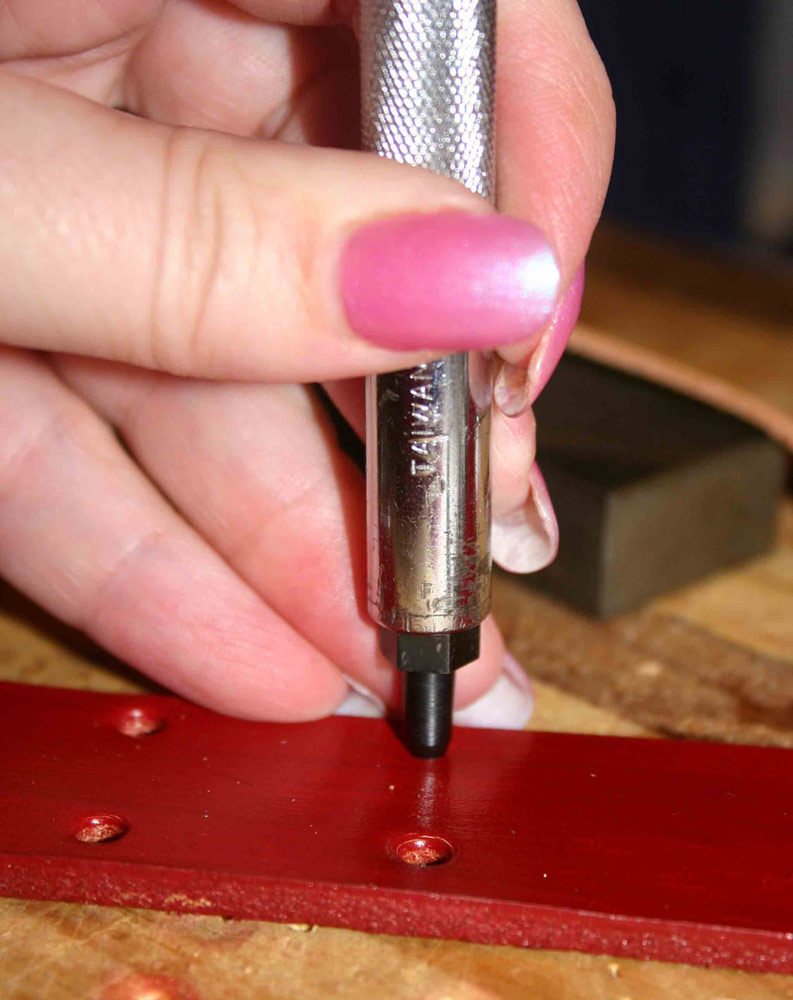
| Space out the locations of the mounts | Hole punch the leather | Add a washer to the back of the belt |
As these were hand carved mounts and the integral rivets on the back are far from precise, one of the mounts with the rivets cut back to only 2mm depth was used as a marker. As each mount placement was decided, the marker mount was pressed into the leather which left a precise impression of where the holes needed to be punched for the integral rivets to come through the leather. After punching the holes, the mount is place in situ, and the belt turned over to the back.
 |  |
|---|---|
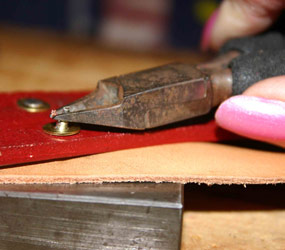
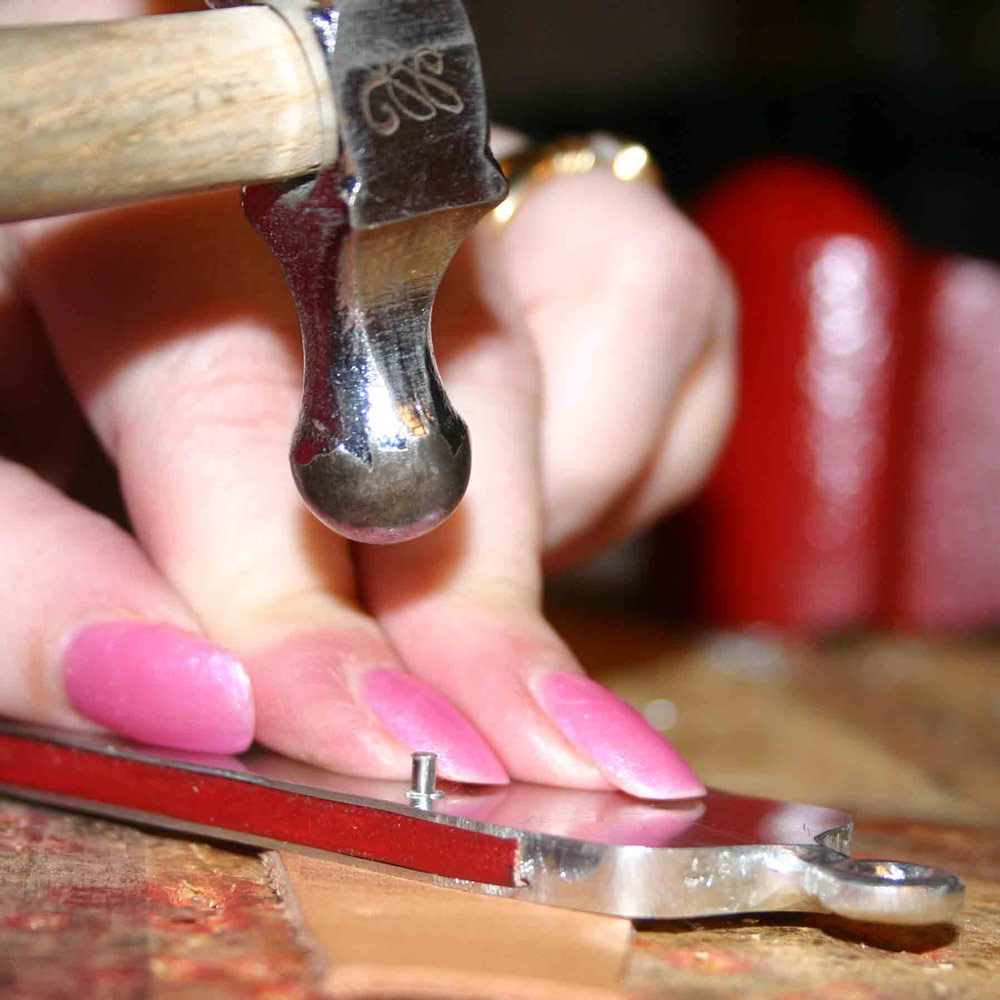
| Snip the integral rivet to the desired length | Use a ball peen hammer to form the rivet |
To protect the bee design on the front of the mounts, a piece of leather was used against the front of the mounts between the belt and the hardened steel slab I was hammering onto. Place a small washer over the integral rivet, and then snip away any superfluous pewter (leave about 1-1.5mm of pewter). The integral rivet can then be hammered down using the ball pean hammer, which will hold it firmly to the leather. Repeat ad nauseum until all mount plates have been secured to the belt.
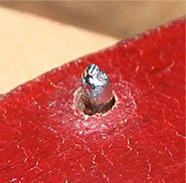
The integral rivet protrudes through the belt, add a washer, trim the pewter if required, and then hammer the pewter over the washer.
Attaching The Strap End
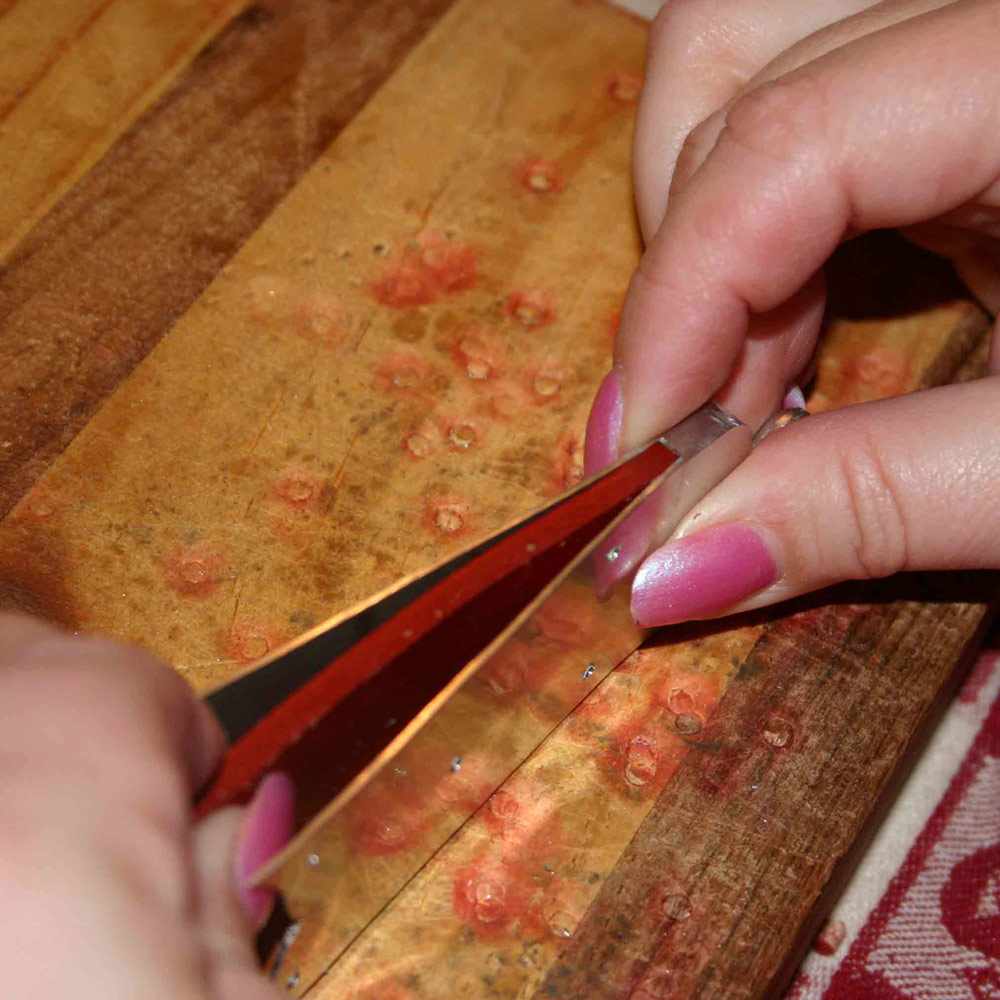 | 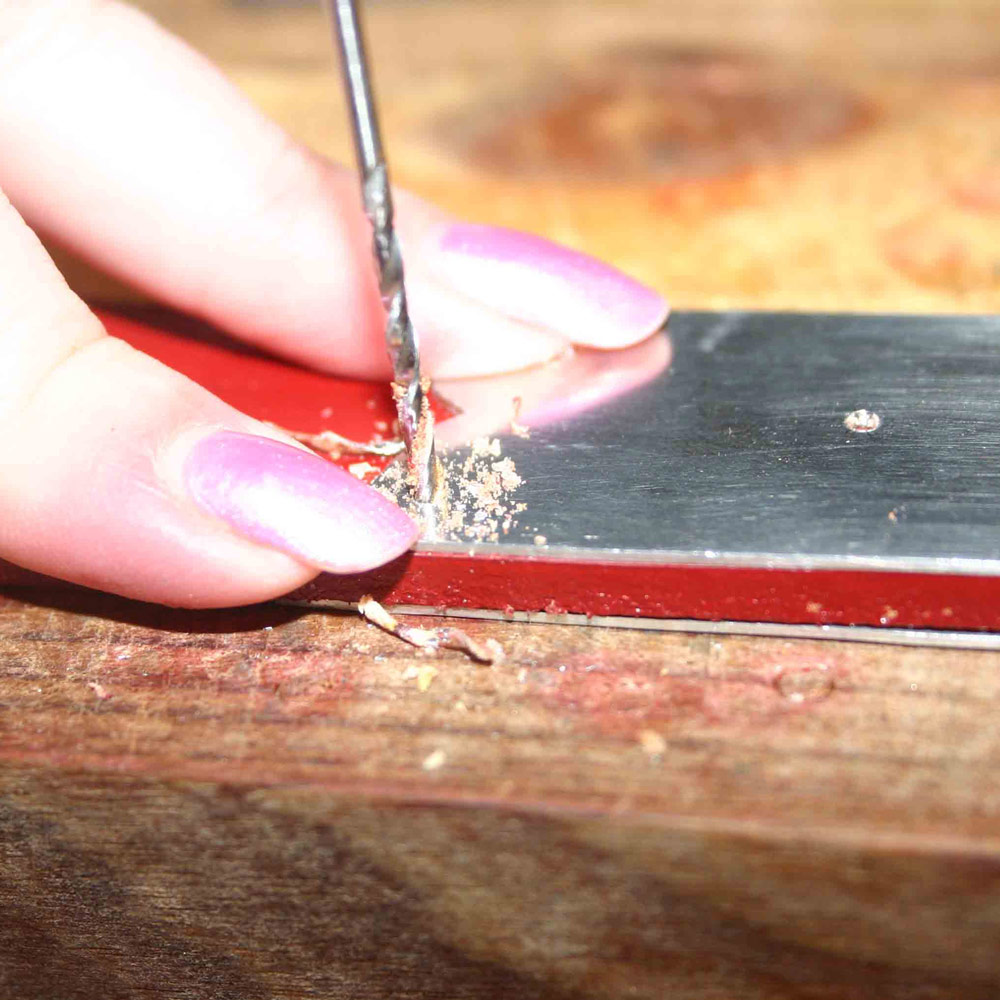 |  |
|---|---|---|
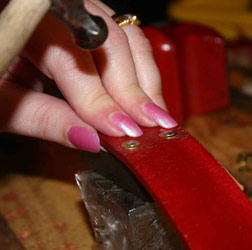
| Wedge the leather firmly into the strap end | Drill the rivet holes as desired | Use a ball peen hammer to form the rivets |
The strap end is attached in much the same way as the buckle plate. Square the end of the leather belt using a right angle and a sharp half moon leather knife. Pry the strap end open and firmly put the leather into place. Drill the holes through both the pewter and the leather in the desired locations, and rivet together using some rolled pewter wire for the independent rivet. Remember to do the front of your rivets first.
Final Product

Bibliography
- Ashbee, C.R The Treatises of Benvenuto Cellini on Gold smithing and Sculpture
Dover 1967
ISBN 1428604308 - Bartlett, Robert Medieval Panorama
Thames & Hudson Ltd, London 2001
ISBN 0892366427 - Cherry, John - Medieval Decorative Art
British Museum Press
ISBN 0714120650 - Cherry, John - Medieval Craftsmen: Goldsmiths
University of Toronto Press, Toronto 1992
ISBN 0802077110 - Coss, Peter - Heraldry, Pageantry and Social Display
Boydell Press, London 2002
ISBN 0851158501 - Hawthorne, John G Theophilus, On Divers Arts
The Foremost Medieval Treatise on Painting, Glassmaking and Metalwork
Dover Publications, London 1963
ISBN 0486237842 - Spencer, Brian Pilgrims Souvenirs and Secular Badges
Medieval Finds from Excavations in London
The Stationary Office, London 1998
ISBN 0947535128 - Whitehead, Ross Buckles 1250-1800
Greenlight Publishing, London 1996
ISBN 189773817X
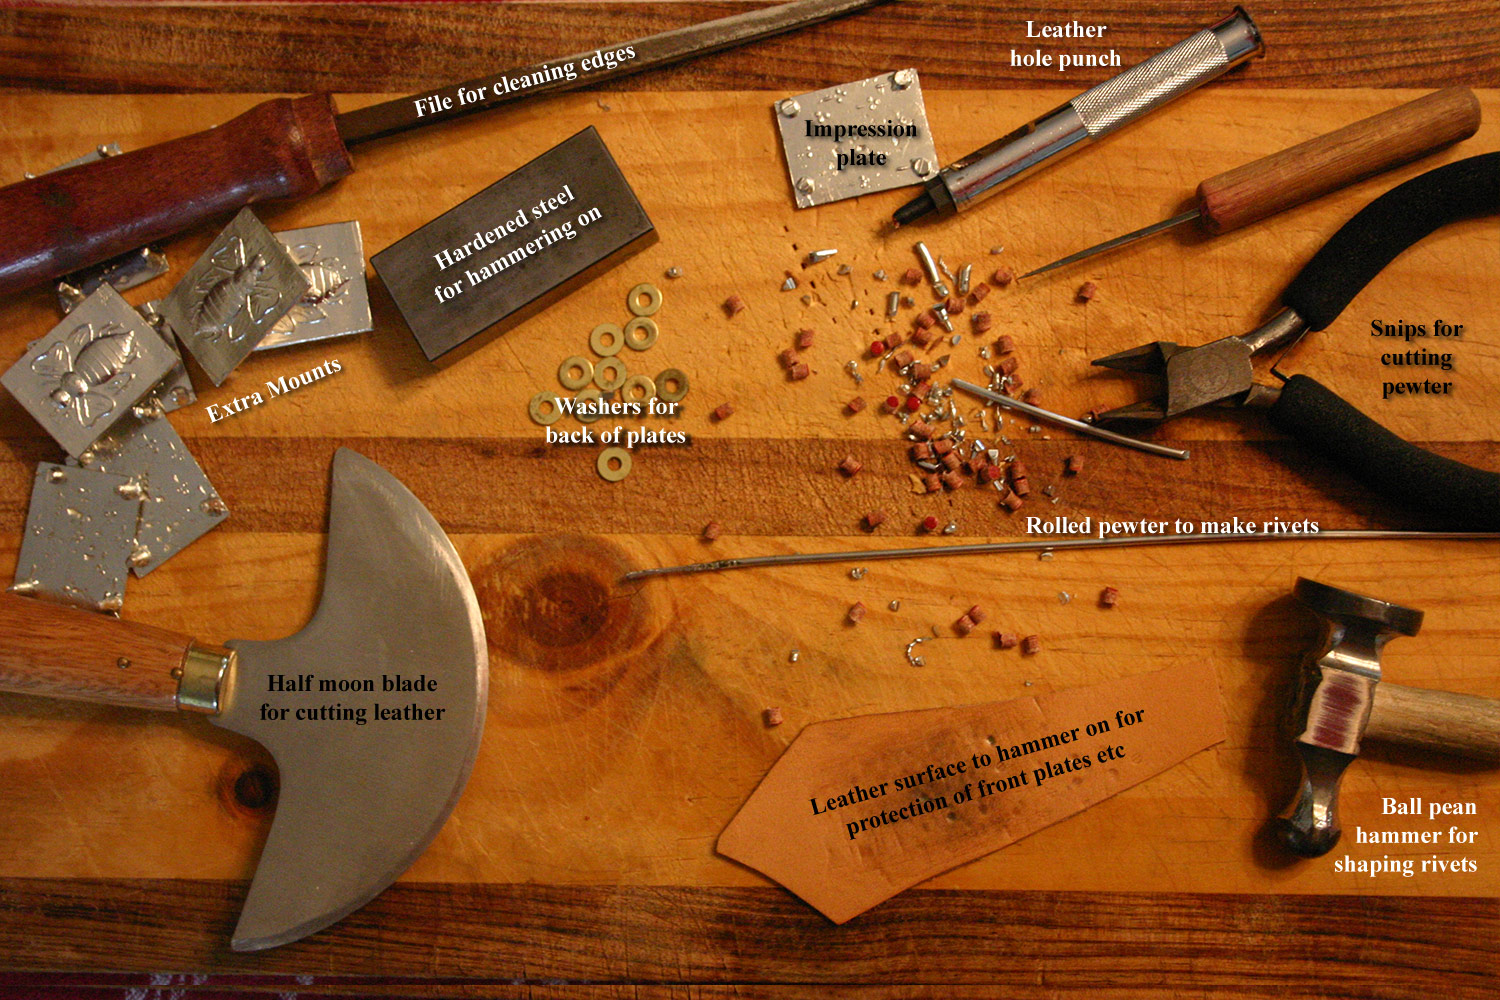
Tools
Acknowledgement
Thank you to Sir Master Leofric Willoughby de Broke for generously sharing his workshop, his time, the use of his tools and for his expert tutelage.
