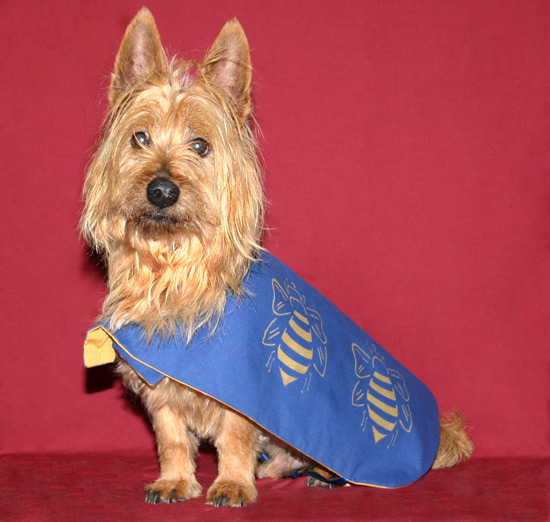
Heraldic Dog Coat
You’ve displayed your heraldry on your standards, your gonfalons, your pennons, your clothing, your embroideries, your tent, your purse, your cutlery, your crockery, your chair and even your friends that have sat still long enough! Just when you think you’ve run out of places to display your device…. along comes the ultimate heraldic accessory in the form of an Heraldic Canine Coat!
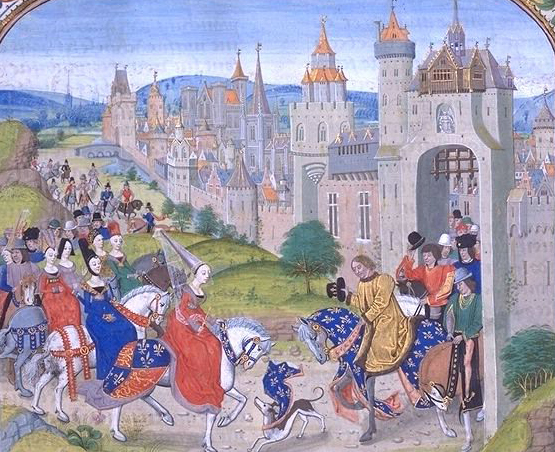
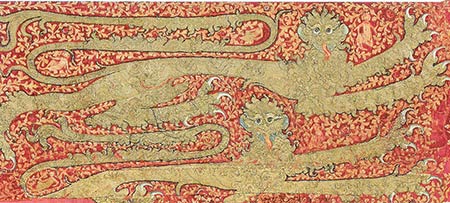
Isabella arrives in Paris.
Jean Froissart, Chroniques 15th C
Bibliotheque National de France, Paris (BNF, FR 2643)
The following is a quick and fun little project to make your best friend a handsome coat to wear to events. It serves the dual purpose of adding to the atmosphere and having the additional benefit of making your pup’s ownership easily identifiable - so you’d be best served by putting one on only your best trained hounds!
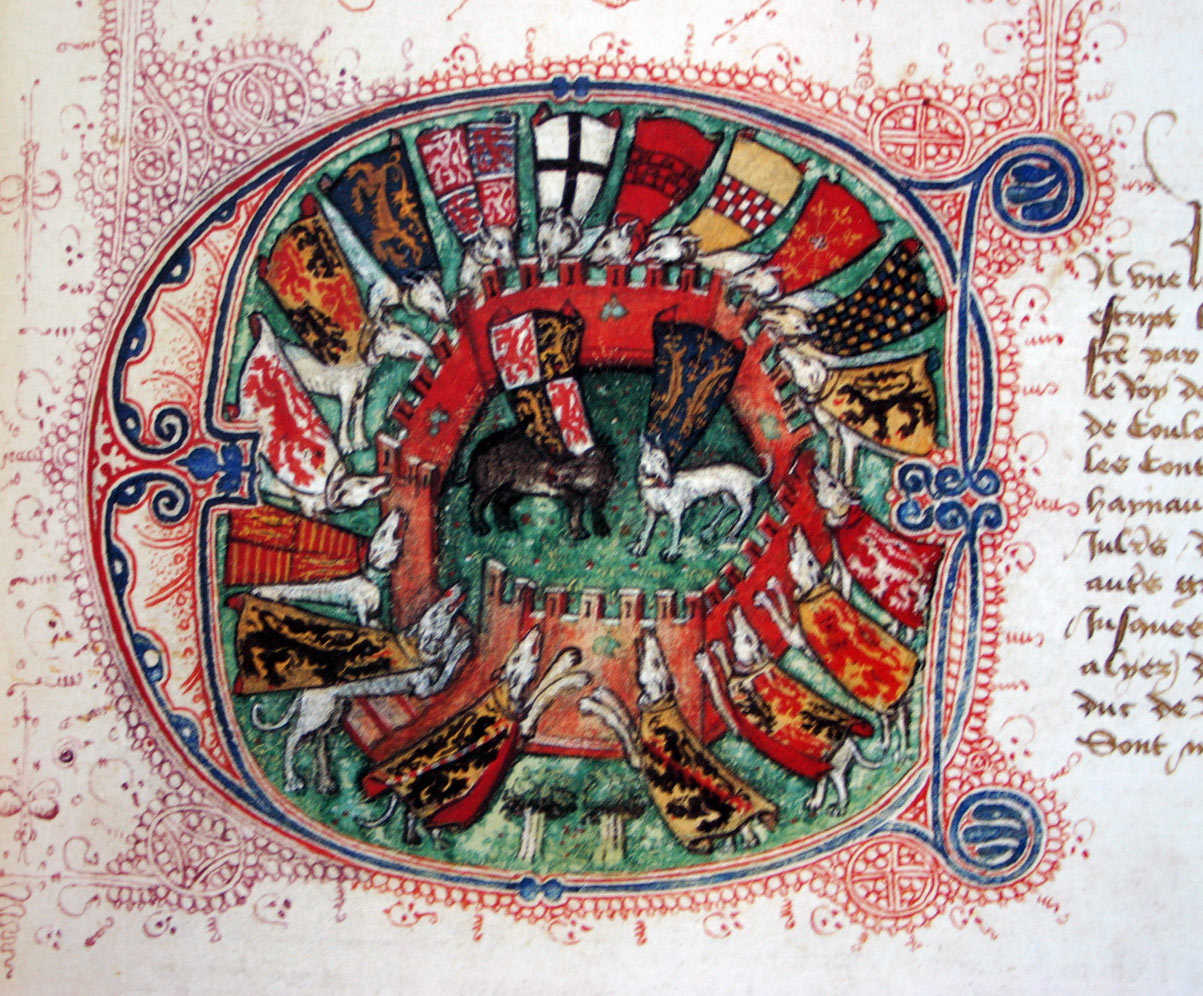
Illuminated Letter - 15th Century
Smeyers (Pg 295)
Materials you will need:
- One dog - preferably well behaved
- Fabric for outer
- Fabric for lining
- Paper scissors and fabric scissors
- Tape measure
- Paper for pattern making
- Sewing machine or needle and thread
- Button and some ribbons for ties
- Items for applying decoration - stencil/paints/embroidery etc
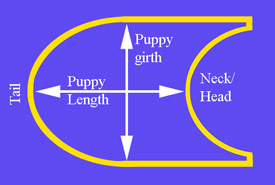
Step One: Measuring your dog.
No this is not a euphemism - we are literally going to take your dog’s measurements from neck to tail (his length), and around the stomach (his girth).
Step Two: Making your pattern
Use these measurements we are going to make a paper pattern. I tend to use old newspapers as large readily available paper for making patterns.
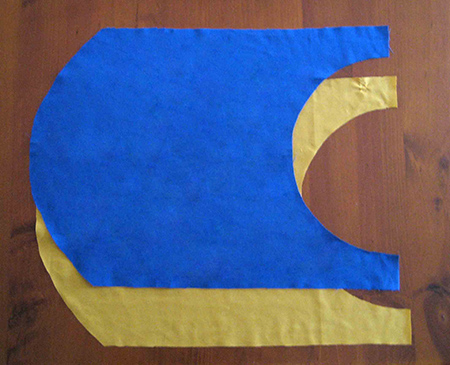
Step Three: Cutting out your fabric
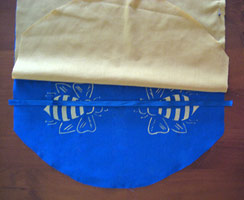
Once you have cut out your pattern, pin it to your fabric and cut out your outer fabric. Repeat with the second colour fabric cutting it to the same size - this will be the lining of your coat.
Step Four: Decorating your coat
Any decoration will need to be applied to the outer fabric. You may choose to paint your heraldic charges onto your fabric, or you may stencil the design on if you have a standard stencil that you regularly use. I have chosen to stencil my dog coat in keeping with a previous theme.
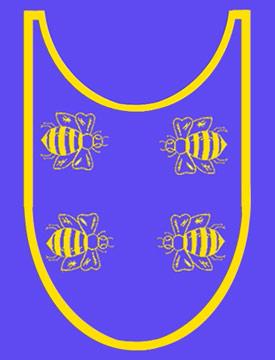
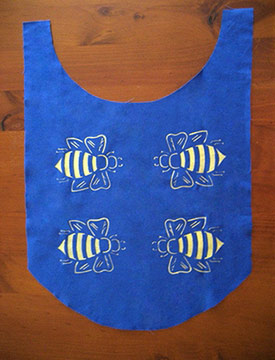
If you want to get really carried away you can always hand embroider emblems onto the outer fabric. There are extant examples of heraldic horse coverings done in very fine embroidery, and these are also depicted in many period illuminations paintings, tapestries, armorial rolls etc.
Fragment of Edward III’s Heraldic Horsecloth c1348 (Staniland)

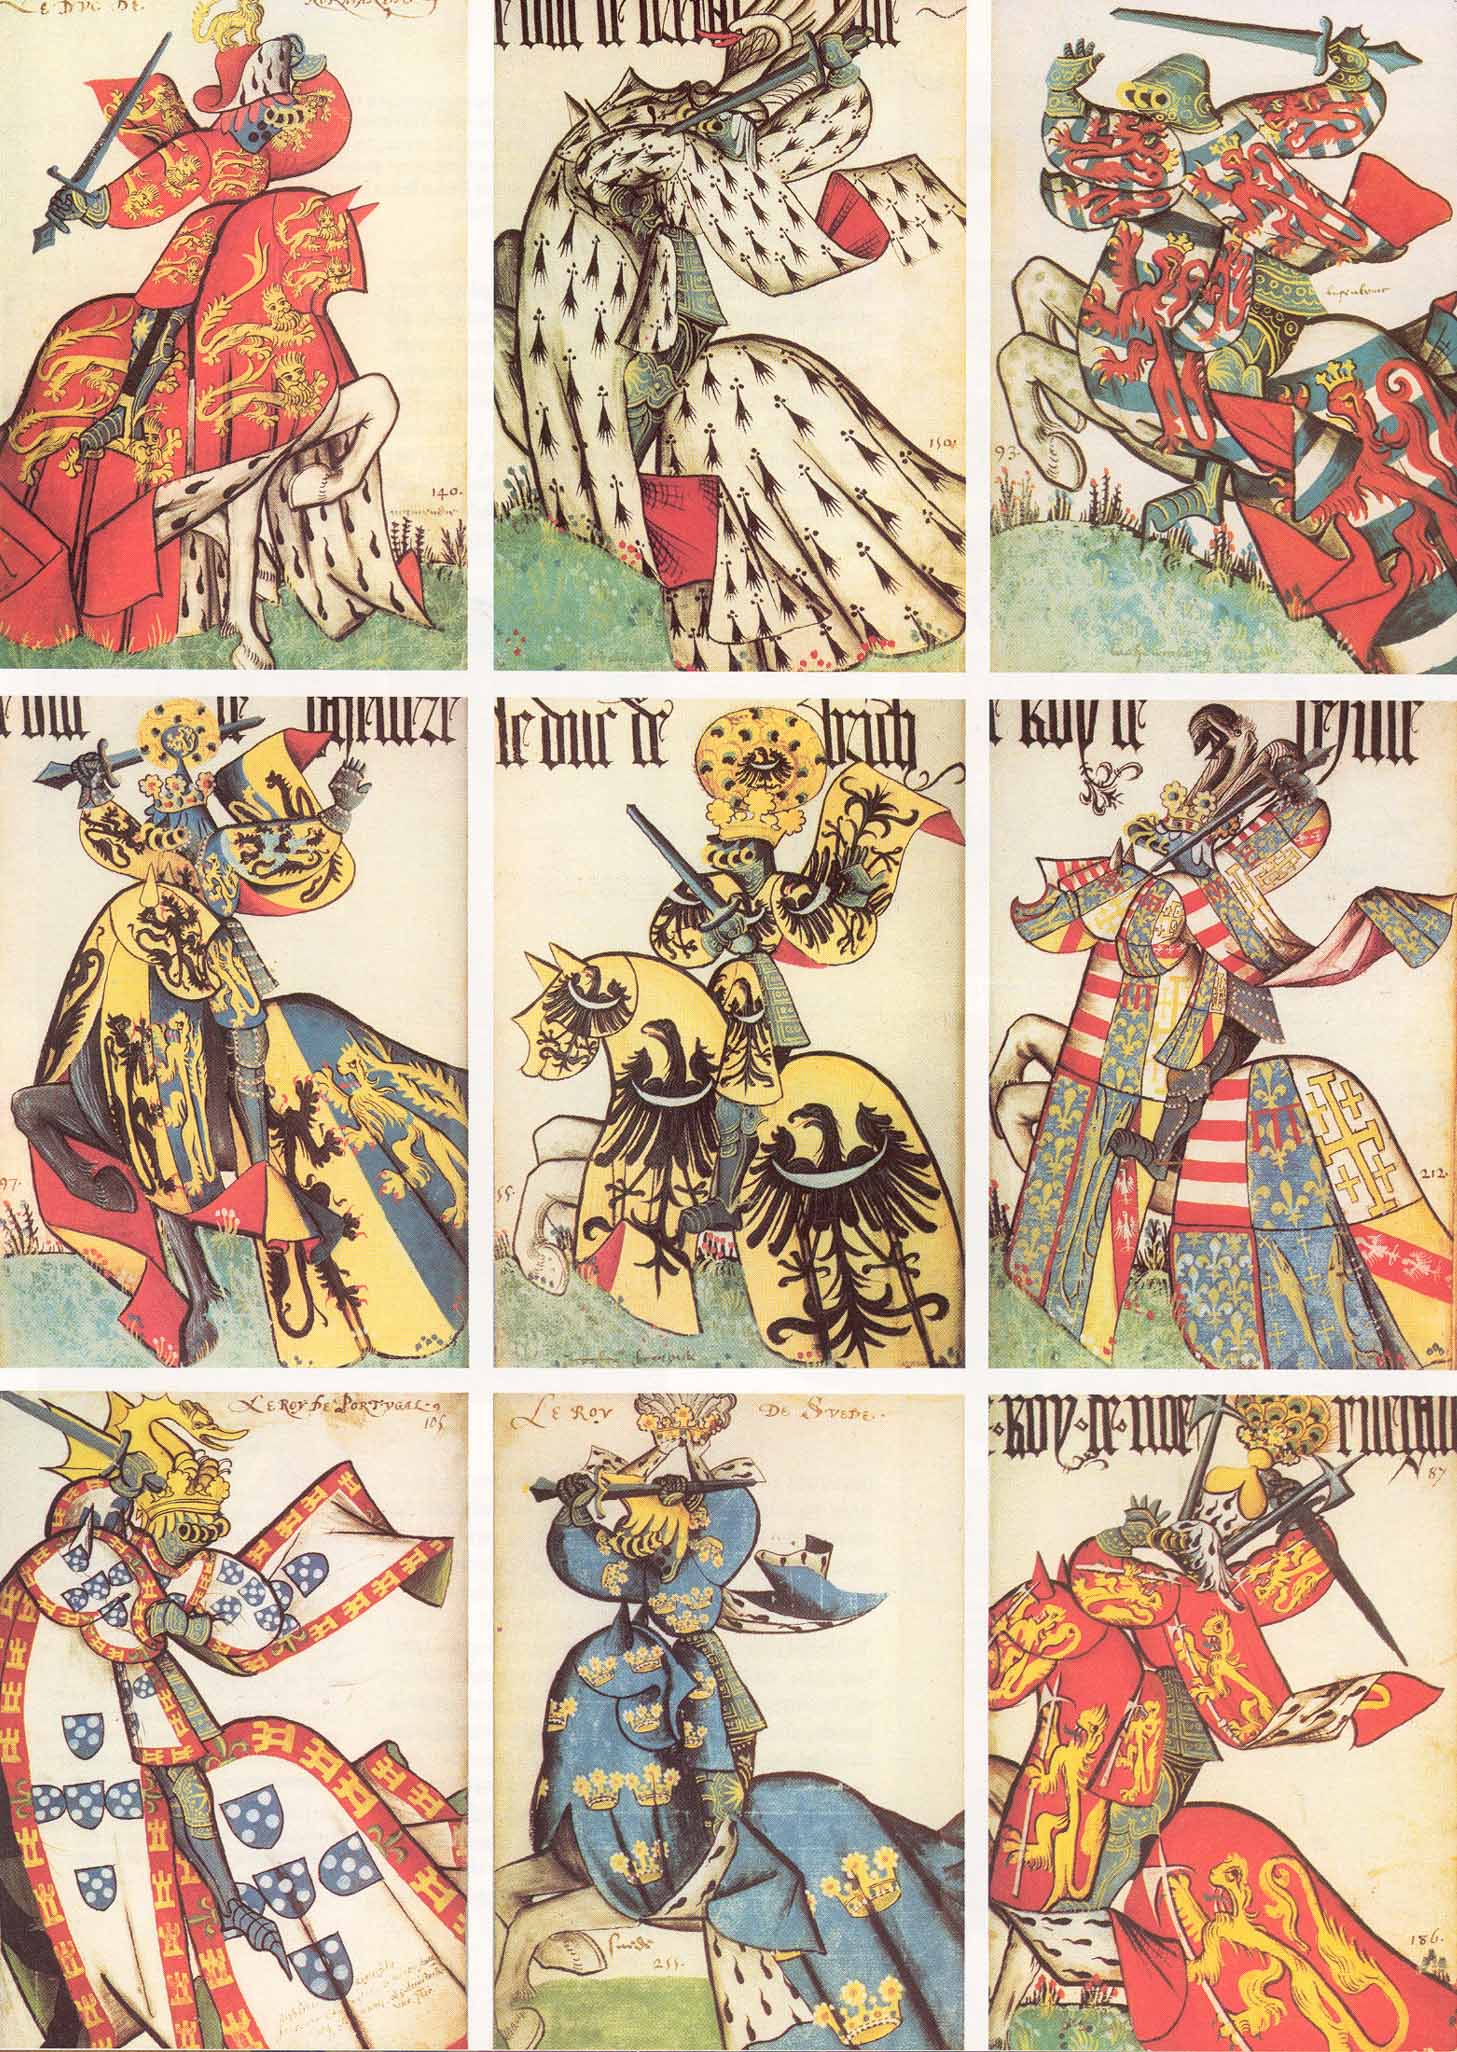
Eighteen Pages from the Armorial Equestre of the Bibliotheque de l’Arsenal, Paris. (Neubecker)
- 1st Row - King of France, Bishop of Langres, King of England, Dukes of Normandy, Brittany and Luxemborg
- 2nd Row - King of Castile, King of Aragon, Count of Toulouse, Duke of Geldern, Duke of Brieg King of Sicily
- 3rd Row - Count of Champagne, King of Scotland, King of Navarra, King of Portugal, King of Sweden, King of Norway
Step Five: Pinning & Sewing
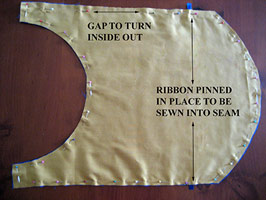
Next thing to do is pin your lining to your outer with the outsides on the insides. I have added in some ribbons that can be tied together under puppy’s belly to stop the coat from slipping around his neck. The ribbons are put on the inside and sewn securely into the seams. Remember to leave a gap to allow for turning it in the right way after the seams have been completed.
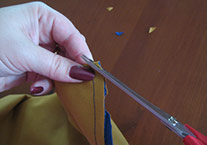
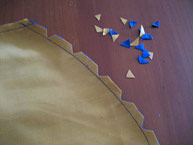
Step Six: Snicking the Curves
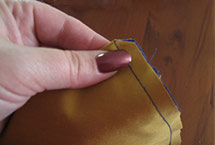
Once the seams are sewn into place we will need to snick the curved sections of the coat so it will sit nicer and flat and crisp once it’s turned inside out - same as you would on a facing of a neckline. Straight cuts are okay for the inside curve and wedge cuts for the outside curves.
Step Seven - Turning the Inside to the Outside.
Once we’ve sewn together the lining and the outer panel, turn the puppy coat inside out through the gap we left in the seams. To make the corners sharper and crisp, fold over the seams make firm folds in the material and hold them firm while turning them through. Use a thin ruler or something pointy to push out the corners from the inside or use a pin to lever the corners out until they are sharp.
Step Eight - Ironing & Hand Sewing
Next you want to iron the coat so the edges are all nicely pressed and the stenciled motifs are heat treated. After that we need to sew closed the gap that we left for turning the coat out the right way using invisible stitching so it’s as unobtrusive as possible.
Step Nine - Add a Button
The coat needs to be secured under puppy’s neck to hold his coat on, so find a suitable button for one of the tab ends and make a button hole on the other.
Step Ten - Affix Coat to Puppy!
You’ve now finished your dog coat and all that remains is to try it on for size. Et voila! You’ve now created the very finest of heraldic haute couture for your hound!

Bibliography
- Neubecker, Ottfried - Heraldry. Sources, Symbols and Meanings
Tiger Books International, Twickenham, UK 1997
ISBN 1855019086 - Smeyers, Maurits - Flemish Miniatures
Brepols Publishers, UL 1999
ISBN 2503509665 - Staniland, Kay - Embroiderers - Medieval Craftsmen Series
University of Toronto Press, 1991, Toronto
ISBN 0802069150