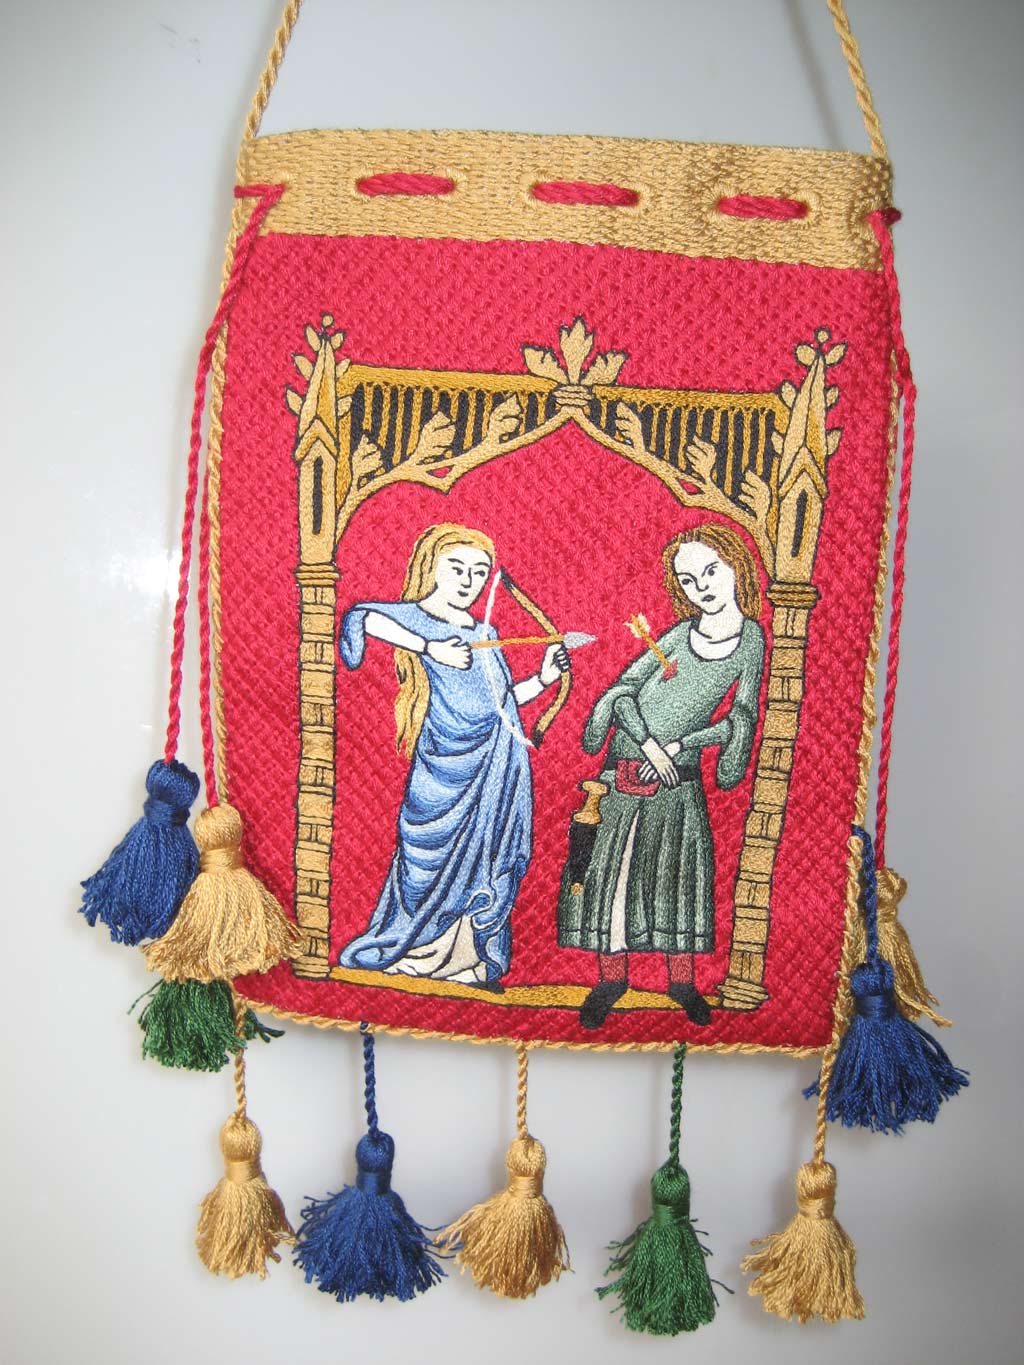
Embroidered Lovers' Purse
While the origins of embroidery are unclear, it is known that for thousands of years, even pre Bronze age man, has used needle and thread to decorate and embellish fabrics that can be used as clothing, household items and personal accessories like these pouches (Staniland). The Opus Anglicanum pouches in discussion here, are predominantly from the late 13th to the early 14th Century and of European origin.
Around 1250-1350AD, examples of these exceptionally skilled embroideries started to emerge. While these highly valued works used the finest quality materials and were therefore expensive to produce, they were in much demand by both Church and State. Across Europe, nobility and papistry alike commissioned special works for ceremonial and ecclesiastical garments. This time period represents the pinnacle of English embroidery and the works produced came to be known as Opus Anglicanum, or ‘English Works’. It was not just the skilled execution that set these works apart - the shading and detail, beauty and expression of the figures was exceptional, and unique to this type of embroidery. Opus Anglicanum works achieved a vitality, realism and emotion in the characters depicted that had hitherto been absent in medieval embroidery.

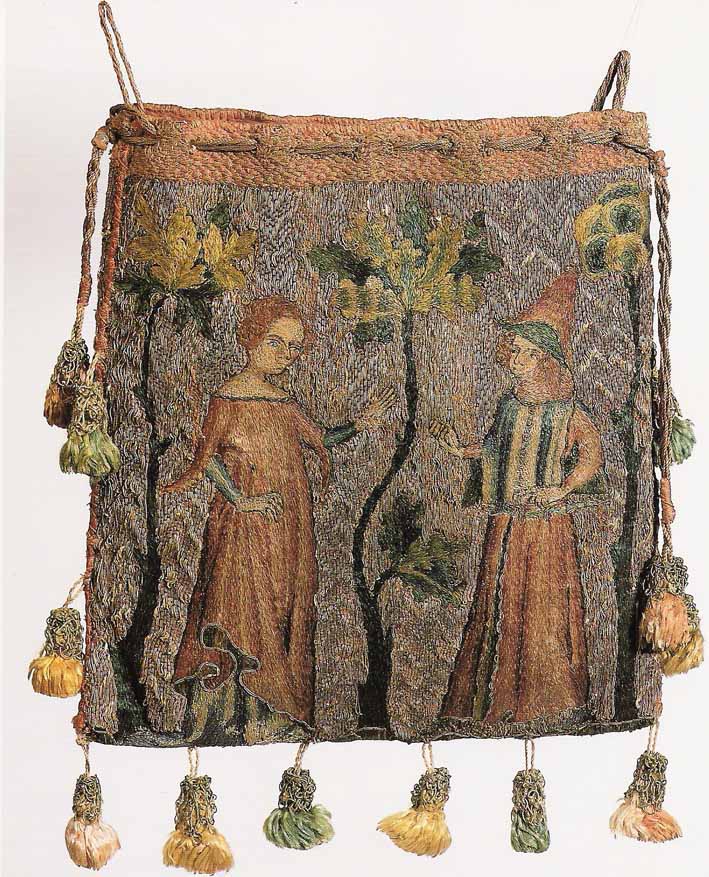
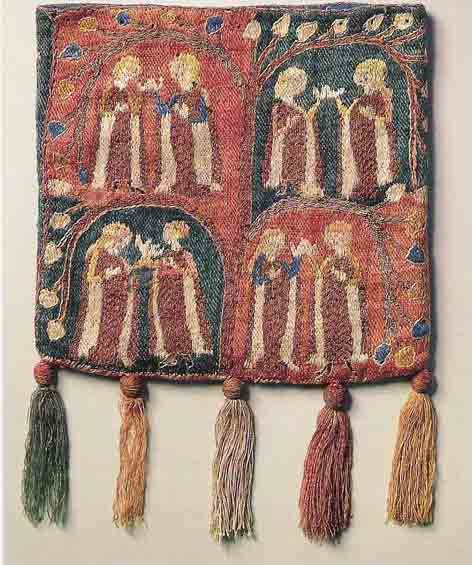
Lovers Purse Paris c.1340 Silk split stitch on linen,
Embellished with chain and knot stitching, Background - couched gold thread Hamburg,
Museum fuer Kunst und Gewerbe (Inv. 56,137) 16 | 14 cm
Many of the Opus Anglicanum works were produced in large embroidery workshops that hired both men and women as professional embroiderers. These workshops completed commissions for the secular and ecclesiastical sectors. Their work was highly sought after and prohibitively expensive. Records from the accounts of Henry III in 1271 shed some detail on one such piece, an altar frontispiece, which was commissioned for the high altar in Westminster Abbey. Four embroiderers were employed for nearly four years to create the work, at a cost of £36 in wages, which translates to be approximately £12,128.22 today. The cost of the gold and silk thread, pearls, enamels, garnets set in gold and silver plaques cost a further £220, which is a staggering £74,116.87 today! (Staniland; pg12)

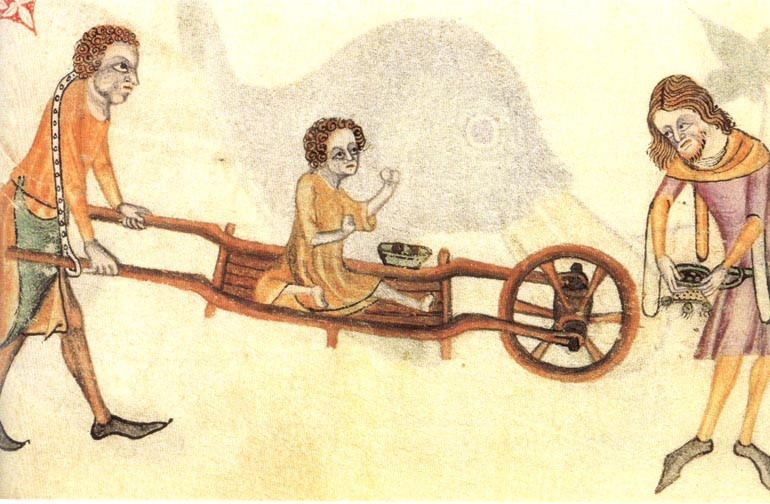
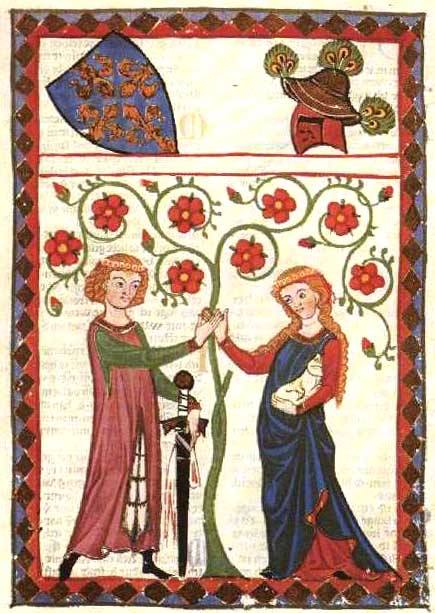
Dietmar von Aist, disguised as a peddler,
displays some belts and purses to his love interest
Manesse Codex, circa 1300-1320, Z�rich, Heidelberg, Universitätsbibliothek
(Cod. pal. Germ. 848, fol. 64 recto)
The techniques used to create the Opus Anglicanum works were much mimicked - with varying degrees of success, but as time passed, the quality of the works decreased towards the 1350s. There are a number of factors theorized to have affected the decline of the Opus Anglicanum works. Firstly there is conjecture that the Hundred Years War was affecting the availability of resources and materials. Also, the Black Death coming to England in 1348, is attributed with virtually wiping out many of the large embroidery workshops, not to mention, dyers, needlemakers and other associated industries from that time. With fewer skilled embroiderers to pass on the technical skills, and demand increasing for quicker methods and more economical materials, (such as woven brocades and velvets) the golden age of Opus Anglicanum was over.
 |  |
|---|---|
| Luttrell Psalter, circa late 1330-40, London, British Library, Additional MS 42130 | Alms purse of Marie de Picquigny (France 1342) 17x30cm Linen, silk and gold thread. Musee de Moyen Age, Cluny Paris |
Alms Purses
Purses in Medieval Europe served a number of purposes: carrying personal effects, storing religious relics (as a form of reliquary), and storing seals used in stamping documents. One popular function was for the distribution of alms to the poor. Almsgiving, was traditionally recommended by the medieval church to foster a state of interior penance. Alms purses or aumônières seem to have been made in many different dimensions, for example the Lovers Purse (pictured above) is 16cm | 14 cm, while the Alms Purse of Marie de Picquigny (also pictured above) is a much larger 30cm | 17cm.
Researching these lovely purses has inspired me to try and make one of my own - it is my first attempt at a piece of medieval style embroidery.
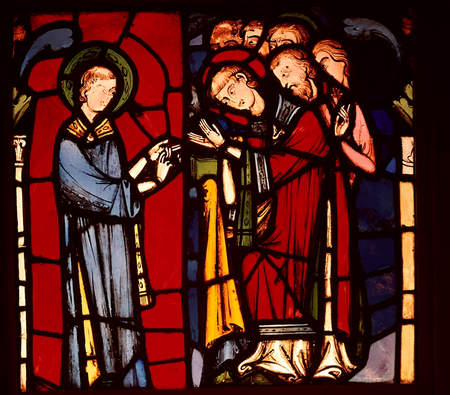
St Stephen. Ile de France Champagne c.1250 Stained Glass.
Victoria & Albert Museum C.1362-1924
Artwork
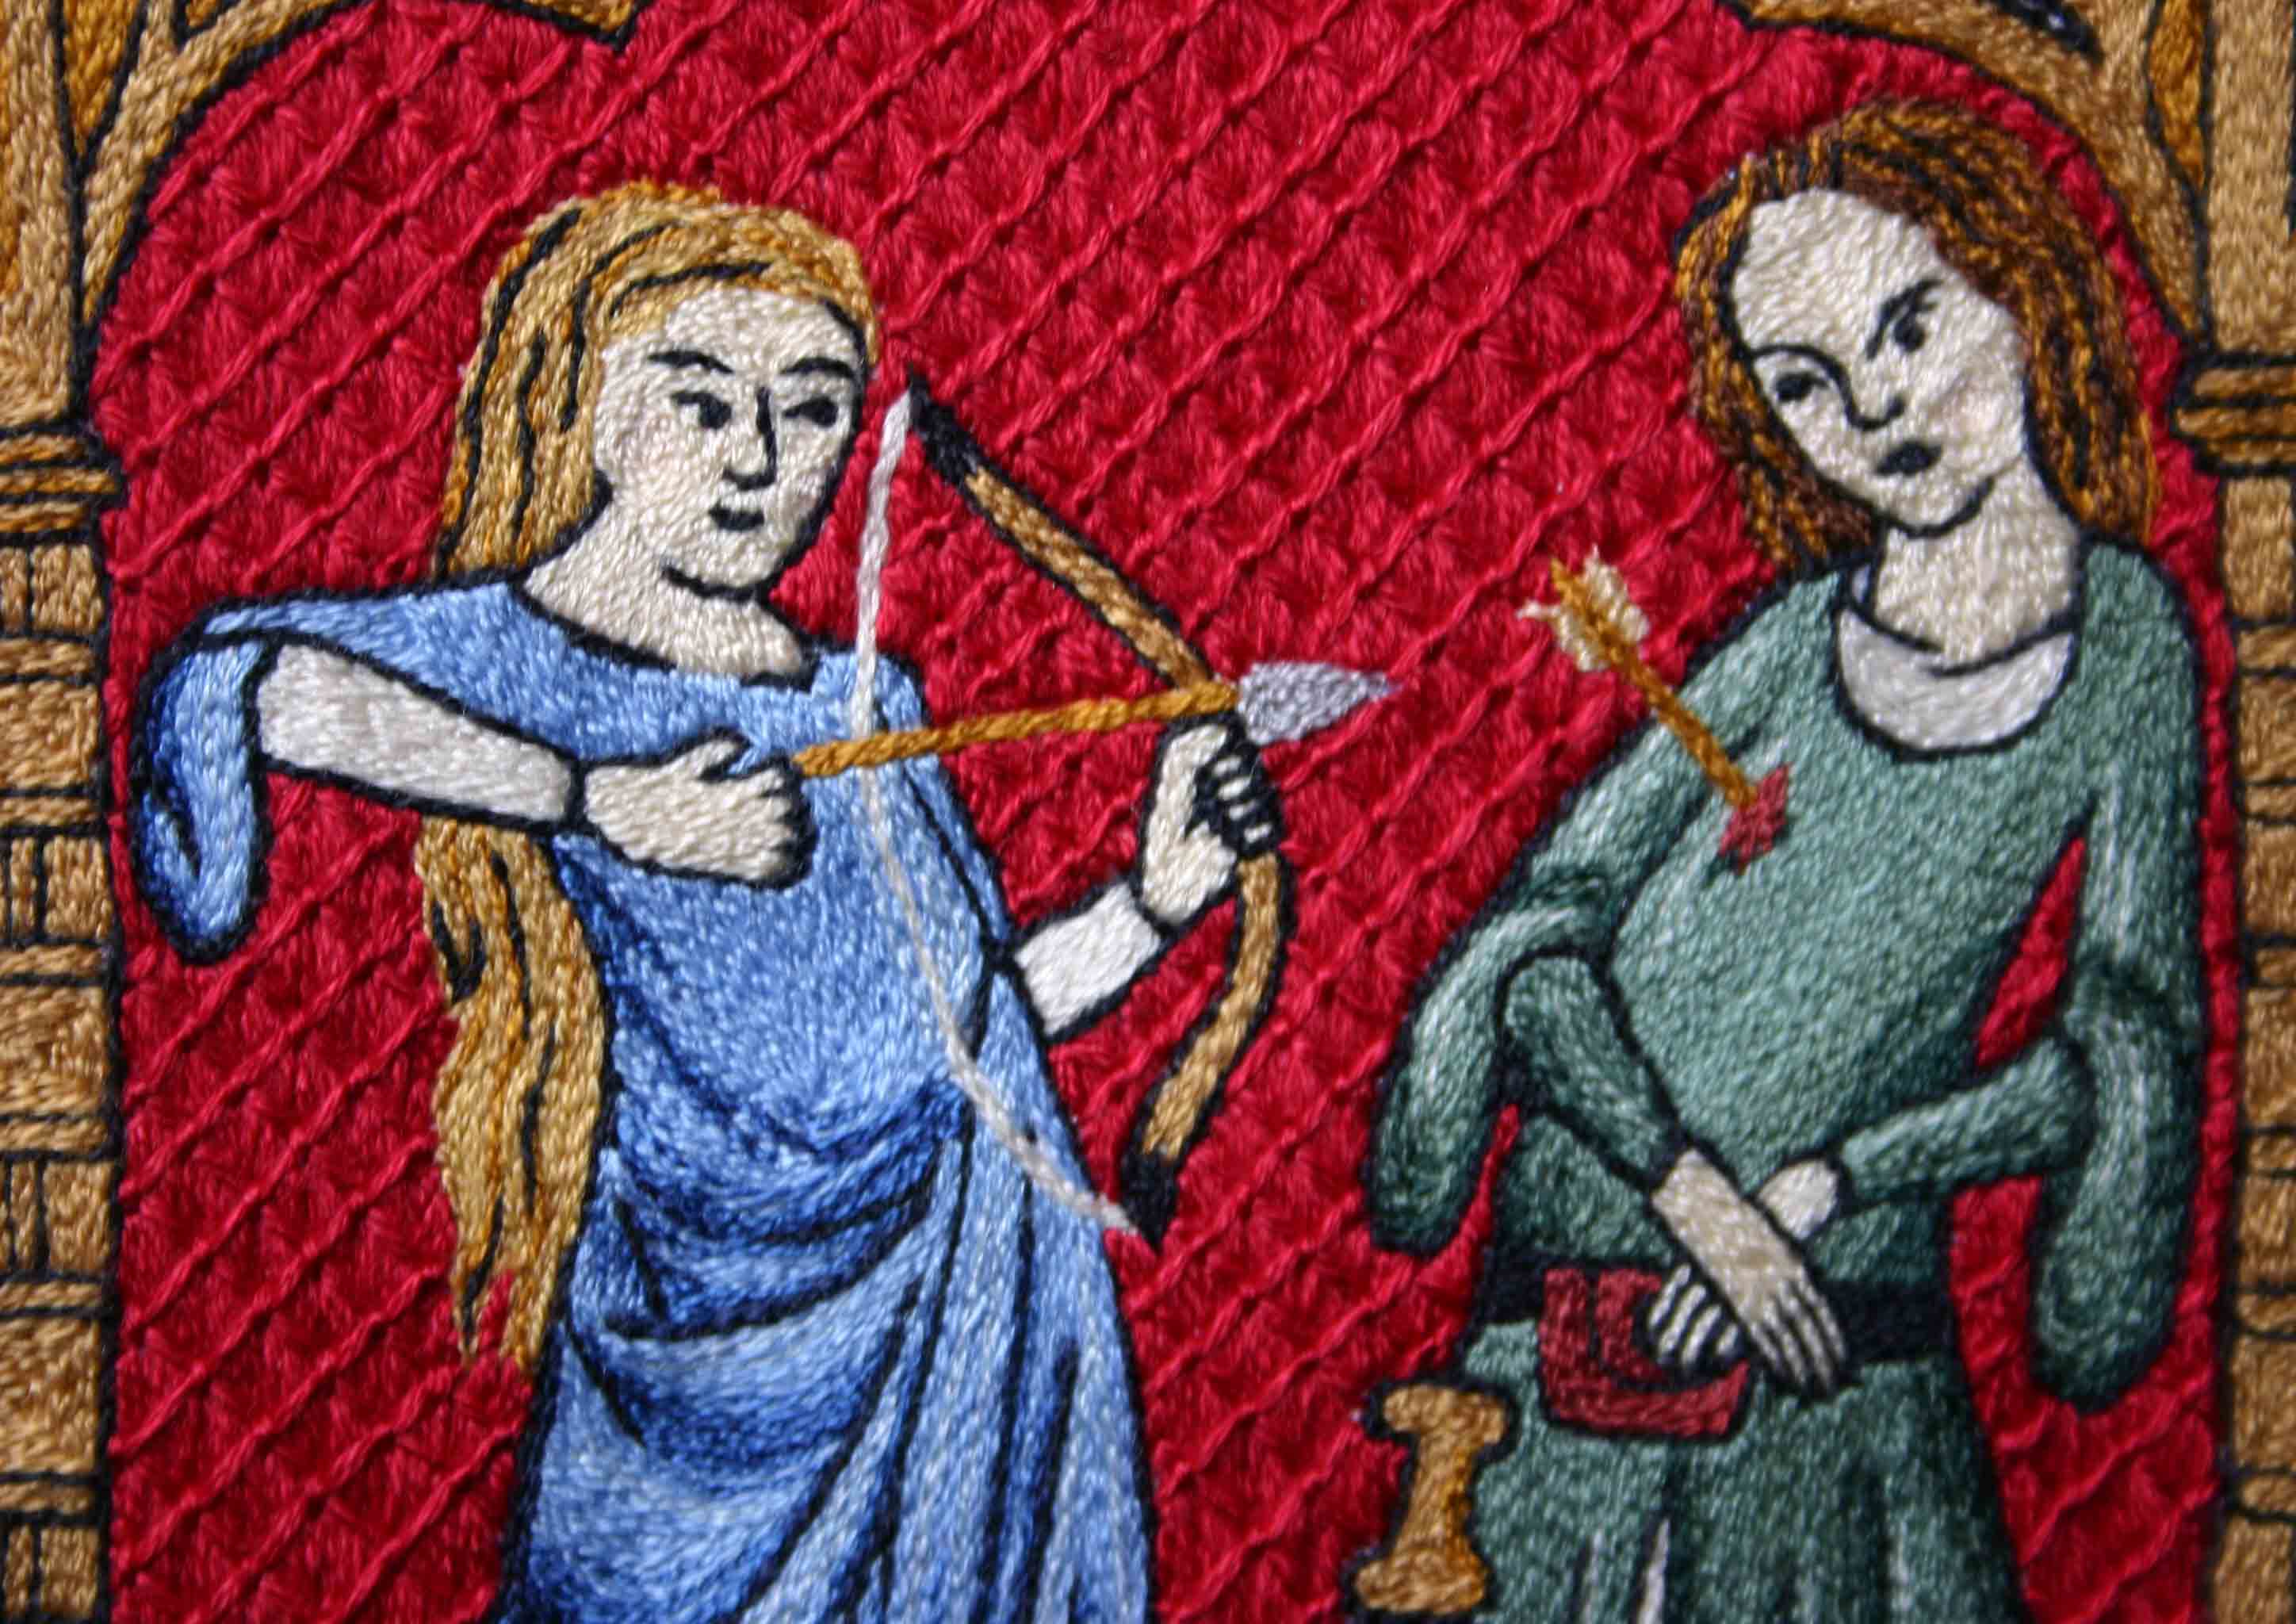
Around this time period 1250-1350AD, the figurative representation of the human form exhibited certain unique elements which are visible across the creative spectrum of the time. These characteristics are quite specific to the time period and not strongly evidenced in other eras.
The human posture was depicted as very slender, often with shoulders slightly back, and the hips/pelvis tilted forward. Hands appear very elegant, finely crafted fingers and somewhat elongated from the wrist. Also, in this style, the facial representations were commonly in 3/4 profile with broad foreheads and large expressive eyes. The posture of the figures seems to be arranged in a careful, flowing manner which was accentuated by the addition of clothing that hangs like drapery, and itself has movement and fluidity. Mostly the figures appear quite gentle and passive, even when portrayed in active situations.
This style of figurative representation can be seen across various art forms uring this time period - from painting, illumination, embroidery and to even stained glass. It seems probable that this trend stems from the beauty ideals of the period. With these considerations in mind, finding or creating the right style of art work for an Opus Anglicanum embroidery is imperative. Representing figures that depict many of these elements will enhance the cohesive period appearance of the piece.
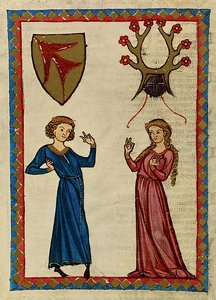
Manesse Codex, circa 1300-1320,
Z�rich, Heidelberg. Universit�tsbibliothek
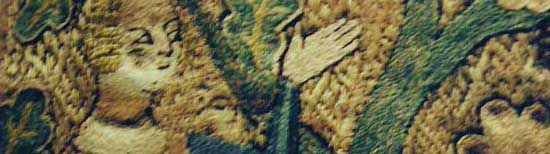
This painting is a detail from the inside of a small wooden casket painted in the early 14th century, and exhibits many of the characteristics discussed above that exemplify the style of figurative representation often seen depicted in Opus Anglicanum works. It is on this image that I decided to base the embroidered panels for my pouch. The centre panel contained a heraldic device, which was cropped off in the original image. After contacting the curators at the Cloisters (Metropolitan Art Museum, NY) I was able to obtain the following images, which show the complete panel as it appears inside the casket.

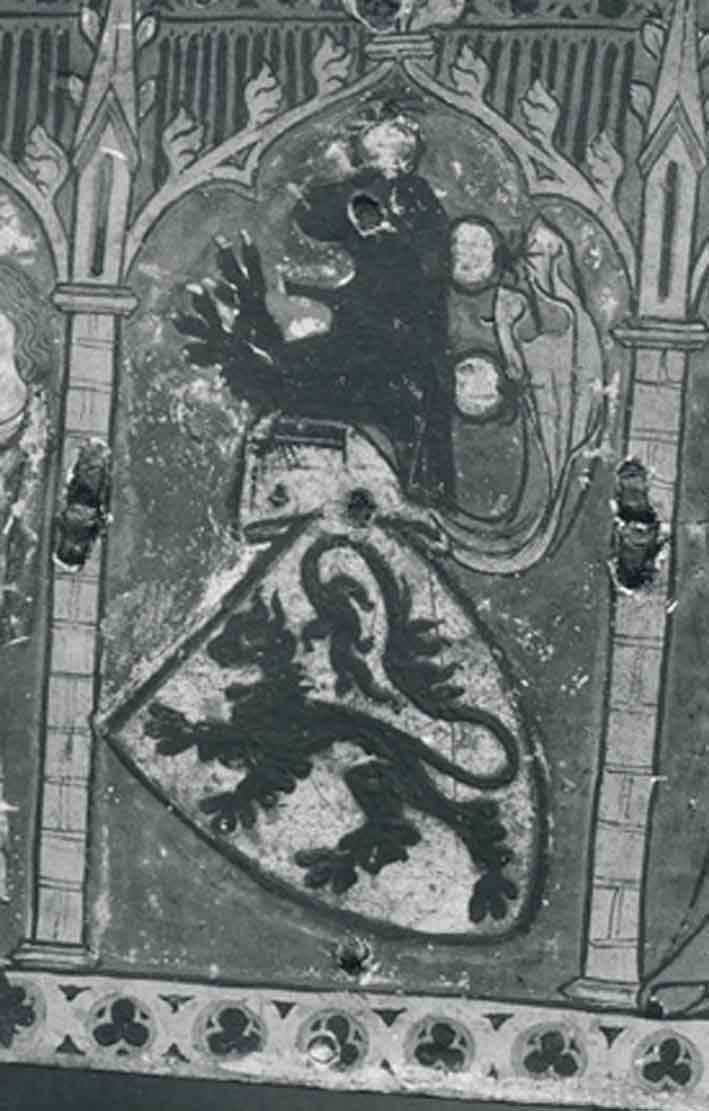
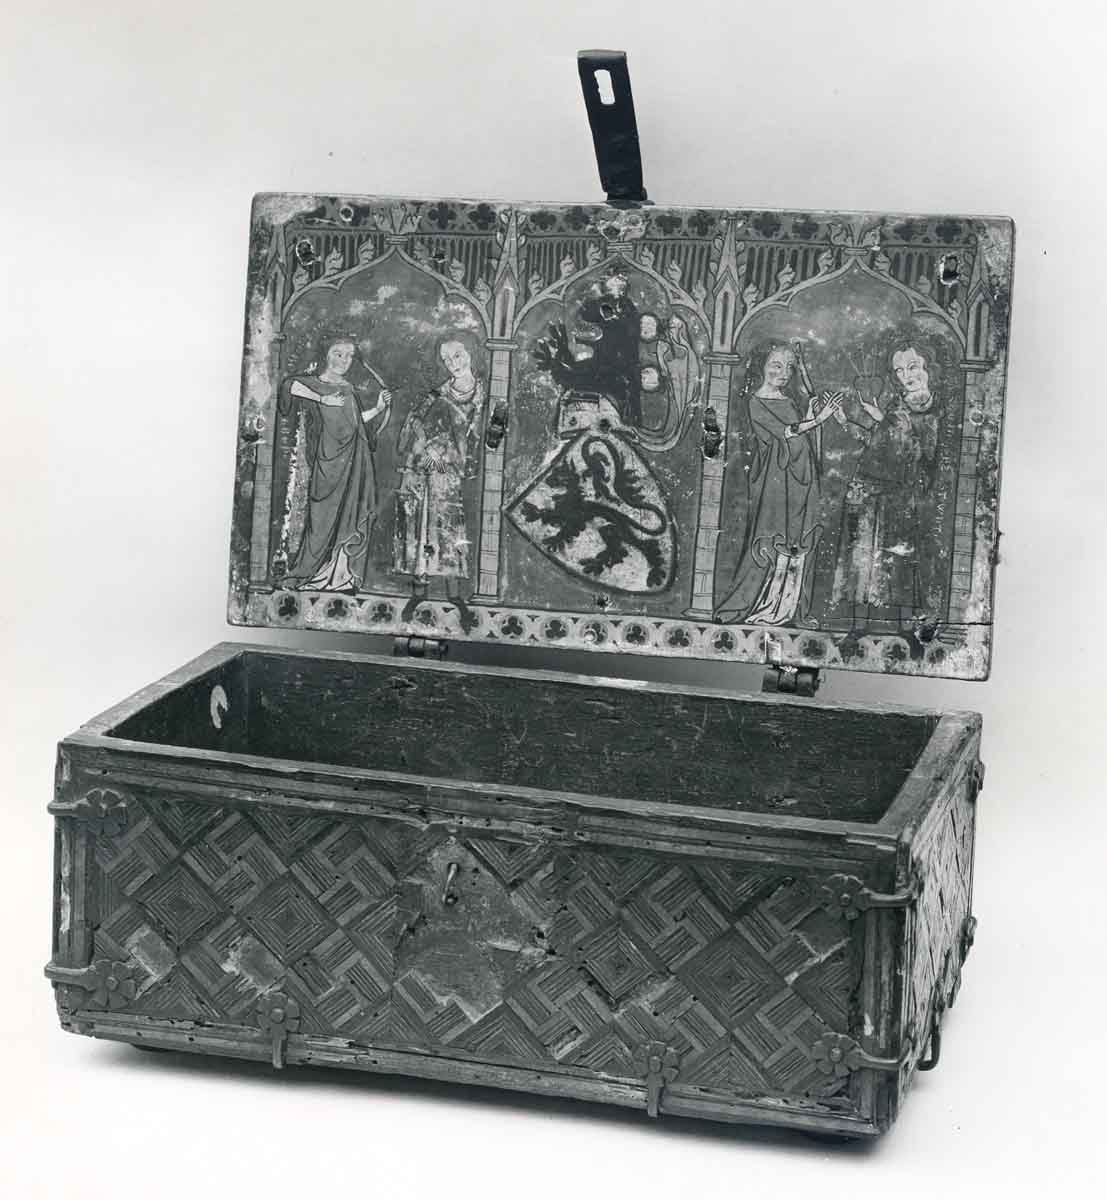
Minnekaestchen Casket.from Upper Rhine c.1320 Painted Oak.
Cloisters Collection, The Metropolian Art Museum, NY (Camille)
The centre panel which depicts the heraldic device shows signs that it may have been altered. The two panels depicting people appear to be quite skillfully executed - the figures are quite detailed, with intricate shading and highlighting. Whereas the centre panel is quite rudimentary in comparison - the heraldic beast is depicted with no shading or detail. It is conceivable that the casket may have changed owners at some point, and the heraldry altered to suit the new owner. Close inspection reveals the mantling and the helm were probably painted by the original artist, but the device and the beast seem to have been added later.
Cartoon Design
Using these images as inspiration, I created cartoons for the front and back of my purse. I have made some changes from the original artworks when drawing up the cartoons - the stone arbor has been shortened to be more in keeping with the desired pouch dimensions. The sleeves on man’s garments have been simplified to be more defined. The heraldic device has been changed to my own SCA registered arms. And lastly the heraldic beast has been replaced with different 14thC German heraldic beast, which I felt was more in keeping with the quality of the original artworks.
French purse c.1300-1350.The Cloisters, Metropolitan Art Museum NY
Photo courtesy of Lady Salaberge de Granson
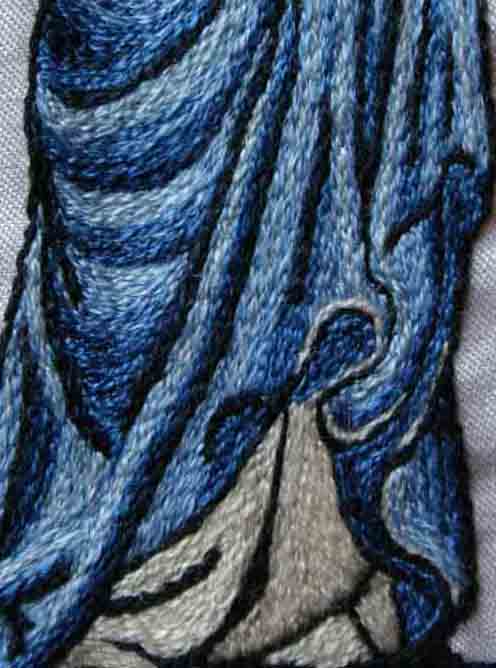
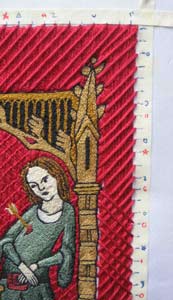
The fist step was to transfer the designs onto the silk twill ground fabric. This fabric has been chosen for its very tight weave, which will allow the thousands of tiny stitches required as the figures and the archway will be split stitched with a single strand of Madeira silk thread. The design was drawn out on paper, inked heavily to define the image and then placed on a light box to enable the design to be copied onto the fabric. The next step was to outline the figures - most figures and objects apparent in the extant purses I sourced appear to have been outlined with a darker thread before the colour, shading and details are applied, as seen in this example above.
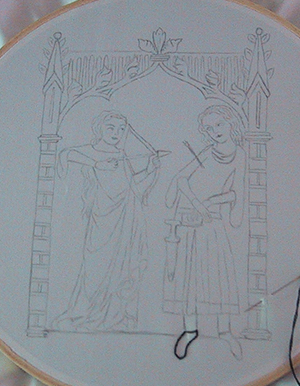
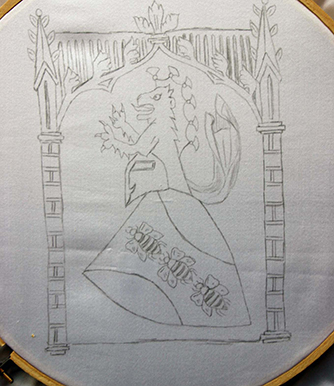
Cartoons transferred onto silk in pencil
Techniques And Materials
The techniques used in the creation of Opus Anglicanum pieces, while somewhat time consuming, are mostly quite simple. The main techniques are split stitch, couching and underside couching. A basic split stitch embroidery technique was employed for the primary designs - the central figures, flora or fauna etc. This is most often seen worked using coloured silk threads. The embroiderers work was so finely done that it created a level of accuracy that had not been observed before, and gave an effect to rival fine painting for detail, shading and expression.
The other technique, used predominantly on the background, is underside couching or pulled couching. This was sometimes referred to as “couche rentre” and evidence indicates that it was frequently done in gold or silver thread. Most extant examples are those worked in the lavish gold or silver thread, being regarded as precious over the ages, they have survived in number compared to their non-metallic counterparts. A greater flexibility in design was permissible using these techniques than previous methods used for backgrounds. The embroideries were most commonly completed on linen ground fabric, though silk twill and plain velvets (later) were used.
| Example | Stitch Technique |
|---|---|
 |  For Figures and Objects - Splitstitch |
 |  Backgrounds - Couching |
 |  Backgrounds - Underside couching |
Outline
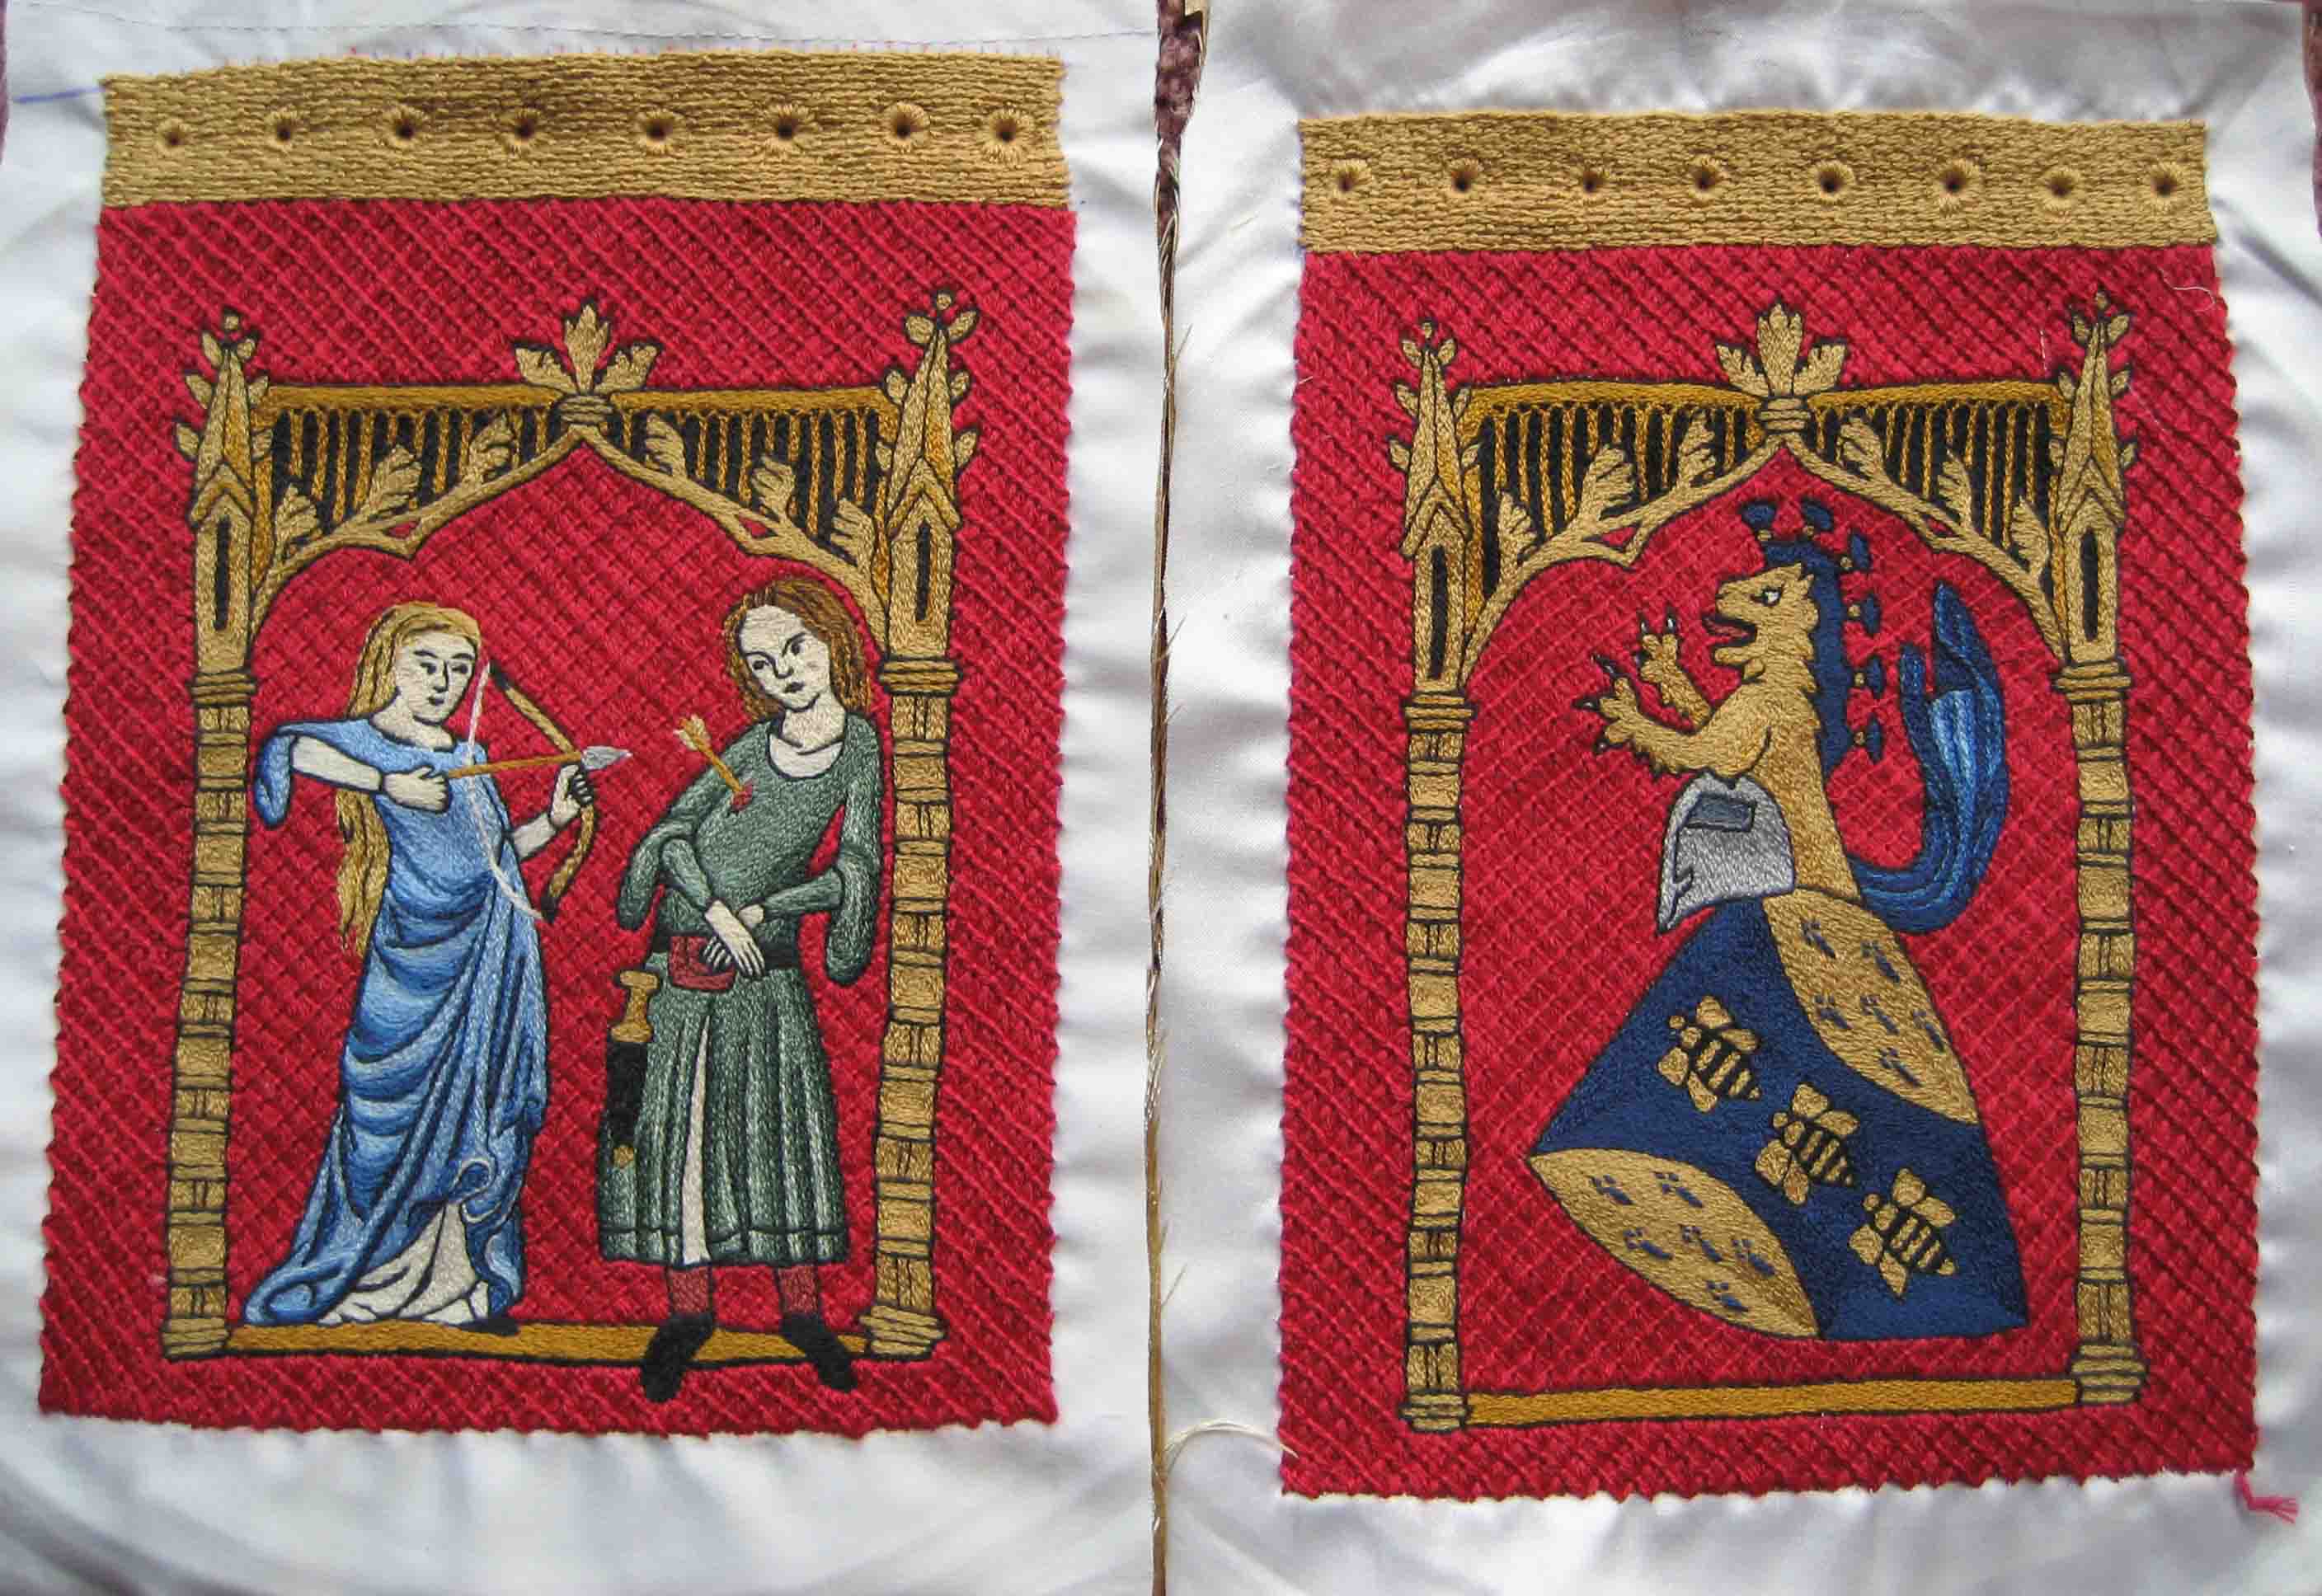
The images below are photographs of the panels after the outline has been applied. I have also at this time stitched in some areas that are to remain black - the shadowed areas of the archway and the lover’s shoes and dagger scabbard and the markings on the bees.
 |  |
|---|---|
| Front Panel | Back Panel |
Shading
The shading effect is achieved by using many different threads in the same colour. Firstly the direction of the ’light source’ in the image needs to be determined - which way is the light falling across your picture? This allows you to decide where to place the highlights - areas which would reflect the light source, and the shadows - areas where the light would fall away from the light source.
The highlight areas are worked in lighter variations of the chosen colour, and the shadow areas are worked in darker tones. Switching back and forth as you work the rows gives the effect of blending the colours together. To particularly define a highlight area, I chose to use the lightest colours or even a white thread.
Madeira silk thread colours used for dress:
Facial Detail
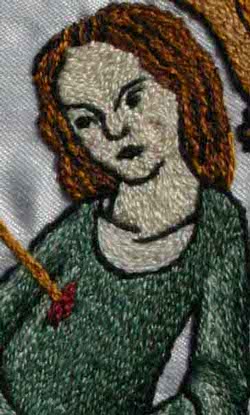
The stitching on the face is worked in flowing patterns around the features. This actually helps give the facial features some dimension as the light reflects off the silk in different directions. When working these figures, I did the outline of the features first and then coloured in the skin tones around them. I have since learnt that you can easily work the facial skintones and apply the detailed features over the top, which would be considerable easier.
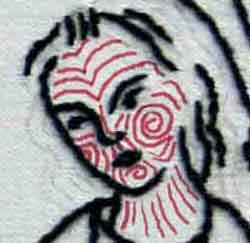
Below is a map showing the direction and flow of the stitching as it was applied to the face area.


Progress on panels after most of the split stitch work is completed
Backgrounds
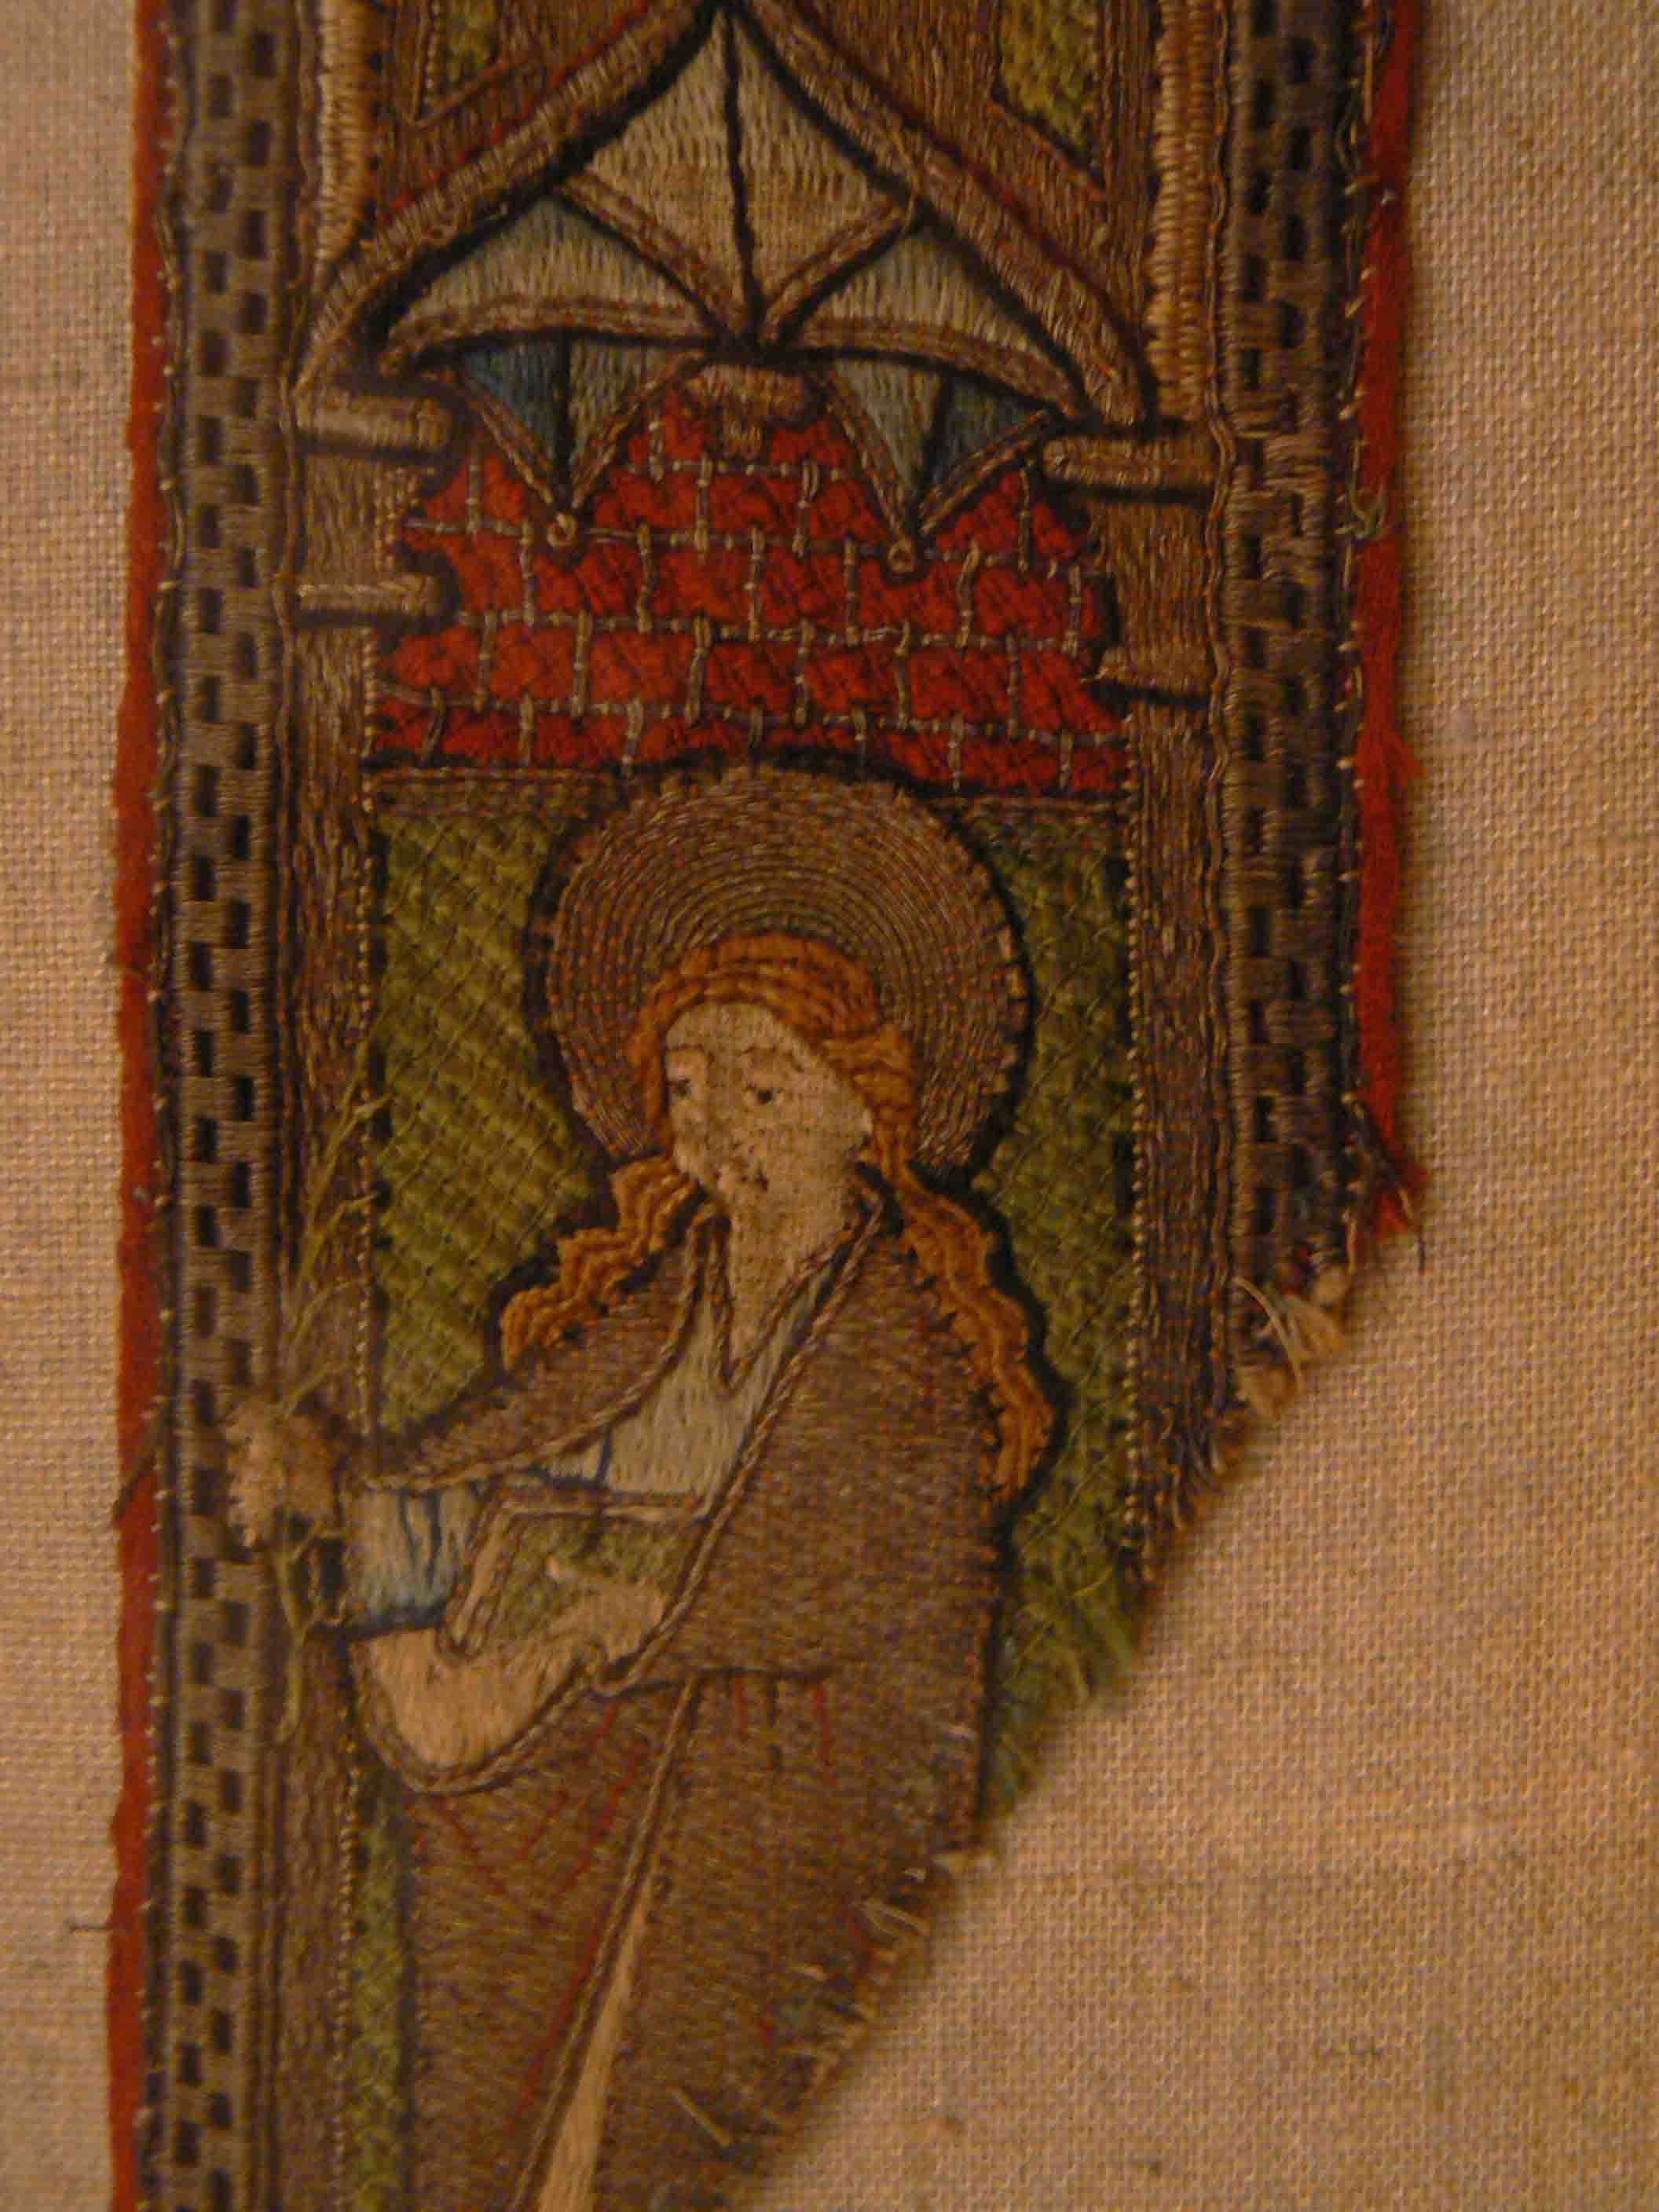
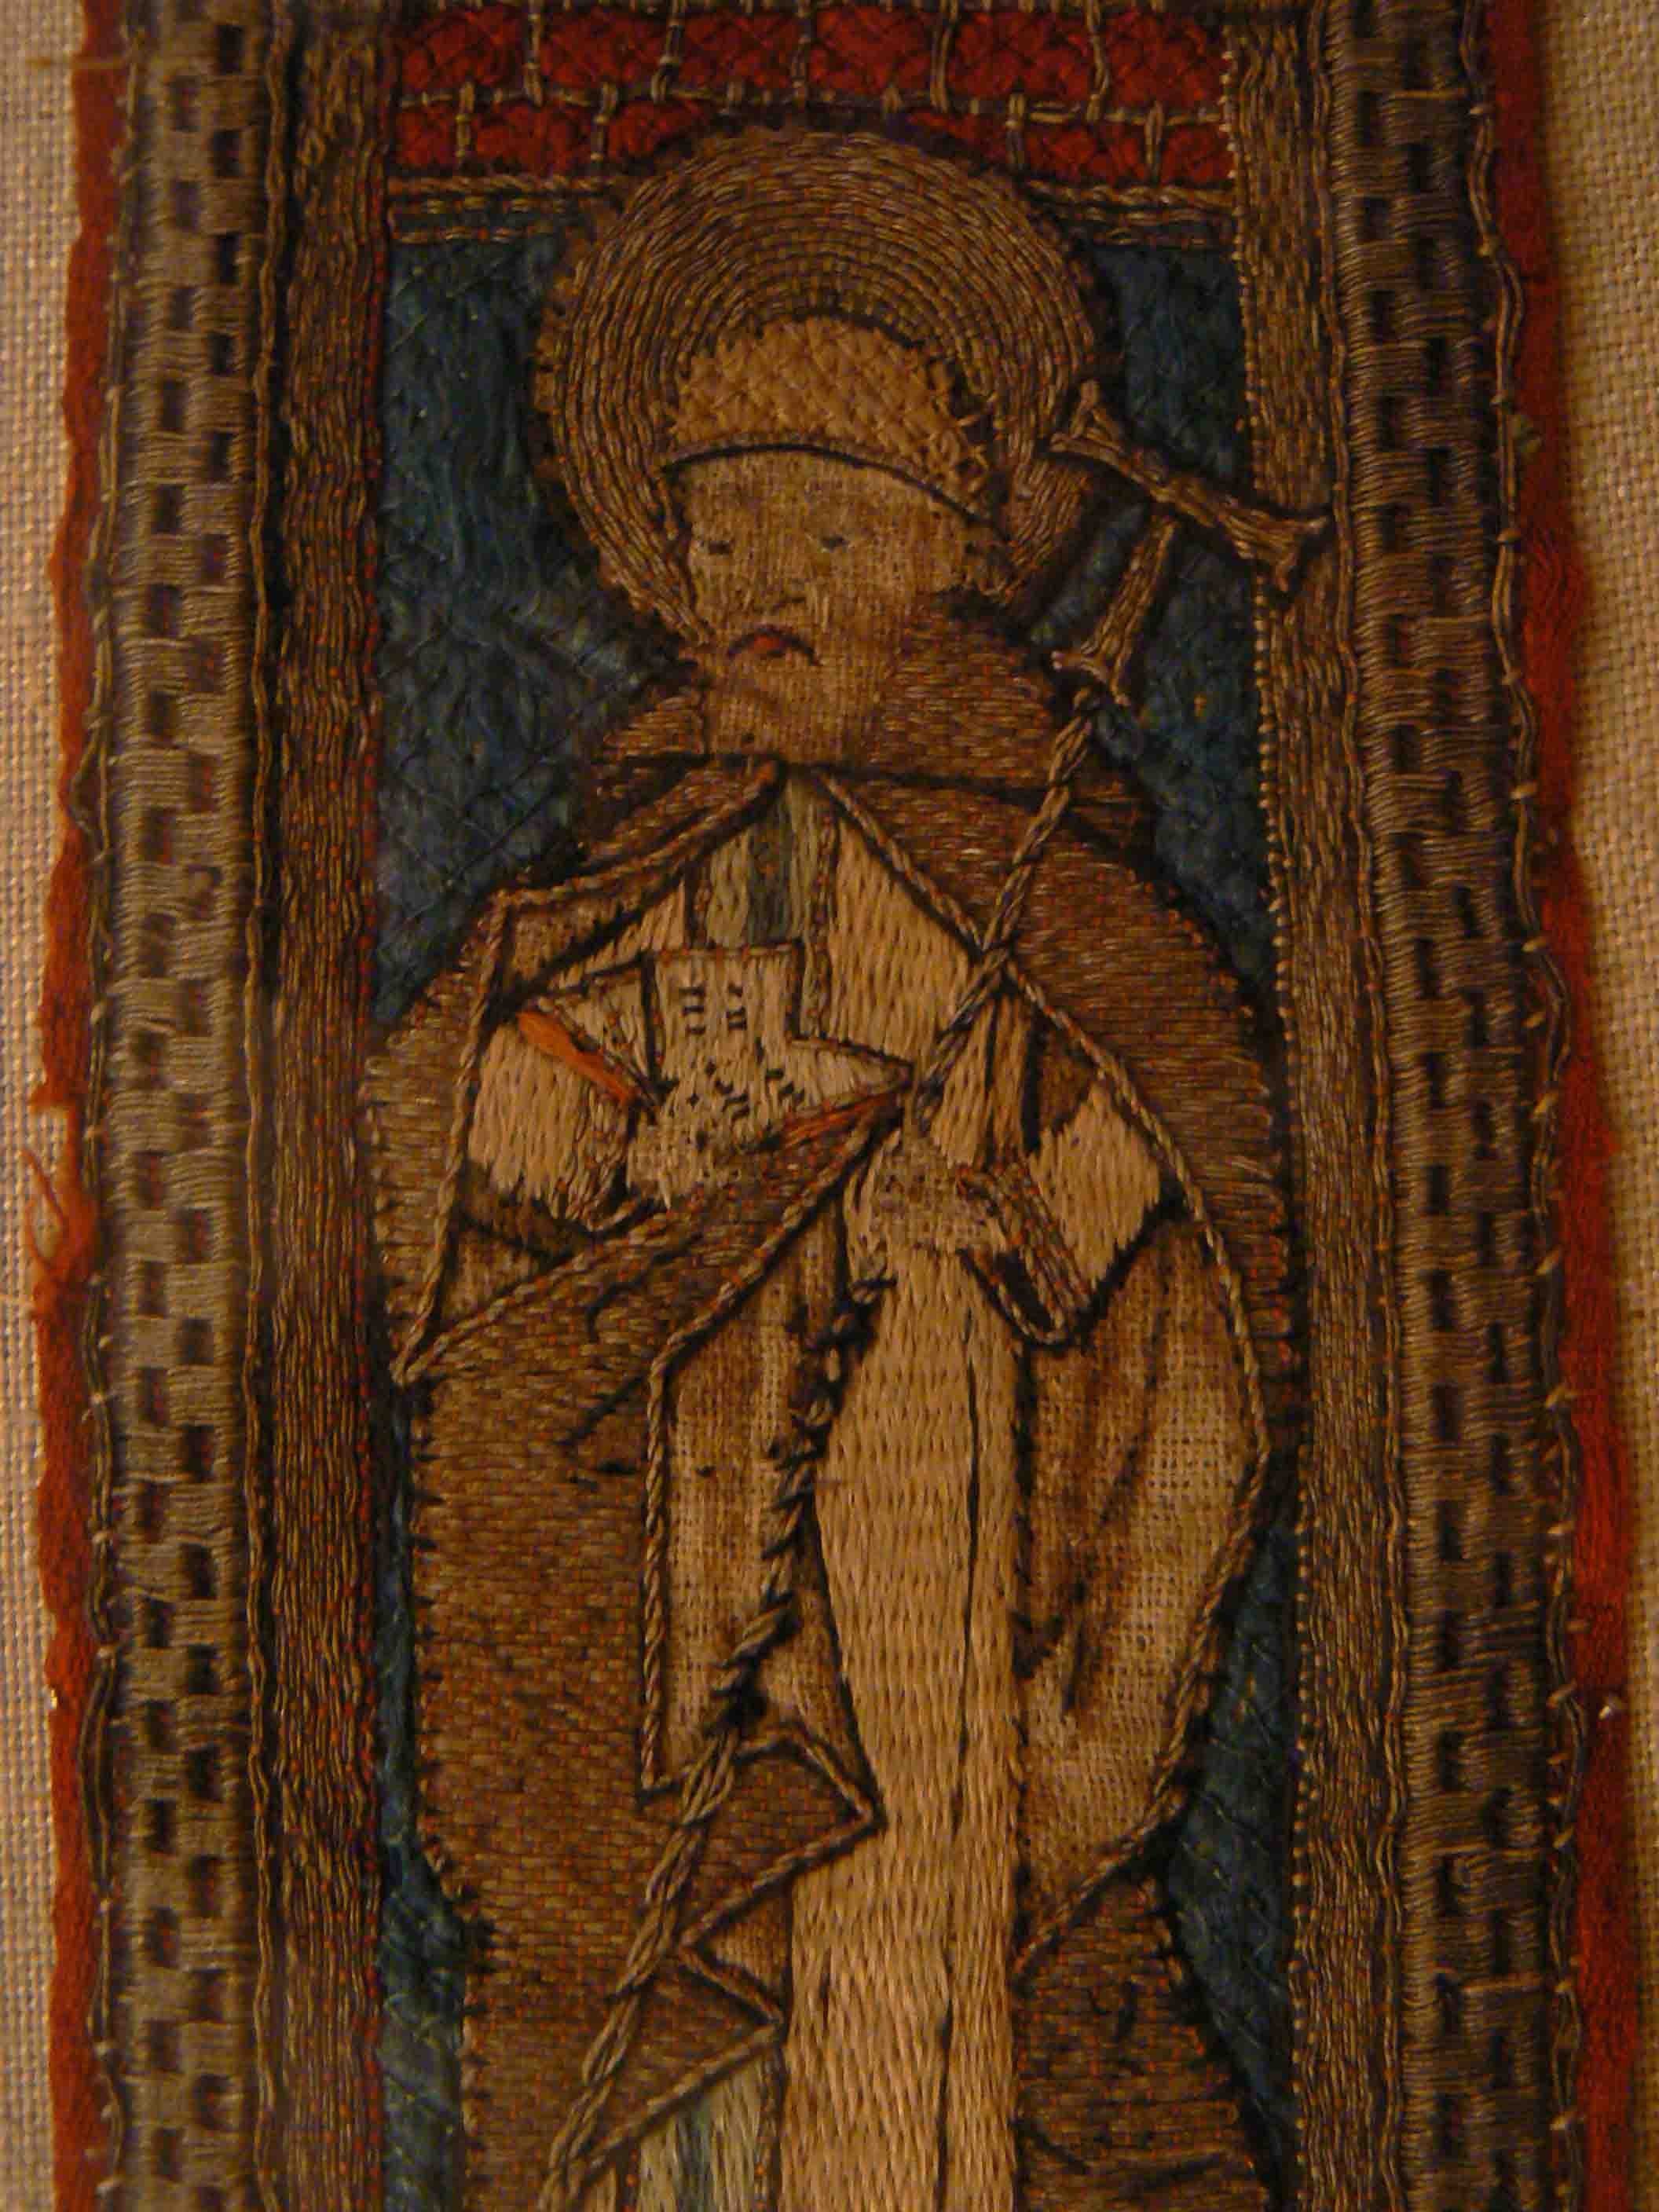
Most extant aumônières appear to have been made with a lavish metallic golden background. It is probably the precious expensive nature of the materials used, and the luxurious appearance of these pouches that has ensured their survival. Finding an example with a non-metallic silk background is somewhat more difficult. It is probable that these less expensive, and probably less prized, purses were not as well looked after and stored with the same care that has conveyed their golden counterparts through the centuries. The example below has a background completed in the underside couching technique, but appears not to have been executed with metallic thread. It may have been completed in coloured silk thread. Unfortunately, I have been unsuccessful in having this verified by the staff at the Cloisters to date.
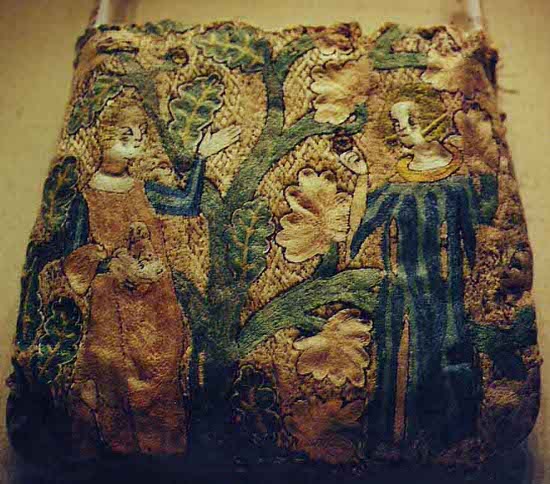
French purse c.1300-1350. split stitch embroidered figures and underside couched background.
The Cloisters, Metropolitan Art Museum NY.
Photo courtesy of Salaberge de Granson
As I had been unable to confirm or source any examples of Opus Anglicanum embroideries with silk rather than metallic backgrounds - this project languished for some years in an unfinished state. Fortunately Mistress Acacia de Navarre found some examples from the Victoria and Albert Museum in London that support the use of silk backgrounds in this style of Opus Anglicanum work. The examples depicted are of German origin c.1450 and originally part of an orphrey that display a representation of St Anthony Abbot and a female martyr. Completed in gilt and silk treats on line, using brick stitch and couched technique, the figures in these pieces were likely worked separately before being applied to the ground.
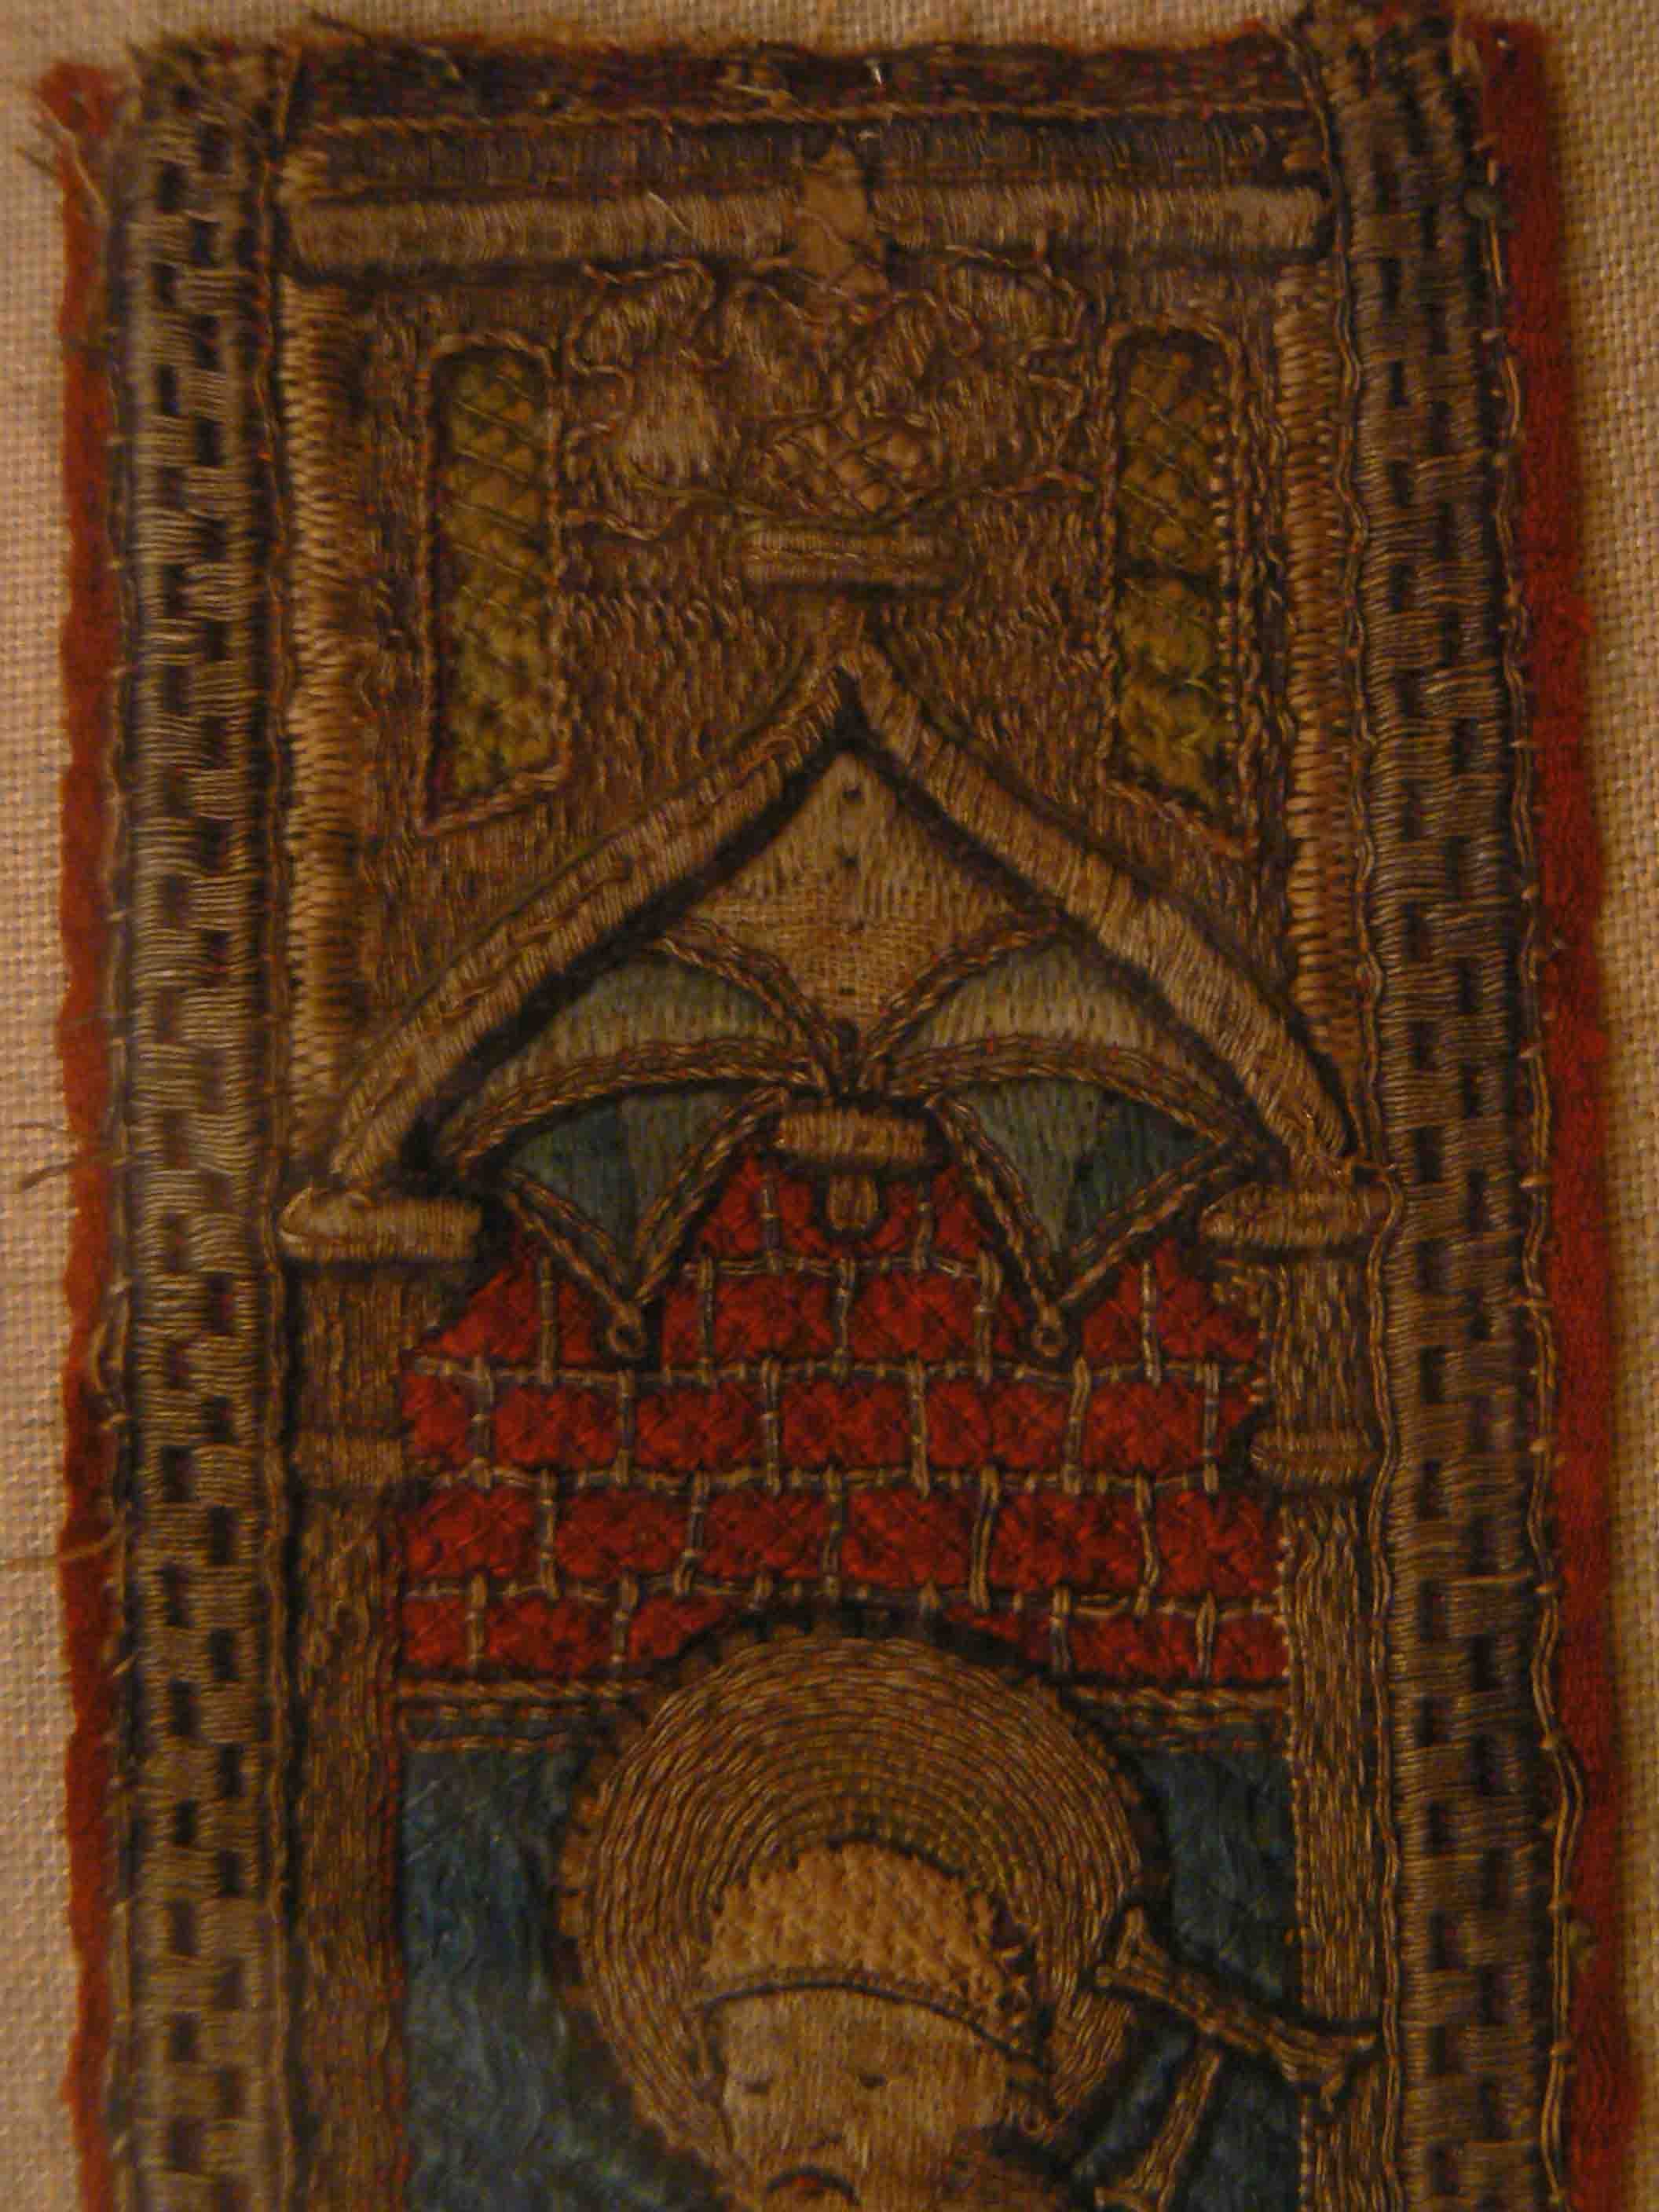
German orphrey mid 15thC, St Anthony Abbot and a female martyr.
V&A Museum, London. Photos courtesy of Mistress Acacia de Navarre.
Utilizing this technique for the background of my purse, I have been able to create the lush red silken background that I had originally designed. The technique involves laying vertical threads across the ground, and then carefully measuring a lattice pattern over the top of the vertical threads in two directions. An anchoring stitch is then applied to each intersection of the lattice pattern.
| Vertical thread layer | First diagonal threads | Second diagonal threads | Anchor stitch at intersections |
|---|---|---|---|
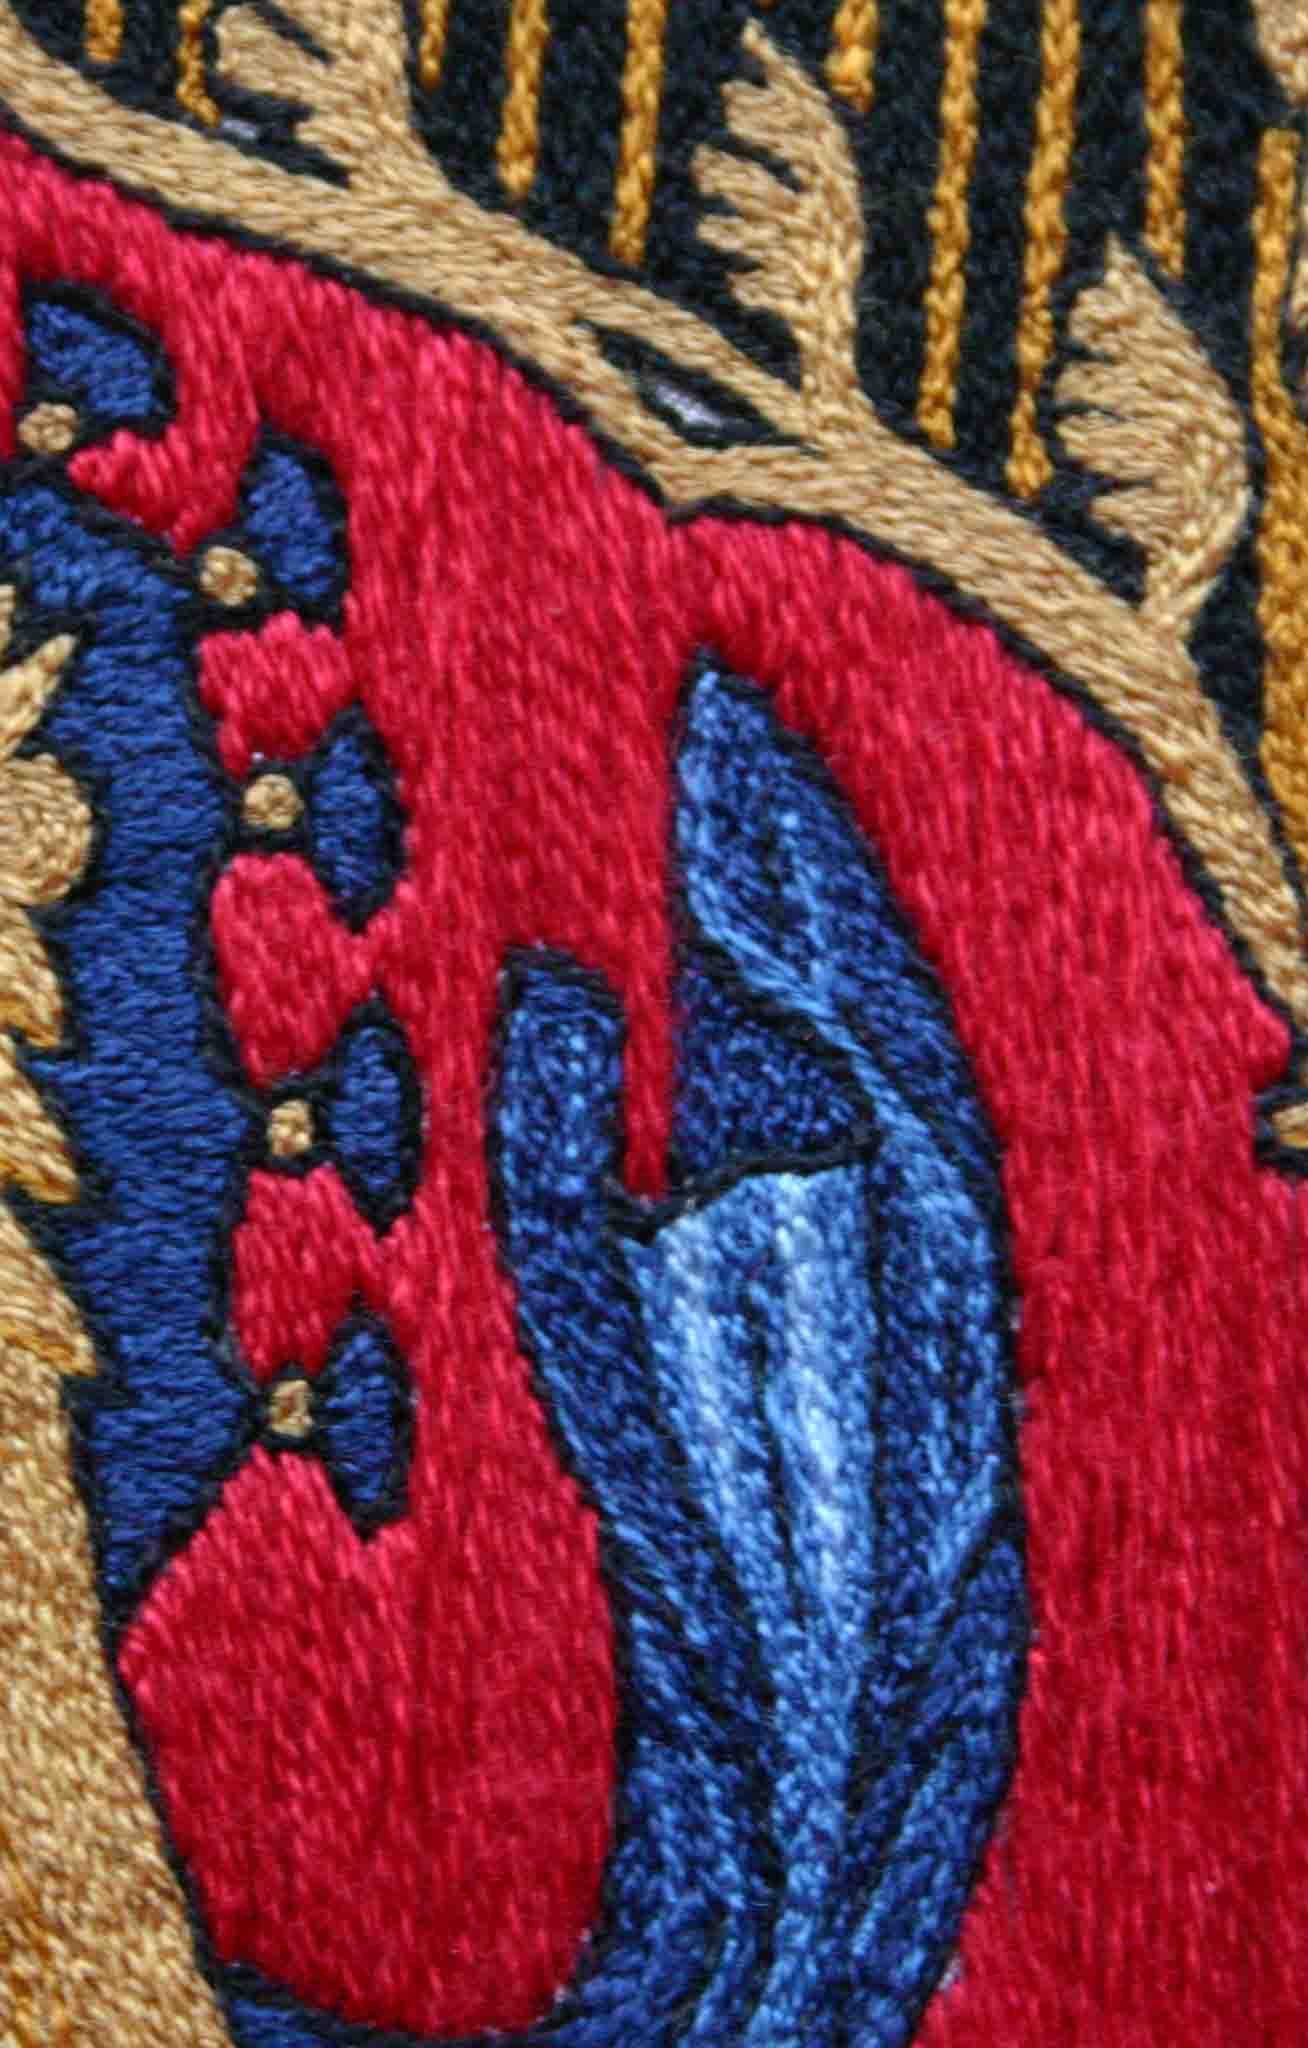 | 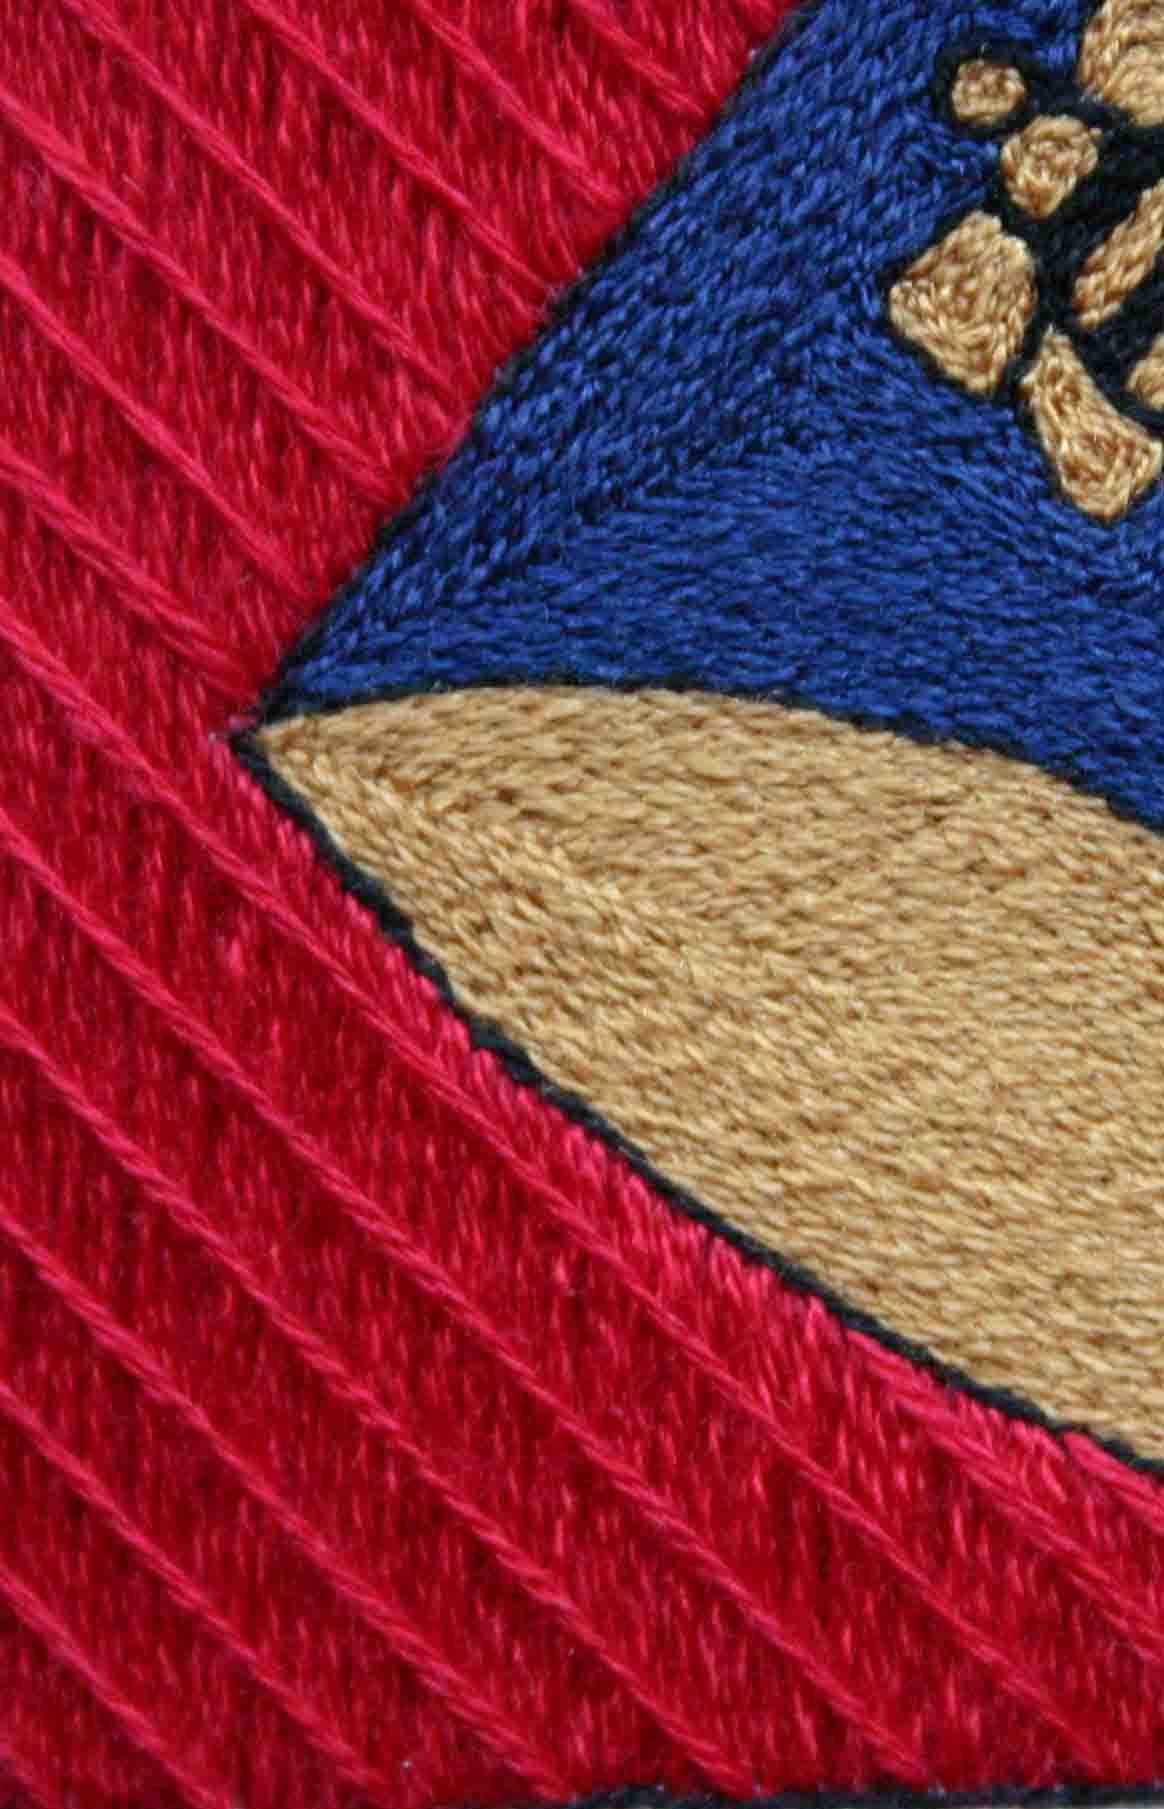 | 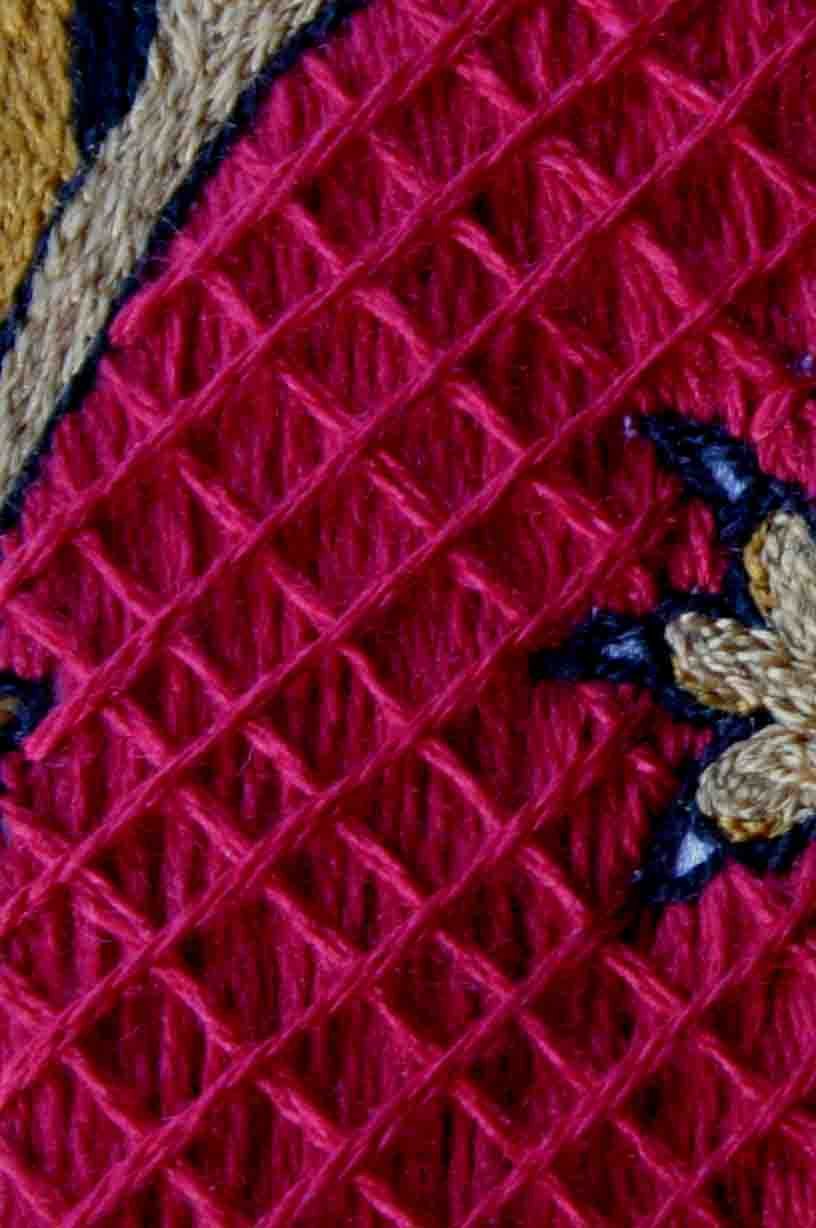 |  |
The resulting effect on the background is a lush textured, rich quilted looking diaper pattern.

Background partially complete
[ ]
(/projects/embroidered-lovers-purse/tigertape_full.jpg)
]
(/projects/embroidered-lovers-purse/tigertape_full.jpg)
To make the background on the inside of the archway appear finer and more detailed, it has been worked with two threads on the diagonal couching, whereas the background sections on the outer of the archway have been completed with the full four threads.
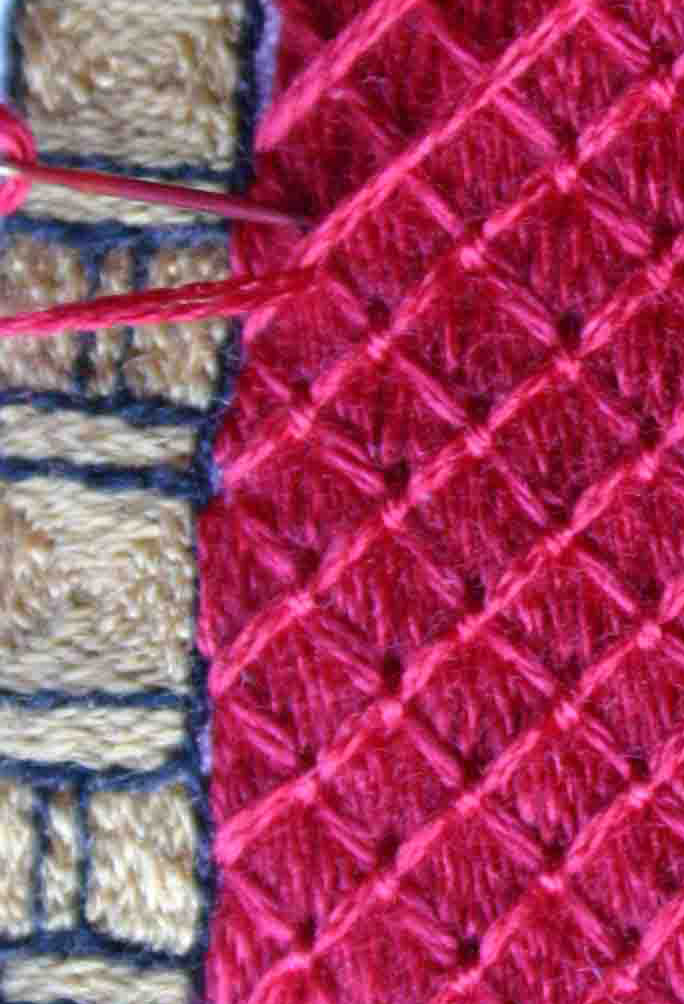
Ensuring the threads in the diaper pattern were parallel with one another proved quite difficult at first as I had numbered each half centimeter increment. This was fine doing the bottom set of diagonal threads, but when doing the top set - the numbers became confusing.
Instead of using a numbered system when doing the outer areas of red couching, I used a series of symbols - blue symbols for the bottom diagonal threads, red symbols for the top diagonal threads. This made the process much simpler and therefore quicker to complete.
The points where the diagonal red threads end beside the split stitch detailed figures tends to pull the vertical threads away from their original placement. I found that this wasn’t a problem as the vertical threads are easily repositioned when the anchoring stitches are applied.
Drawstring Section
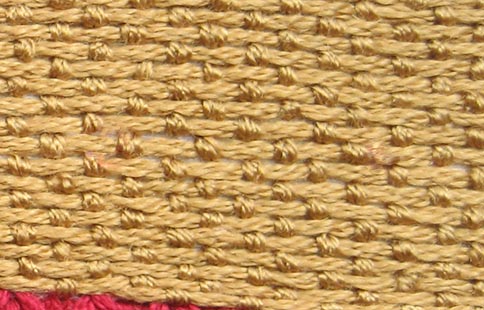
When the background work for the panels was completed, it was time to move onto the areas that would allow the intrinsic construction of the actual purse - namely the section that the drawstrings are thread through. At this point the lining also needs to be added. I had initially thought the drawstring section may have been a tablet woven strip and this came about for two reasons – the look of it appeared to have a woven or brickwork type pattern to it, and it certainly would have allowed for the drawstring section to have been easily replaced should it become worn.
Lovers Purse, Paris c.1340 Silk split stitch on linen,
Embellished with chain and knot stitching, Background - couched gold thread Hamurg,
Museum fuer Kunst und Gewerbe (Inv. 56,137) 16 | 14 cm
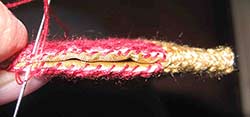
On closer inspection of the French Lovers purses I discovered there was a section where the threads appeared to have worn away leaving the linen ground fabric visible, which lead to the conclusion that it was plausible that the contrasting drawstring strip was stitched onto the ground using couching techniques (as visible in the detail picture above).
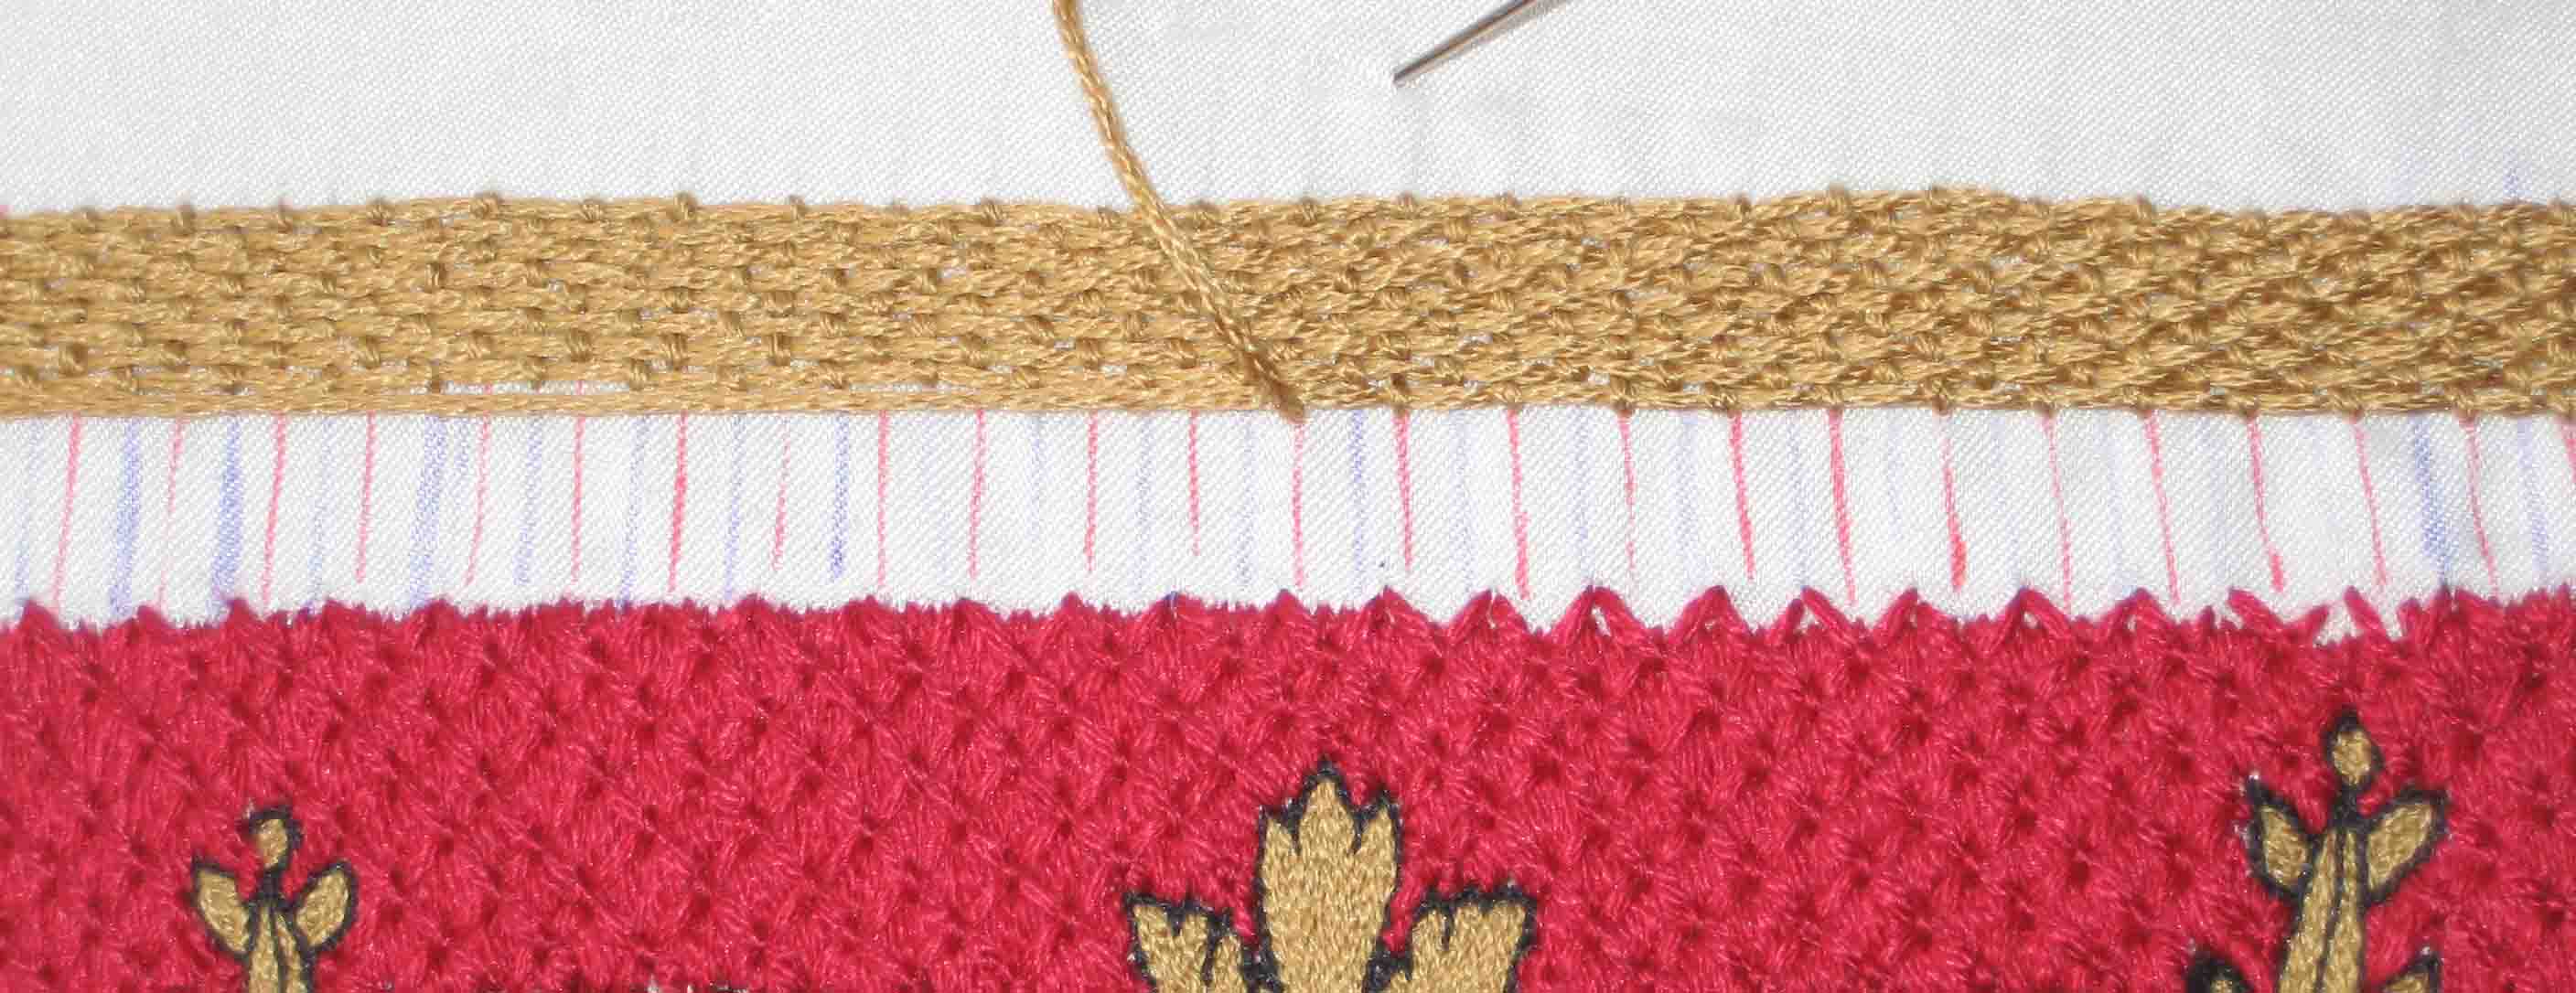
The drawstring section of the purse has been worked in traditional couching techniques using a brickwork/offset pattern similar to what appears in the extant example. Once this was completed on both panels, the buttonholes for the drawstrings to be threaded though needed to be created in this completed couched section. At this point the lining was placed behind the panels, so the button holes would be fixed through both the outer embroidered panel and the lining.
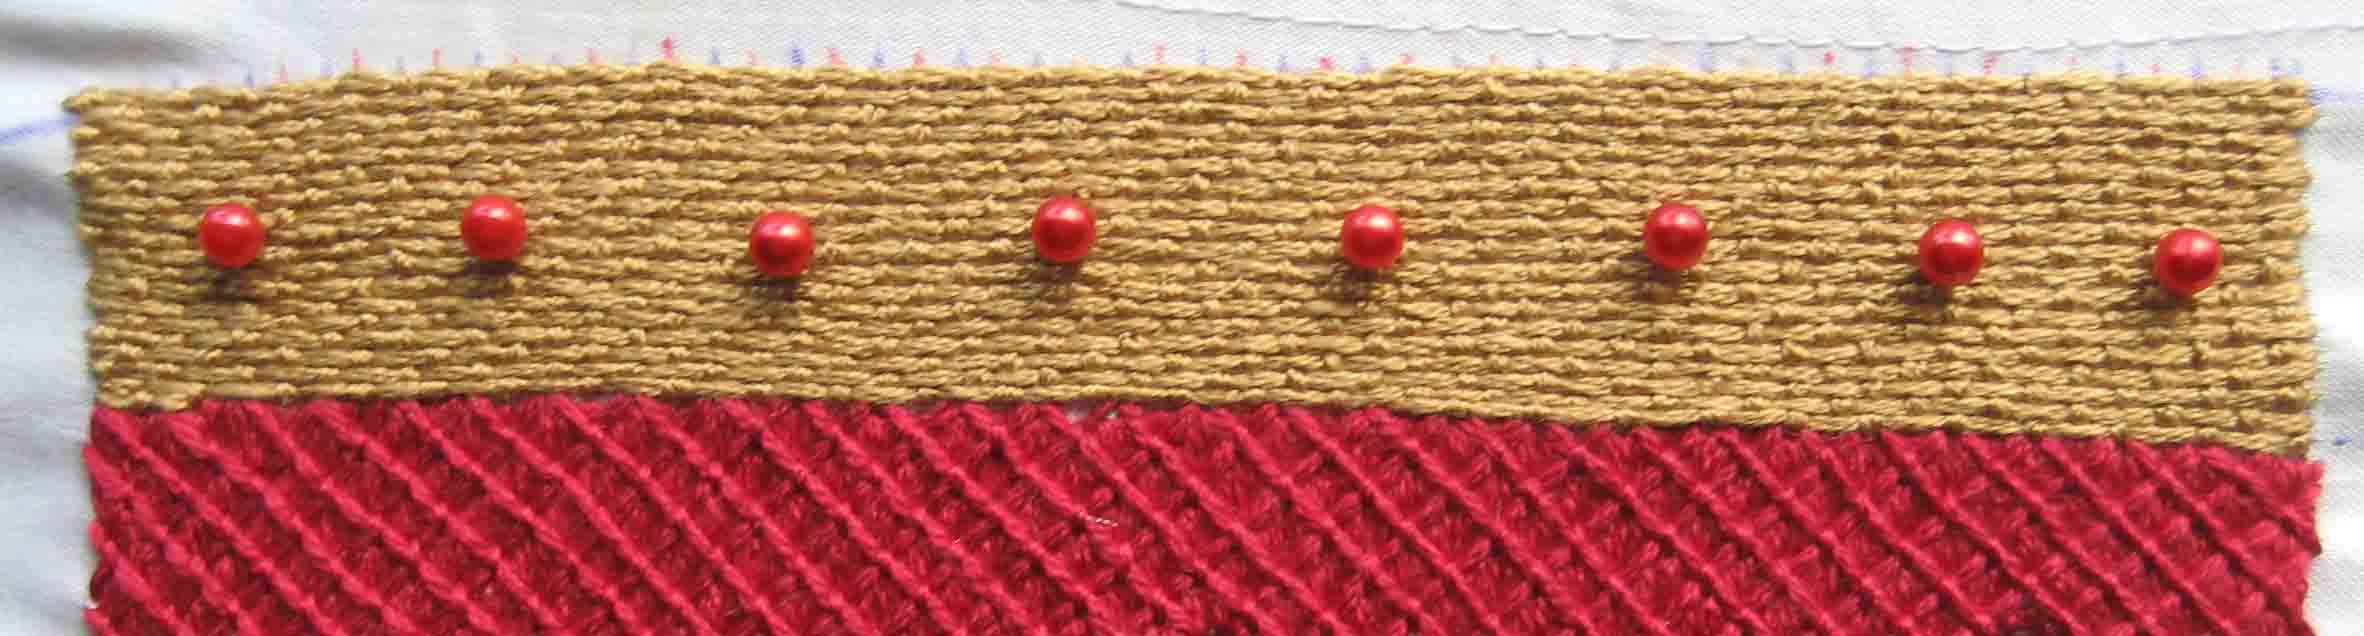
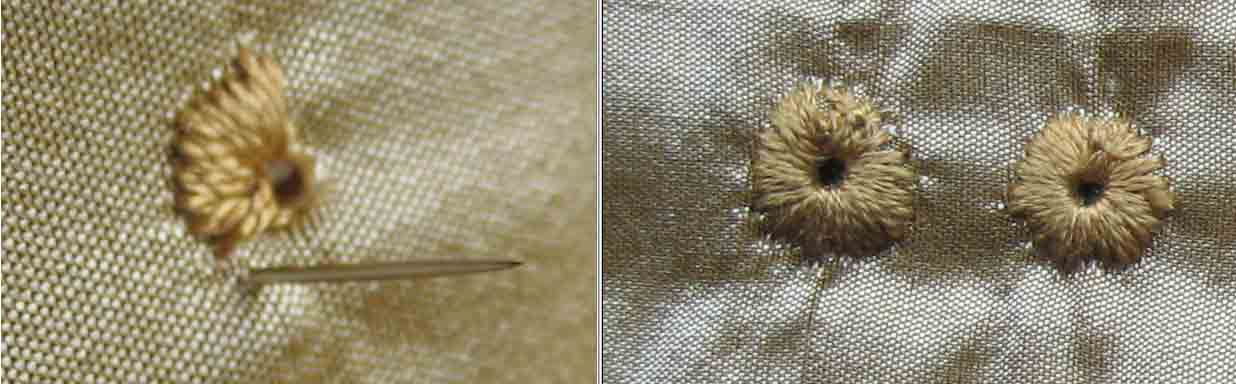
Working out the spacing for the button holes is important – remembering that the drawstrings will wrap around the left and right edges of the flat purse, the end buttonholes need to be close to the edge of the strip so that the drawstring cannot slip over the top of the opening.

The buttonholes were worked by using an awl to make a small hole between the threads being careful not to actually cut or split any individual threads. The hole can then be stretched larger using a bigger awl or similar implement (in this case a larger awl and then an ordinary nail was used). It is then worked using a needle to sew all the way around each buttonhole continuing to stretch it larger as you go and trying to keep the stitch length uniform. The back of your buttonholes will look something like this –
Construction
Now came the hard bit - after the buttonholes were completed for both the front and back panels, the panels needed to be cut away from the excess fabric that allowed them to be worked in their embroidery frames over the last three years (it was remarkably difficult to take scissors to them!)
The excess fabric and lining has then been then folded in to be between the outer embroidered panel and the lining. Then the entire edge sewn with an invisible stitch to make two independent panels. I found at this point that pins were of no use whatsoever as the pins inhibited the panels from laying flat making it difficult to determine if the lining was sitting flat as well. Paperclips worked well to hold the edges firm and flat while this section was stitched.

After both the panels were sewn to their respective linings, the front panel was then sewn to the back panel on both the sides and the bottom, leaving the top as the opening to the pouch. The stitching around the edges was run around twice for strength. After this stage, I also went over the purse with a single strand of red silk to ‘fill in any gaps’ to ensure that no sections of the white ground fabric were visible.
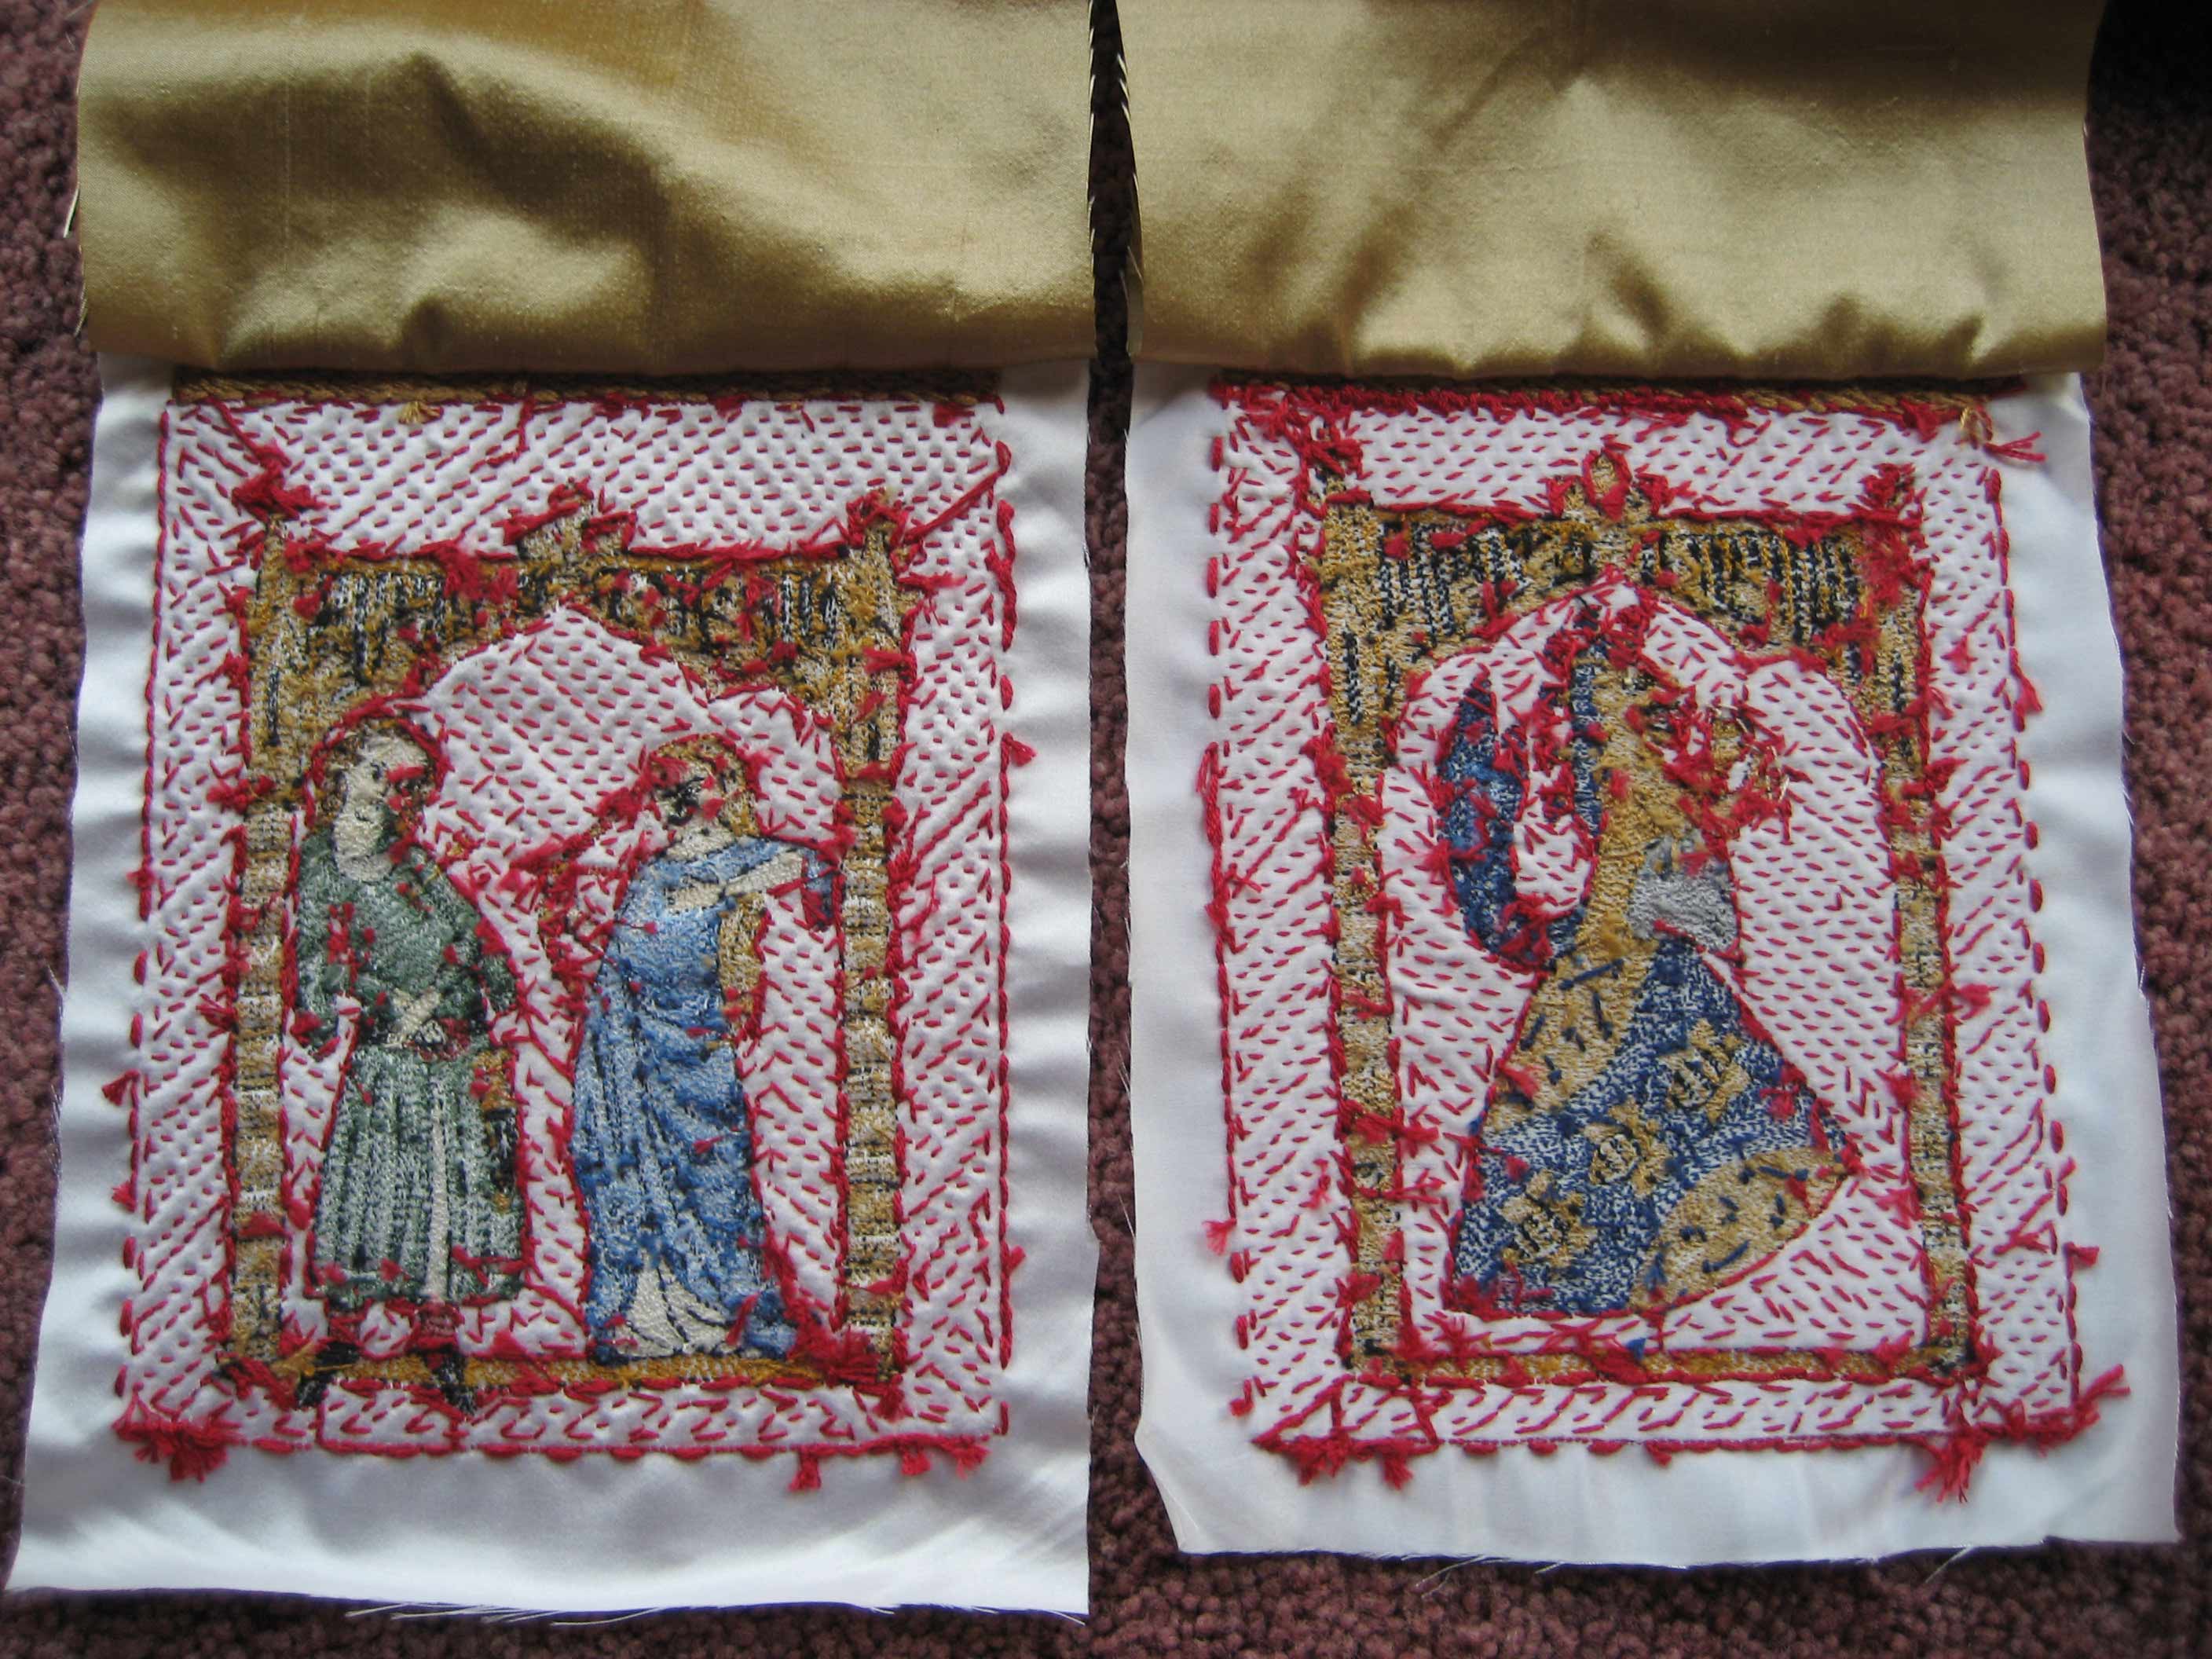
Prior to sewing the panels closed forever they were photographed and the back of each panel can be viewed by clicking here.
Cord & Tassel Making
Investigating tassels from extant purses made during the period is a bit hit and miss. No doubt many of them were trimmed when they got tattered or replaced if they came apart from the purses and some may have been embellished in later periods according to taste.
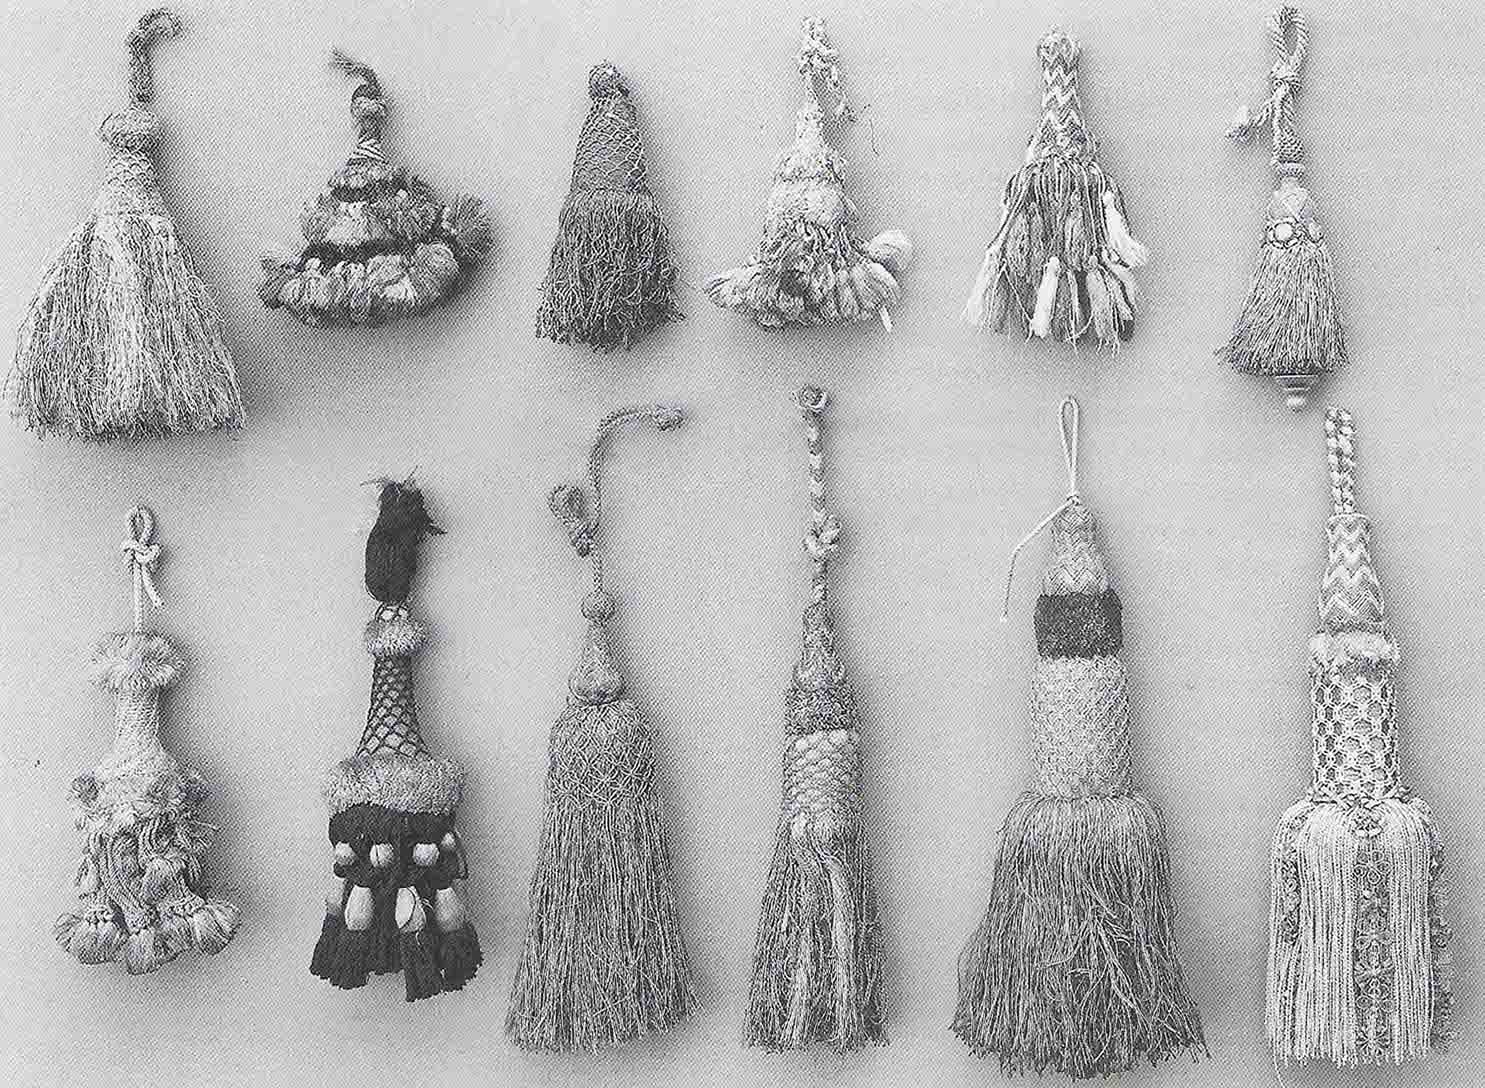 | 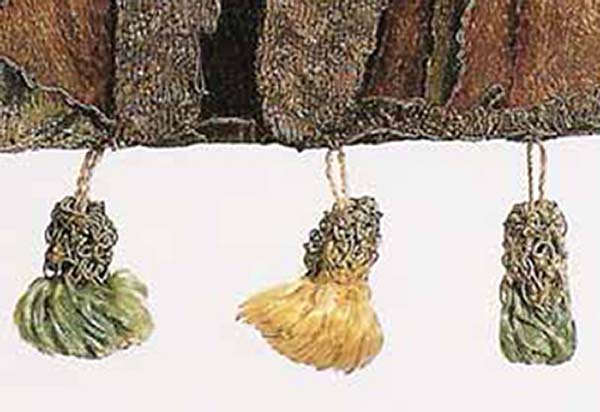 |
|---|---|
| XVI-XIX Century tassels (Welch pg 16) | Tassels from lovers purse –braid may be later addition |
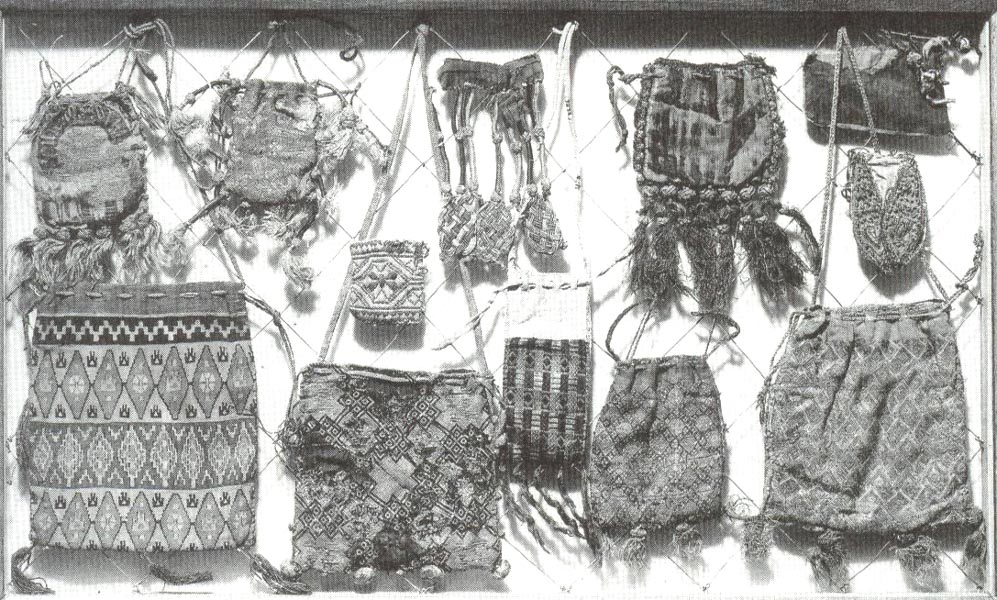
Relic purses – German origin approx 14th Century

Swiss alms purses, Silk on linen, c. 1320 Landesmuseum Zurich
Photos Courtesty of Lady Salaberge de Granson
The tassels I’ve opted to make for this project are very simple tassels attached to a twisted cord. These have then been attached by passing the main hanging cord through them and sewing them into the desired positions on the purse.
Winding a tassel is relatively simple – you can wind a tassel on any firm surface such as a book, a piece of cardboard, your hand etc. I used an old credit card as it was firm enough to be used several times over and would allow the tassels to be approximately the same length. The fullness of the tassel will depend on how many times you wind the thread around your object. To make a number of tassels of a uniform length and fullness, I used the same length of thread in each - an entire 5m skein of Madeira silk thread for each tassel. (Welsh, Pg 65)
There are many options for making cord – braiding, needle woven braids, tablet woven cords/braids, flat braiding, finger crocheted cords and numerous other rope making techniques. I opted for a simple but effective finger twisted rope making technique to make the small cords that the tassels are attached to and for the red drawstrings and the main gold coloured purse string.
To make a simple twisted hanging cord, measure out approximately six times longer than the desired finished length of the cord. The amount the cord shrinks will be determined largely by the type of thread/yarn you are using.
Fold the thread in half and tie the cut ends together into a long loop. Hold the loop between the index fingers of each hand and start twisting. The threads are sufficiently twisted when you release the tension and the cord twist back onto themselves. The cord has then been hand sewn down around the entire purse and holds on the tassels where required to becomes the main strings from which the purse hangs. The red drawstrings woven through the button holes and now the purse is complete…. finally!

Materials
Split Stitch Work (Madeira silk thread)
| Colour | Code | Count | Notes |
|---|---|---|---|
 | Black | 4 | Outline |
 | White | 1 | highlights |
 | Ecru | 1 | |
 | 2014 | 1 | skin tone |
 | 0306 | 1 | blush on cheeks |
 | 1002 | 1 | palest blue |
 | 1003 | 1 | |
 | 1005 | 1 | |
 | 1007 | 3 | heraldic blue |
 | 1008 | 1 | darkest blue |
 | 2013 | 1 | pale gold hair |
 | 2209 | 1 | gold hair |
 | 2210 | 4 | gold archway light |
 | 2213 | 2 | gold archway dark |
 | 2006 | 1 | brown hair |
 | 0811 | 1 | rust tights |
 | 0511 | 1 | purse / blood |
 | 1701 | 1 | palest green |
 | 1703 | 1 | |
 | 1704 | 1 | |
 | 1405 | 1 | |
 | 1705 | 2 | darkest green |
 | 1803 | 1 | helm |
 | 1802 | 1 | helm / grey arrow |
Background
| Colour | Code | Count | Notes |
|---|---|---|---|
| 0511 | 14 | couched background |
Tassels and Cord
| Colour | Code | Count | Notes |
|---|---|---|---|
| 2210 | 5 skeins | tassels |
| 2210 | 4 skeins | cords |
| 1007 | 4 skeins | |
| 1405 | 4 skeins | |
| 0511 | 2 skeins | cords |
Approx 68 skeins Madeira silk thread @ approx $2.25/packet - $153.00
Fabric
- Duchess twill silk – 25cm@ $125.00/m = $31.25
- Dupion silk lining – 25cm @ $ 22.00/m = $ 5.50
Total materials cost - $189.75 (approximate cost only)
Time – estimated at between 380-400 hours (No… this is not a typo).
I’d like to say a special thank you for the kind support and encouragement of Mistress Acacia de Navarre and Mistress Eleanor of the Ornkeys who have kindly share their time and resources over the admittedly lengthy duration of this project. I should also like to thank Lady Salaberge de Granson, Mistress Acacia and the kind staff of the Cloisters at the Metropolitan Museum for sourcing various photographs that I would otherwise not have been able to access.
Thank you

Bibliography
- Camille, Michael - The Medieval Art of Love
Harry N Abrams Inc, 1998, New York
ISBN 0810915448 - Lemon, Jane - Metal Thread Embroidery - Tools, Materials and Techniques
BT Batsford Ltd, 2002, London
ISBN 0713487585 - Neubecker, Ottfried - Heraldry - Sources, Symbols and Meanings
Tiger Books International, Twickenham, 1997
ISBN 1855019086 - Snook, Barbara - English Embroidery
Bell and Hyman 1974, London
ISBN 0713525657 - Staniland, Kay - Embroiderers - Medieval Craftsmen Series
University of Toronto Press, 1991, Toronto
ISBN 0802069150 - Welch, Nancy - Tassels - The Fanciful Embellishment
Altamont Press, 1982 Ashville USA
ISBN 188737423X